Page 7
SRP 003-304 • Issue 9 • July 2004
Buffer Tube
Pigtail
a) Use a clean tissue soaked in alcohol to
gently clean the connector. Do not press
heavily on it as you clean.
b) Dry the connector prior to installation with
compressed air or a dry tissue.
c) Clean all areas that will contact the
connector adapter.
d) Do not force the connector into the
receptacle. If the connector does not fit
easily into the receptacle, back it out and
reinstall.
e) Install threaded connectors into the adapter
and tighten. Do not OVERTIGHTEN. Do
not allow the connector body (ferrule) to
turn as you screw it into place. This causes
the surfaces to grind against each other.
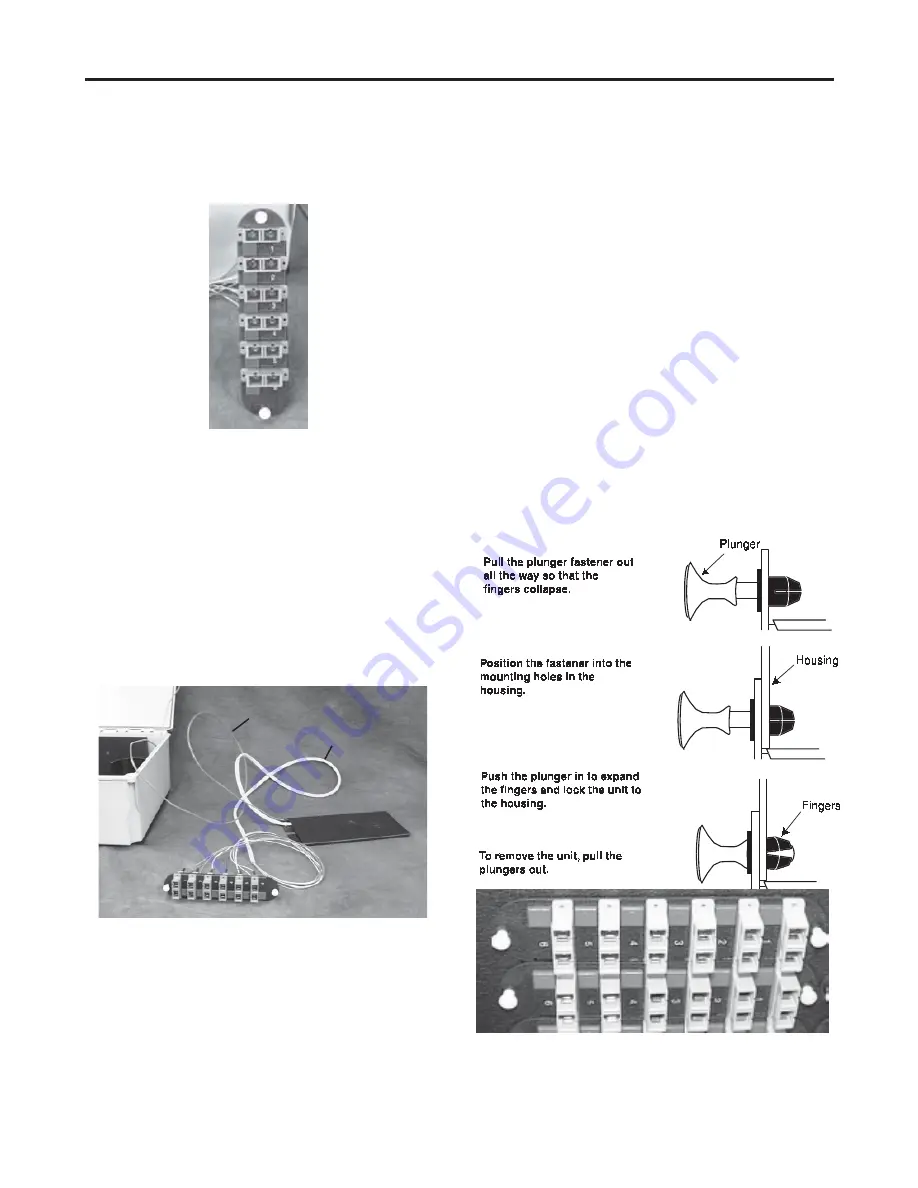
10.5
Remove the blank panels from the unit.
Install the connector panels into the connector
support bracket (Figure 14).
10. Connector Panels
10.1
LANscape
®
connector panels (Figure 12)
are sold separately, typically with connector
adapters installed.
10.2
If fibers are not already connectorized,
install connectors onto the fibers using pigtail
splicing or direct connectorization per
manufacturer’s instructions. If installing BTF
kits, proceed to Section 12.
10.3
Panels can be ordered with a specific
length of preconnectorized pigtail cable
installed. Pigtails are fiber optic cables with
connectors on one end that are installed into
connector panels (Figure 13). The other end of
the pigtail is terminated in a splice tray.
Figure 12
Figure 13
10.4
Install connectors
into the appropriate
panels.
NOTE:
The connector is a delicate device. Obey the
following precautions. Damage to the surface of the
connector will make it unusable:
Figure 14
Buffer
Tube
Pigtail


