Standard Recommended Procedure 003-794-AEN | Issue 14 | March 2020 | Page 6 of 27
4.2.2 Pulling Grip Removal
Step 1:
Remove the pull line and clean any dirt or debris from the outer surfaces of the sleeve.
IMPORTANT:
Disassemble the pulling sleeve on a work surface free from dirt, excessive heat, or any solvents.
Step 2:
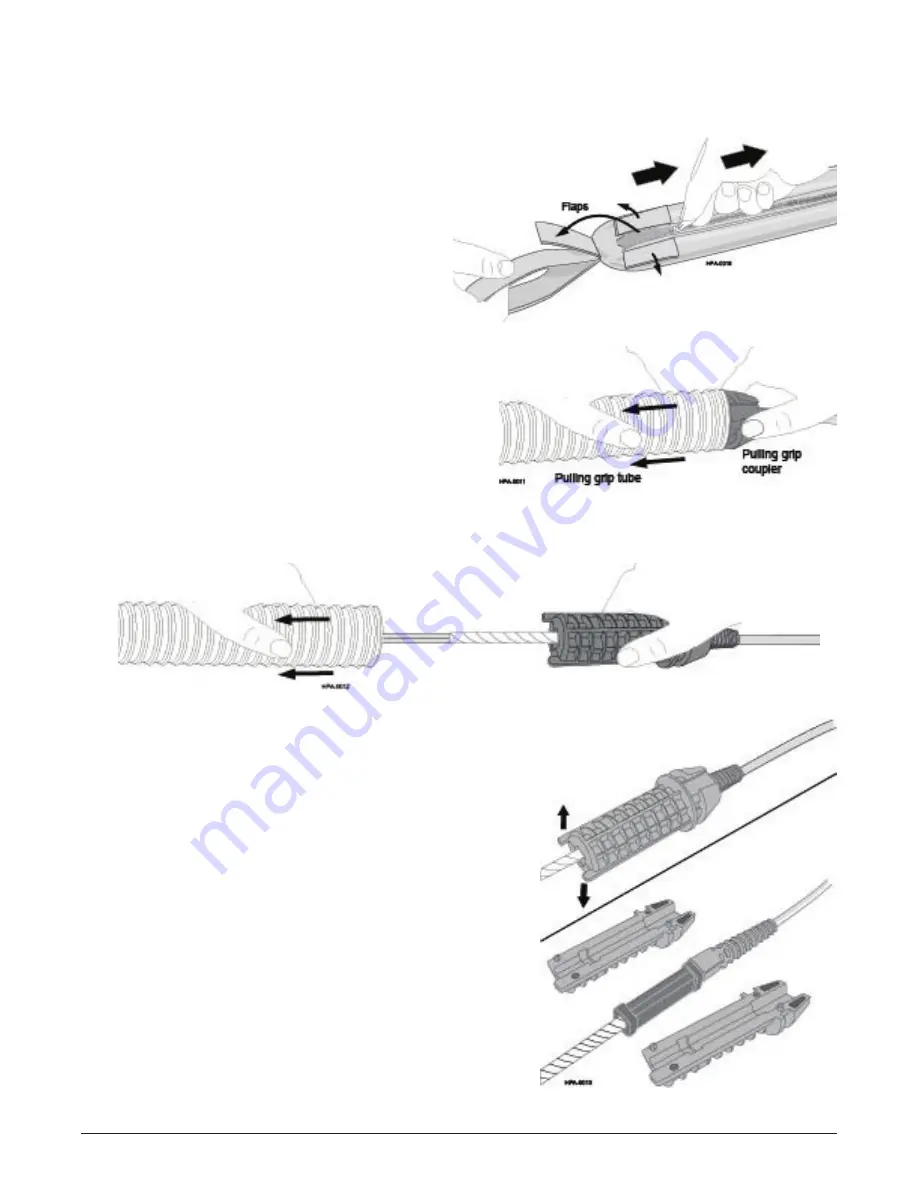
Lift the hook-and-loop flaps to expose
the zipper pull. While holding the sleeve’s
pulling loop with one hand, unzip the
sleeve (Figure 6).
Step 3:
Remove the cloth sleeve from around the
grip.
Step 4:
With the grip lying on a work surface, grasp the
coupler at the cable-end of the trunk cable. With
a slight twisting motion, pull the corrugated
tube away from the coupler with your other
hand (Figure 7).
Step 5:
Slowly slide the tubing away from the coupler
and its connector legs (Figure 8).
Step 6:
Use the tabs on the furcation end of the coupler to
separate the coupler’s two halves.
Step 7:
Remove the coupler halves from the trunk furcation body
and dispose of the coupler assembly (Figure 9).
Figure 6 — Unzipping the Sleeve
Figure 7 — Grip Disassembly
Figure 8 — Tubing Removal
Figure 9 — Remove Coupler Halves


