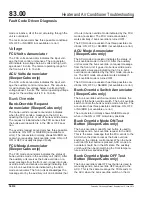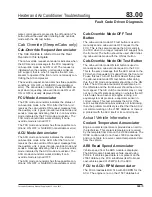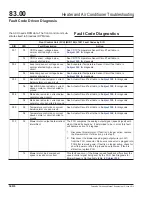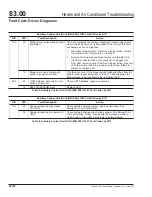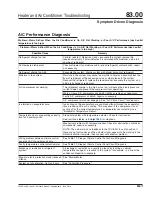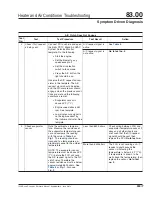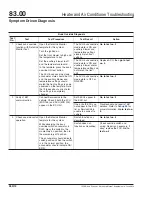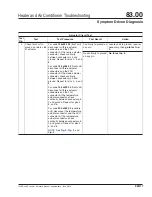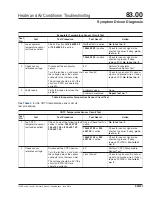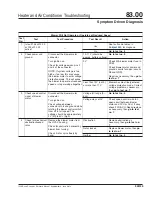
A/C Clutch Circuit Test
Test
No.
Test
Test Procedure
Test Result
Action
1
Check power to A/C
clutch relay.
Remove the A/C clutch relay
from the PDM.
Turn the ignition on and check
for voltage on the PDM socket
that corresponds to pin 87 A/C
clutch relay.
No voltage
Go to test no. 2
.
12V
Go to test no. 3
.
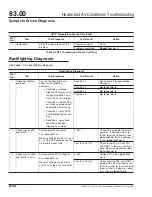
2
Check A/C clutch
fuse.
Check the 20A A/C clutch fuse in
the PDM (fuse 55).
Fuse okay
Check to make sure power is
getting to fuse. If okay, check
circuit between fuse and A/C
clutch relay. Repair as
necessary, then
go to test no.
6
.
Fuse blown
Locate source of high current
between the PDM and the A/C
compressor clutch. The circuit
may be shorted to ground.
Repair as necessary, then
go to
test no. 6
.
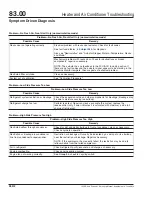
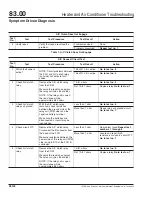
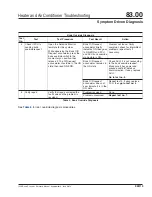
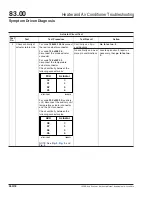
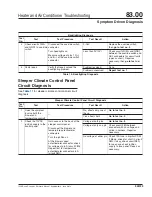
3
Check A/C clutch
circuit resistance.
Remove the A/C clutch relay
from the PDM. Measure the
resistance between the PDM
socket that corresponds to circuit
97T and the negative battery
terminal.
NOTE: Make sure batteries are
disconnected. Failure to do so
may give inconclusive results.
2.85 to 4 ohms
Check the A/C clutch relay. Make
sure pin 87 is making contact
with pin 30 when the relay is
energized. Replace as
necessary, then
go to test no.
6
.
More than 4 ohms
Go to test no. 4
.
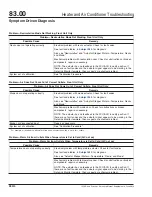
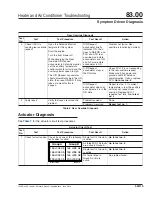
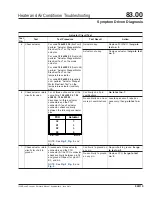
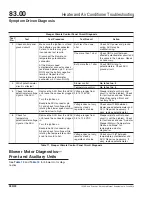
4
Check binary switch.
Disconnect the binary switch and
check continuity across the
switch terminals.
Continuity
Go to test no. 5
.
No continuity
Check refrigerant pressures. If
pressure is below the binary
switch cutout pressure, the
system is severely
undercharged. Locate source of
leak and recharge.
If pressures are within the binary
switch range, replace the binary
switch then
go to test no. 6
.
Heater and Air Conditioner Troubleshooting
83.00
Symptom Driven Diagnosis
122SD and Coronado Workshop Manual, Supplement 9, June 2014
350/10

