background image

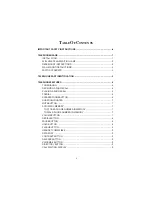
T

ABLE 

O

C

ONTENTS

IMPORTANT SAFETY INSTRUCTIONS ............................................................ iv

TELEPHONE USAGE ............................................................................................ 1

INSTALLATION ............................................................................................  1
24/90V MESSAGE WAITING LAMP ............................................................. 2
DESK MOUNT INSTRUCTIONS ..................................................................... 2
WALL MOUNT INSTRUCTIONS ...................................................................  3
FACTORY PRESETS .................................................................................... 3

TELEPHONE PART IDENTIFICATION ................................................................ 5

TELEPHONE FEATURES .....................................................................................  6

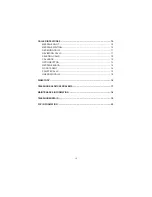
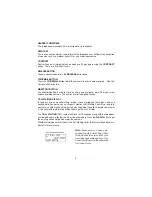
TONE DIALING ............................................................................................  6
RECEIVING A PHONE CALL ........................................................................  6
PLACING A PHONE CALL ...........................................................................  6
PREDIAL ....................................................................................................... 6
SPEAKERPHONE BUTTON ..........................................................................  6
DURATION COUNTER ..................................................................................  7
MUTE BUTTON ............................................................................................  7
AUTOMATIC MEMORY ................................................................................  7
   TO STORE A PHONE NUMBER IN MEMORY ...........................................  7
   TO DIAL A PHONE NUMBER IN MEMORY ...............................................  7
VOLUME BUTTON .......................................................................................  7
REDIAL BUTTON .........................................................................................  8
PAUSE BUTTON ..........................................................................................  8
HOLD BUTTON ............................................................................................  8
FLASH BUTTON ..........................................................................................  8
HEADSET COMPATIBLE ............................................................................... 9
DATA PORT .................................................................................................  9
CONTRAST BUTTON .................................................................................... 9
RELEASE BUTTON ....................................................................................... 9
VOICEMAIL BUTTON .................................................................................... 9
DIRECTORY BUTTON ................................................................................... 9
CALL WAITING DISPLAY ...........................................................................  9

ii

Summary of Contents for Medallion 3200

Page 1: ...OWNER S INSTRUCTIONMANUAL CALLER ID TYPE II MULTI FEATURE TELEPHONE MODEL3200 ...

Page 2: ...e want you to know all about your new Medallion Telephone how to install it the features it provides and the services you can expectfromitsuse WehaveincludedthisinformationinyourOwner s InstructionManual PLEASE READ BEFORE INSTALLING AND USING YOUR NEW TELEPHONE EQUIPMENT i ...

Page 3: ...FEATURES 6 TONE DIALING 6 RECEIVINGAPHONE CALL 6 PLACINGAPHONE CALL 6 PREDIAL 6 SPEAKERPHONEBUTTON 6 DURATIONCOUNTER 7 MUTEBUTTON 7 AUTOMATIC MEMORY 7 TO STOREA PHONE NUMBER IN MEMORY 7 TO DIALA PHONE NUMBER IN MEMORY 7 VOLUME BUTTON 7 REDIAL BUTTON 8 PAUSE BUTTON 8 HOLD BUTTON 8 FLASH BUTTON 8 HEADSETCOMPATIBLE 9 DATAPORT 9 CONTRAST BUTTON 9 RELEASE BUTTON 9 VOICEMAIL BUTTON 9 DIRECTORY BUTTON 9 ...

Page 4: ...ECEIVING CALLS 11 REVIEWING CALLS 11 DELETING CALLS 12 CALLBACK 12 OPTIONBUTTON 13 MESSAGEERROR 14 NO DATA SENT 14 PRIVATE CALLS 15 UNKNOWN CALLS 15 DIRECTORY 16 TELEPHONE SERVICE PROBLEMS 17 MAINTENANCE INFORMATION 18 TELEPHONE REPAIR 19 FCC INFORMATION 20 iii ...

Page 5: ... the product 6 Useonlythetypepowersourceindicatedonthelabel Ifyouarenotsure of the type power supply to your home consult your dealer or local power company 7 Do not place any objects on the telephone line cord Do not locate the telephone where the line cord will be walked on 8 Do not block or cover ventilation slots and openings in the bottom of the telephone The openings should never be blocked ...

Page 6: ...icinity of the leak 14 Unplug the telephone from the wall outlet and refer servicing to qualified service personnel under the following conditions When the line cord is frayed or plugs damaged If liquid has been spilled into the telephone If the telephone has been exposed to rain or water If the telephone does not operate properly by following the operating instructions Adjust only those controls ...

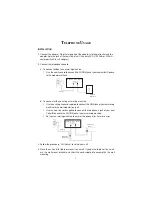
Page 7: ...Use the existing line cord supplied to connect the LINE jack of your answering machine to the wall modular line jack Use the new line cord supplied to connect the telephone s jack of your new Caller ID phone to the PHONE jack of your answering machine Set your answering machine to answer the phone after 2 or more rings 3 Follow the procedure Unit Setup to set up your unit 4 Place the unit on a fla...

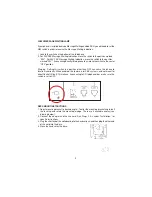
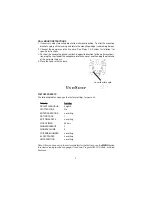
Page 8: ...is switch in a position other than OFF can cause this phone to function incorrectly When enabled this feature is for PBX systems and not meant for direct Central Office CO interface If connecting to CO telephone lines make sure this switch is set to OFF 2 DESK MOUNTINSTRUCTIONS 1 Adjust mounting bracket to desired angle To alter the mounting bracket angle pull the lever up and rotate the mounting ...

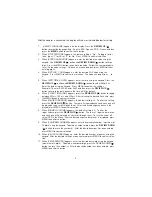
Page 9: ... the handset and then plug the other end of the cord into the base 4 Place the handset on the base UNIT SETUP FACTORYPRESETS The following table shows you the factory settings for your unit Display Setting SELECTLANGUAGE English STUTTERTONE No ENTER AREACODE no setting SETLDSCODE 1 EDITTIME DATE no setting FLASHTIMER 600 ms RINGERCADENCE 3 RINGERVOLUME 5 VOICEMAILNUMBER no setting 3SECPAUSES no se...

Page 10: ...press the REVIEW UP button to toggle between 600ms 100 ms and 300ms After selecting the desired flash time press the MENU button to confirm selection 7 When RINGER CADENCE appears the default setting is 3 To alter this setting press the REVIEW UP button There are 5 ringer cadences and each one will be played as you scroll through them After the desired ringer cadence is dis played press MENU to co...

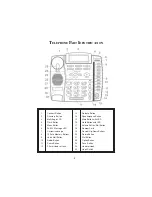
Page 11: ...Flash Button 16 Hold Button with LED 5 Menu Button 17 Volume Button Edit Button 6 24 90V Message LED 18 Number Card 7 Customized Logo 19 Review Up Down Buttons 8 10 Auto Memory Buttons 20 Delete Button 9 Voice Mail Button 21 Dial Button 10 Redial Button 22 Option Button 11 Pause Button 23 Save Button 12 2 5mm Headset Jack 24 Handset Hook 25 Hook Switch ...

Page 12: ...ill appear in the display To delete a digit or the entire number press the REVIEW DOWN button 2 To dial the displayed number lift the handset press theSPEAKERPHONE buttonor press the DIAL button SPEAKERPHONE BUTTON ACAdaptor must be used to ensure proper function 1 Receiving Incoming Calls a When the phone rings press and release the SPEAKERPHONE button and talk normally into the built in micropho...

Page 13: ...ume the conversation press MUTE The MUTE indicator will go out and your call can continue AUTOMATIC MEMORY To StoreANumber In Memory 1 Press the SAVE button SAVE TO appears on the display window 2 Press the desired memory location M1 M10 3 ENTER NUMBER appears on the display 4 Enter the desired number using the keypad maximum of 24 digits Press SAVE to confirm 5 ENTER NAME will appear Type the nam...

Page 14: ...nt in the dialing sequence where a pause is desired 2 The PAUSE button can be pressed more than once to create a longer pause HOLDBUTTON 1 To place a call on hold press the HOLD button and hang up the handset The HOLD Indicator will light up and remain lighted until you resume your conversation 2 To resume your conversation lift the handset or that of any extension phone on the same line or press ...

Page 15: ... sorted alphabetically CALLWAITING DISPLAY In the past if you had call waiting service a tone alerted you there was a new call coming while you were on an existing call Now our Call Waiting Caller ID not only tells you there is another call waiting but lets you know who the caller is before you answer it The call waiting information will be shown on the unit s display The CALL WAITING CW symbol wi...

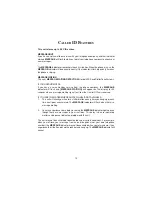
Page 16: ...ppear on the display for 20 seconds when a message waiting signal on from the Central Office is received IFYOU AREIN AN AREAWHEREANFSKSIGNALISNOTAVAILABLE 1 This unit will check your line for a stutter dial tone every time you hang up or each time a call goes unanswered The MESSAGE indicator will flash when there is a message waiting 2 You may experience some delay in seeing the MESSAGE indicator ...

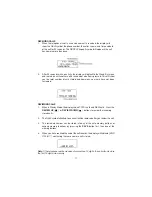
Page 17: ...ew calls have not been reviewed REVIEWINGCALLS 1 When in Stanby Mode the display shows TOTAL calls and NEW calls Press the REVIEW UP or REVIEW DOWN buttons to review the incoming stored calls 2 The NEW symbol attached to each call will be removed after you review the call 3 The reviewed number can be stored into any of the auto memory buttons or keypad memory locations by pressing the SAVE button ...

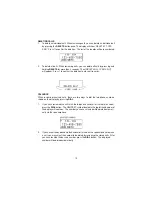
Page 18: ...CALLBACK When reviewing received calls there are two ways to dial the telephone numbers shown on the display by pressing DIAL 1 If you have reviewed the calls with the telephone handset in its cradle on hook press the DIAL button The HANDSET symbol located in the top left hand corner of the display will come on The number you have selected will be dialed automati cally via the speakerphone 2 If yo...

Page 19: ...umber 11 digit long distance code 1 3 digit area code 7digit telephone number If a local call and its 7 digit number is displayed Pressing OPTION once will change it to a 10 digit format your area code 7 digit number Pressing OPTION twice will change it to an 11 digit number 1 your area code 7 digit telephone number Pressing OPTION three times will go back to the original 7 digit telephone number ...

Page 20: ...e times will add the LDS code to the number 1 3 digit area code 7 digit telephone number When the desired format of the telephone number is reached press DIAL to dial the displayed number MESSAGEERROR The display indicates MESSAGE ERROR if your unit receives a call that has an error in the transmission or reception NODATASENT NO DATA SENT will be displayed if there is no caller ID CID number sent ...

Page 21: ...the option to block his name and number from being sent then PRIVATE CALLER will be displayed on the screen UNKNOWNCALLS When the telephone company is unable to provide the caller s telephone number UNKNOWN CALLER and his name will alternately display on the screen when this information is received When the telephone company is unable to provide the caller s name UNKNOWN NAME and his telephone num...

Page 22: ...warrowandstartover Alllettersareupper case Toenteraspacewhenstoringanameornumber presstheupreviewarrow Note Use the key to edit entries Finding Items In The Directory PressDIRECTORYto entertheDirectoryReviewMode ThefirstentryintheDirectory is displayed The Down and Up Review Arrows may be used to scroll through the directory To leave the directory at any time press Directory To search for a direct...

Page 23: ...DOESNOTFUNCTION The telephone may have been momentarily disconnected from the telephone jack BLANKSCREEN 1 Check if the adapter is connected properly 2 Press the Contrast button to see if contrast level is set correctly CALLERSARENOTDISPLAYEDONTHESCREEN 1 Verify that you have subscribed to the appropriate service Caller ID and Call Waiting Caller ID from your telephone company If you only subscrib...

Page 24: ...cords after you disconnect the adapter MAINTENANCEINFORMATION Treat your telephone equipment with care for trouble free performance Avoid dropping the handset Carefully place the handset on hook after use Avoid putting near heating appliances and devices that generate electrical noise for example motors and florescent lamps Clean your telephone equipment with a damp cloth Stains may be removed wit...

Page 25: ... sale of this product If you return your telephone for repair the warranty period is not extended The original date of purchase continues to apply to your warranty OUT OF WARRANTY REPAIR We will repair this product for a nominal fee after the LIMITED WARRANTY has expired if you send it to us in a complete and undamaged condition The repaired unit will be shipped to you C O D freight collect RETURN...

Page 26: ... REN total is more than three RESTRICTIONS You must not connect your telephone to coin operated lines or party lines INSTALLATION This model telephone must be connected to the telephone company lines through a modular jack The required USOC for the modular jack is RJ11C for desk mounting and RJ11W for wall mounting The USOC number is printed on the label on the bottom of your telephone HEARING AID...

Page 27: ...warrant that this product is compatible with the type of equipment of any particular phone com pany or the services provided by it CORTELCO DISCLAIMS ANYIMPLIED WARRANTY INCLUDING THE WAR RANTYOFMERCHANTABILITYANDTHEWARRANTYOFFITNESSFORAPAR TICULARPURPOSE ASOFTHEDATEONEYEARFROMTHEORIGINALPUR CHASEOFTHEPRODUCT CORTELCO ASSUMESNORESPONSIBILITYFOR ANYSPECIAL INCIDENTALORCONSEQUENTIAL DAMAGES THISWARR...

Reviews: