6
7
FIND THE BEST POSITIONING OF THE DEVICE
• In a room with a temperature between 15° and 25 °C.
• Far from the direct light of sun that even through the windows can provoke uncon-
trollable heatings inside the incubator
• Far from heating sources, lamps and other heating devices.
• Far from electric devices.
• Not in an open space or in a not repaired room.
• Not in cold places (under15/17°C.)
• Far from water
• Far from draught air
• Far from humidity or excessively dry zones
• Away from animals reach
• Away from children reach
• Position the brooder on a stable and plane surface, which can be easily reached by
the person who will follow the brooding.
• Do not position anything on the brooder as the object can influence with the thermic
exchange between the external room and the brooder. Anything positioned
on the cover may provoke uncontrollable heating of the brooder and/or the
check circuit ofthe temperature.
ATTENTION: The feeding wire must be positioned and protected from
animal’sreach.
PREPARING
(before connecting to the electric network):
1. Position the separator on the base of the eggs holder.
2. Move the knob in order to verify the correct sliding of the base.
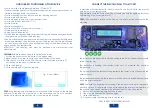
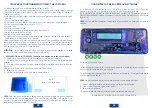
3. With the use of a little bottle, fill in the two water containers (picture 9)
positioned on the base of the brooder
4. Close the brooder.
5. Verify the integrity of the feeding wire.
NOTE:
if the feeding wire is damaged, do not connect the brooder to the electric
network. To replace the wire, apply to the assistance centre or to qualified
personnel in order toprevent any risk or to damage the brooder
Fig. 9 - Humidifiers
CONNECT THE ELECTRIC PLUG TO A SOCKET
6. Wait about 20/40 minutes (for AF-25) and/or 2 hours (for AF-50) for the internal
adjustment of the temperature.
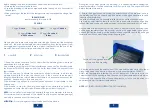
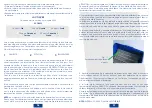
It is possible to verify the correct working of the device with the lightning indicator
visiblethrough the cover (picture 10).
NOTE:
it is advisable to switch on the device 1 day before proceeding with the
brooding.
The indicator is lighting fix: the resistor is heating to reach the perfect temperature
inside the brooder.
The indicator is flashing: the resistor works only to maintain the constant
temperature.
The quicker flashes the indicator the greatest is the thermic loss of heat with the
external room.
The indicator is switched off: the resistor is switched off as the internal temperature
ofthe brooder is excellent.
NOTE:
The indicator is lighting fix or flashing. If the indicator switches off frequently
andfor long time it is advisable to check frequently the internal temperature of
the brooder orto check whether it is positioned next to a heating source.
7. Disconnect the feeding wire from the socket.
8. Open the brooder and position the eggs.
9. Close the brooder .
10. Connect again the feeding wire to the socket.
NOW THE BROODING IS BEGINNING
3
4
2
1


