background image

10

11

ATTENTION

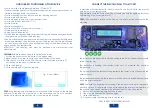
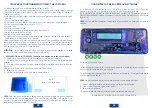
At the end of the brooding period, it is advisable to clean carefully the base, the 

grilland the separators with  a detergent .  Dip the base grille and the separators; 

cleanthe internal of the base using a sponge with detergent avoiding  the water 

and thedetergent entering in the space containing the insulating material.

Its very important to keep clean the resistor and the blades of the fan. After the 

hetching, while the chicks are drying inside the brooder, lot of their downs fallinside 

the blades of the fan and on the electric resistor.

After each brooding, verify that the blades of the fan and the heating source are 

wellcleaned.

DIRT ON THE HEATING SOURCE PROVOKE FIRE

IMPORTANT: DISCONNECT THE DEVICE BEFORE PROCEEDING WITH THE

CLEANING OPERATIONS.

• Clean the blades and the resistor with a light blow for example using a bottle of

compressed air.

• DO NOT use air jets with high pressure

• DO NOT introduce any object through the spaces of the grille.

• For very bad dirty or incrustation, ask to the distributor or to the assistance centre.

ANNEX TO THE USER INSTRUCTION OF THE BROODER AF-25 /AF-50

CHECK AND ADJUSTMENT

The brooder is calibrating during the mounting and test phases with a brooding tempera- 

ture of 37,8 °C (100° F).

To obtain the perfect temperature it is necessary to follow these suggestions 

beforebeginning with the brooding:

• Position the brooder in the room following the safety rules shown in the manual. 

In order to guarantee a uniform temperature it is very important to choose the best

position in a room, which offers the characteristics previously shown in this manual.


NOTE:

 we suggest to switch on the device one day before proceedingwith  the  

brooding and to check the fluctuation of the temperature and if necessary, to 

adjust the temperature.

•  Connect the brooder to the electric network and check the correct working of the 

device. Wait about 1 hour (for AF-25) and/or 2 hours (for AF-50) until the brooder

reaches the perfect working temperature 

During the first switching on the brooder smells burning. 

• After 2 hours of working, the brooder and the surface where it is positioned  

   uniformed the temperature. 

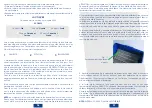
Check the internal temperature through the thermometer positioned on the grille.

If the temperature is different from 37,8° C or different from the temperature to use 

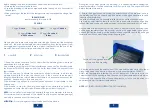
for thebrooding, it is possible to adjust it operating on the plastic screw (picture 10) 

positionednext to the protection box of the thermoregulation system,  on the same 

side of thethermometer.

The thermometer supplied with the brooder follows rapidly the temperature’s 

fluctuations; therefore, it is possible and usual to see continuous fluctuations in the 

temperature of ± 0.5°C due to the following conditions:

• Approaching to the brooder.

• Displacement of air

• Positioning of the brooder on a different surface (the surface on the previous 

   position is warm).

• During the thermoregulation.

For the adjustment of the temperature proceed as follows:

• Follow all the safety conditions for the use of the brooder shown in this manual.

• Operate on the plastic screw without forcing its working.

• Use a screwdriver (electrician’s screwdriver).

• To increase the temperature turns the screw  clockwise. Each turn is about 0,5 

   degrees.

• To reduce the temperature turn the screw anticlockwise. Each turn is about 0,5


   degrees.

• After the turning of the screw, WAIT AT LEAST 15 MINUTES, to allow the internal


   temperature to uniform and to stabilize.

• If a further correction of the temperature is required,  follow the above mentioned


   instructions. The fluctuation of the temperature is proportioned to the rotation.

• IT IS VERY IMPORTANT TO WAIT THE STABILISATION OF THE TEMPERATURE.

Summary of Contents for AF-25

Page 1: ...1 AF 25 AF 50 INCUBATOR INCUBATRICE COUVEUSE USER MANUAL MANUALE D USO MANUEL D UTILISATION Rev 00 02 03 ...

Page 2: ...ntegrity of the internal components especially resistor and fan The integrity of the box with the safety system The integrity of the connection wire to the electric network The correct positioning of the waterproofing holes of the 2 air inlets and the 4 outlets If the device is d amaged or one of its compone nts is missing it is necessary tosend it back to the distributor o r to an assista nce cen...

Page 3: ...el The brooder is calibrating during the test to have an internal uniform temperature on 100 F 37 8 C with an external temperature about 20 C It is possible to verify the temperature through the thermometer picture 8 found on theupper side of the cap 30 minutes after the brooder working the mercure line must coincide with the referenceon the protection grille Even if minimum differences do not com...

Page 4: ...ity of the feeding wire NOTE if the feeding wire is damaged do not connect the brooder to the electric network To replace the wire apply to the assistance centre or to qualified personnel in order toprevent any risk or to damage the brooder Fig 9 Humidifiers CONNECT THE ELECTRIC PLUG TO A SOCKET 6 Wait about 20 40 minutes for AF 25 and or 2 hours for AF 50 for the internal adjustment of the temper...

Page 5: ...vice from the socket beforeopening it and only to reconnect it after the closure ATTENTION it is very dangerous to use liquids next to the device 25 EGGS HUMIDITY ROTATION TEMPERATURE 24 eggs Chicken 35 eggs Guina fowl and Pheasan 75 eggs Quail 10 eggs Goose 20 eggs Duck and Turkey 1 2 3 During the three days before the hetching it is advised against opening the brooder therefore it will be necess...

Page 6: ...e temperature and if necessary to adjust the temperature Connectthebroodertotheelectricnetworkandcheckthecorrectworkingofthe device Wait about 1 hour for AF 25 and or 2 hours for AF 50 until the brooder reaches the perfect working temperature During the first switching on the brooder smells burning After 2 hours of working the brooder and the surface where it is positioned uniformed the temperatur...

Page 7: ...th your help to carry out furtherimprovements to our products 1 Did you already use a similar product other constructor our product 2 Functionality of our product 3 Instruction manual 4 Percent age ofhetch 5 Did you find correct the informations supplied with the product i e adjustment of the temperature umidity temperature indication etc 6 Possible suggestions YES NO YES NO INS SUFF GOOD EXELLENT...

Page 8: ...y of use of the device repairing and or modifications carried out by non authorised personnel not respect of the directions supplied with the user manual of the brooder Corti Zootecnici s r l via Volta 4 21020 Monvalle VA Italy To send back to Purchase date AF 25 AF 50 Model Stamp Note if the device is returned please send back only the cover Invoice N Fiscal Ticket N 14 15 ...

Page 9: ...omponentistiche interne in particolare resistenza e ventilatore L integrità della cupola contenente il sistema di controllo L integrità del cavo di collegamento alla rete elettrica La corretta collocazione dei funghetti di impermeabilizzazione delle 2 prese d aria e dei 4 sfoghi Qualora l apparecchio risultasse danneggiato o mancante in qualuque sua componente restituirlo al rivenditore o inviarlo...

Page 10: ...sizionare le uova in modo che appoggino tutte sul piano scorrevole di fondo Posizionare il lato più lungo dell uovo parallelamente ai separatori per consentire alle uova di ruotare agevolmente su se stesse quando viene azionato il tirante Con uova di piccole dimensioni è possibile fare più file per ogni divisione purché siano sufficientemente distanziate da poter ruotare L apparecchio è stato cost...

Page 11: ... una bottiglia di piccole dimensioni riempire con acqua tiepida le due vaschette di umidificazione fig 9 posizionate sulla base dell incubatrice 4 Chiudere l incubatrice 5 Verificare l integrità del cavo di alimentazione in ogni sua parte NOTA se il cavo di alimentazione risultasse danneggiato l apparecchio non deve essere messo in funzione Per la sostituzione del cavo rivolgersi al servizio d ass...

Page 12: ... chiuso ATTENZIONE È molto rischioso maneggiare liquidi in prossimità di apparecchi intensione I tre giorni precedenti la schiusa è sconsigliabile aprire l incubatrice Pertanto sarànecessario verificare ed eventualmente rabboccare il livello dell acqua nelle vaschettequalche giorno prima 2 Ruotare le uova azionando il pomello esterno all incubatrice due volte al giorno una volta alla mattina ed un...

Page 13: ...di garantire la massima costanza della temperatura è molto importante l ambiente dove verrà collocata Nota consigliamo di accendere l incubatrice un giorno prima di iniziare la cova e dicontrollare l oscillazione della temperatura ed eventualmente procedere alla taraturadella temperatura Collegare l incubatrice alla rete elettrica e dopo averne verificato il corretto funzionamento lasciare che rag...

Page 14: ...tare ulteriori migliorie al ns prodotto 1 Avete già utilizzato lo stesso prodotto altro costruttore nostro prodotto 2 Funzionalità del nostro prodotto 3 Manuale di istruzioni 4 Percentuale di schiusa 5 Ritenete sufficienti le regolazioni e le indicazioni fornite dall apparecchio reg temperatura umidità indicazione temperatura etc 6 Eventuali suggerimenti SI NO SI NO INS SUFF BUONO OTTIMO INS SUFF ...

Page 15: ...tiva o errata installazione incapacità d uso riparazioni e o modifiche da personale non autorizzato non rispet to delle indicazioni fornite nel manuale d uso dell incubatrice Corti Zootecnici s r l via Volta 4 21020 Monvalle VA Italy Ritagliare e restituire a Timbro Nota qualora l apparecchio venga restituito rendere solo il coperchio Data di acquisto Fattura N Scontrino Fiscale N AF 25 AF 50 Mode...

Page 16: ...rcle L integrité des composants internes en particulier de la résistance et du ventilateur L integrité de la coupole contenant le système de contrôle L integrité du câble de connexion au réseau élèctrique Le positionnement correct des bouchons d aspiration des 2 prises d aire et des 4 ouvertures Dans le cas où l appareil est endommagé ou manquant en certaines de ses parties rendez le au revendeur ...

Page 17: ...ai de façon à ce que la température interne resteconstante à 100 F 37 8 C avec une température extérieure de 20 C environ Il est possible de vérifier la température grâce au thermomètre figure 8 placé surl extrémité superièure du couvercle couveuse vide après 30 minutes environ de fonctionnement lacolonne du mercure doit coincider avec le repère sur la grille de protection Une moindrevariation en ...

Page 18: ...fs coulisse bien en actionnant le pommeau extérieur 3 A l aide d une petite bouteille remplir les deux petits bacs d humidification figure 9 placés sur la base de la couveuse avec de l eau tiède 4 Fermer la couveuse 5 Vérifier l intégrité totale du câble d alimentation NOTE Danslecasoùlecâbled alimentationsoitendommagé nepasconnecter la couveuse au réseau électrique Pour remplacer le câble s addre...

Page 19: ...ENTION il est très dangereux d utiliser des liquides près d appareils électrique Pendant les trois jour qui précèdent l éclosion il est conseillé de ne pas ouvrir la couveuse Donc il sera nécessaire de vérifier et de ajouter de l eau dans les bacs les dernièrs trois jours avant l écclosion 2 Tournerlesoeufsdeuxfoisparjourenutilisantlepommeauextérieuràlacouveuse une fois le matin et une fois le soi...

Page 20: ...e procéder avec la couvéeet de contrôler les variations de la température et si nécessaire de procéder avecl e règlage de la température Connecter la couveuse au réseau électrique et après avoir vérifié le fonctionnement correct de l appareil attendez qu elle arrive à la température de couvée Pendant le premier allumage la couveuse émet un léger roussi Attendre environ 1 heure de fonctionnement po...

Page 21: ...ide d apporter d ameliorations à notre produit 1 Avez Vous déjà utilisée un produit similaire d autre constructeur notre produit 2 Fonctionnement de notre produit 3 Manuel d utilisation 4 Pour centage d éclosion 5 Considérer Vous suffisantes les régulations et les indications fournies de l appareil rég température umidité indication température etc 6 Conseils éventuels OUI NO OUI NO INS SUFF BON E...

Page 22: ...nstallation incapacite d usage reparations et ou modifications effectuees par personnel non qualifie non respect des indications fournies avec le manuel d utilisation de la couveuse Corti Zootecnici s r l via Volta 4 21020 Monvalle VA Italy Rendre à Timbre Note en cas de restitution de l appareil rendre seulement le couvercle Date d achat Facture N Reçu fiscal N AF 25 AF 50 Modèle ...

Page 23: ...Corti Zootecnici Srl Via Volta 4 21020 Monvalle VA Italy ...

Reviews: