Network Video Recorder
139
Chapter 17 — Controlling With a Network Keyboard
You can control the Client program by using a network keyboard.
NOTE:
This function is supported only for a specific model of a network keyboard.
17.1 Registering
1.
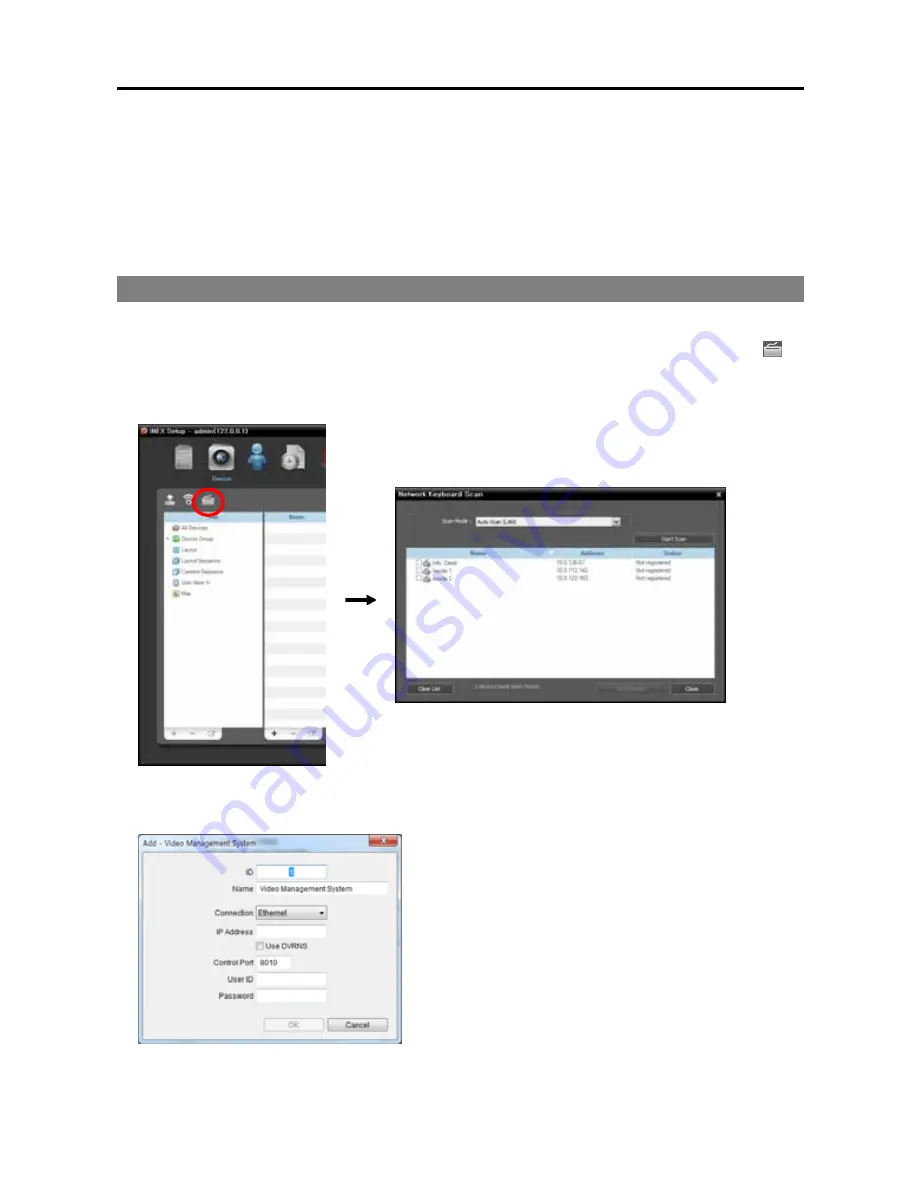
Register the network keyboard on the administration service: Go to the
Start
Menu
→
Click
iNEX
→
Run the
iNEX Setup
program and enter login information
→
Select the
Device
menu
→
Click
(Network Keyboard Setup) button, and the
Network Keyboard Scan
window appears. The way to
register a network keyboard is identical to the way to register a device. Refer to
12.1 Registering
Devices
(p. 100) about registering a device.
2.
Register the Client system on the network keyboard. Refer to the network keyboard’s user manual for
details.
ID
(Client system ID): The network keyboard assigns
the ID automatically when the Client system is registered,
and you can change the ID. The ID is used to distinguish
the Client system from other Client systems when
controlling it with a network keyboard, so each must have
a unique ID.
Name
: Set up a Client system name for your reference.
IP Address
: Enter the Client system’s IP address. Do
not check
Use DVRNS
.
Control Port
: Enter the Control port number set in the
Client System (Check the Control port number in the
System
menu
→
Preference
→
Network
→
Network
Keyboard
setting).
Summary of Contents for CRINEXSN04-2TB
Page 1: ......
Page 2: ......
Page 8: ...User s Manual vi Troubleshooting 160 Specification 161 Index 163 ...
Page 18: ...User s Manual 10 ...
Page 32: ...User s Manual 24 ...
Page 54: ...User s Manual 46 ...
Page 70: ...User s Manual 62 ...
Page 82: ...User s Manual 74 ...
Page 94: ...User s Manual 86 ...
Page 102: ...User s Manual 94 ...
Page 142: ...User s Manual 134 ...
Page 164: ...User s Manual 156 ...
Page 170: ...User s Manual 162 ...

