4-Channel Digital Video Recorder
9
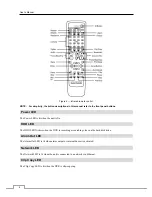
Camera Buttons (1 to 4)
Pressing the individual camera buttons will cause the selected camera to display full screen. Buttons 1 to 4 are also
used to enter passwords.
In the PTZ mode, pressing the button 1 zooms in the screen and the button 2 zooms out the screen, and pressing the
button 3 focuses near and button 4 focuses far.
PLAY/PAUSE Button
In the live monitoring mode, pressing the button freezes the current screen and the screen displays icon. When
in the playback mode, pressing the button plays back images at regular speed or pauses playing video.
Pressing the button selects a highlighted item or completes an entry that you have made during system setup.
Arrow Buttons
These buttons are used to navigate through menus and GUI. You can also use them to change numbers by highlighting
a number in the menu and using the
Up
and
Down
arrow buttons to increase or decrease the number’s value.
These buttons are also used to control Pan and Tilt when in the PTZ mode. When in the PIP display format, pressing
the
Up
and
Down
arrow buttons moves the position of the small screen counter-clockwise and clockwise, and pressing
the
Left
and
Right
buttons changes the PIP screen size.
In the playback mode, pressing the
button plays video backward at high speed. Pressing the button again toggles
the playback speed from
,
and
. The screen displays
,
and
respectively. Pressing the
button plays video forward at high speed. Pressing the button again toggles the playback speed from ,
and
. The screen displays ,
and
respectively. When in the pause mode, pressing the button
moves to the next image and pressing the button moves to the previous image.
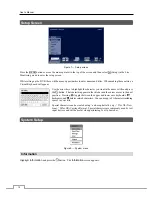
MENU/CAMEO Button
Pressing the
MENU/CAMEO
button enters the
Setup
screen. You will need to enter the authorized user and password
to access Setup. Pressing the button also closes the current menu or setup dialog box. In the Playback mode, pressing
the button displays the Search menu.
Pressing and holding the button for three seconds or longer enters the cameo mode. The yellow outline surrounding
the video indicates the active cameo, and pressing the arrow buttons moves the active cameo. Pressing the desired
camera button in the active cameo edits the cameo and displays the video of selected camera. Pressing the (Play/
Pause) button exits the Active Cameo mode. Selecting
Exit Group Edit
in the cameo menu displayed when pressing
the
MENU/CAMEO
button also exits the Active Cameo mode.
NOTE:
A cameo is defined as any cell within quad (2x2) screen display. The cameo mode allows you to change
the screen layout by editing the cameo.
PLAYBACK Button
Pressing the
PLAYBACK
button enters the playback mode, and pressing the button again exits the playback mode.
When entering the playback mode, video is paused. Pressing the (Play/Pause) button plays back video at regular
speed. The screen displays when the DVR is in the Pause mode and the screen displays when the DVR is playing
back video.
When in one of the multi-view formats, pressing this button enters the Triplex mode. The DVR supports the Triplex
function: monitoring, recording and playing back at the same time.
Summary of Contents for 4 Channel
Page 1: ......
Page 2: ......
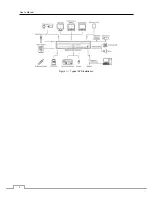
Page 10: ...User s Manual 2 Figure 1 Typical DVR installation ...
Page 14: ...User s Manual 6 ...
Page 54: ...User s Manual 46 ...
Page 72: ...User s Manual 64 ...

