Part 1 – Introduction
10
•
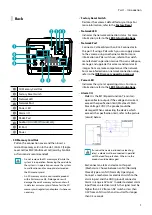
RS485 Port
Connect a pan/tilt driver to this port. Connect the
driver's TX+/RX+, TX-/RX- to the network camera's
+/—. For more information on RS485 connections,
refer to the pan/tilt driver manufacturer's
operation
manual
.
•
Audio I/O
DC-B4501X model only
-
Out
: Connect an amplifier to this port (line out).
This device does not feature a built-in audio
amplifier unit and therefore requires the user to
purchase a separate speaker system with a built-in
amplifier.
-
In
: Connect an audio source (line in). A built-in
microphone is featured on the front.
•
IO Port
This function is not supported.
•
Power
-
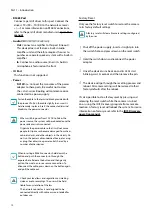
DC12V -/+
: Connect the two wires of the power
adapter to these ports. Be careful not to cross
the + and - wires. Booting will commence once
connected to a power supply.
Fasten the cable to the terminal block provided with
the product. Pull on the cable slightly to ensure it is
held securely in place. Insert the connected terminal
block into the power connector.
•
When switching over from 12 VDC to PoE as the
power source, the system will be rebooted once the
power adapter is disconnected.
•
Organize the power cable so that it will not cause
people to trip over or become damaged from chairs,
cabinets, desks, and other objects in the vicinity. Do
not run the power cable underneath carpet or a rug
or plug the cable into a power outlet shared by a
number of other devices.
When inserting a RS485 connector, hold down the
button and push the connector in through the
exposed hole. Release the button and then gently
pull on the wire to ensure a secure connection. To
disconnect the cable, press down on the button again
and pull the cable out.
•
Check your local laws and regulations on making
video or audio recordings. The user will be held
liable for any violation of the law.
•
The network connector is not designed to be
connected directly with cable or wire intended for
outdoor use.
Factory Reset
Only use the factory reset switch to restore the camera
to its factory default settings.
A factory reset will clear all camera settings configured
by the user.
1
Shut off the power supply, insert a straight pin into
the switch hole, and press down on the reset switch.
2
Hold the switch down and reconnect the power
adapter.
3
Once the device turns back on and its LEDs start
blinking, wait 5 seconds and then remove the pin.
4
The device will go through the resetting process and
reboot. All camera settings will be restored to their
factory defaults after the reboot.
It's also possible to do a factory reset by pressing and
releasing the reset switch while the camera is turned
on or using the IDIS Discovery program from a remote
location. A factory reset will reboot the system. For more
information on factory reset, refer to the
IDIS Discovery
operation manual
.


