04
05
ASSEMBLY INSTRUCTION
HARDWARE CONTENTS Note: Hardware
not shown actual size.
CAUTION:
Please read and understand this entire manual before attempting to install or
operate the product.
CAUTION:
Before beginning the installation or operation of product, make sure all parts
are present. If any part is missing or damaged, do not attempt to install or
operate the product. Contact customer service for replacement parts.
WARNING:
All electrical connections must be in accordance with local codes, ordinances,
and national electric codes. If you are unfamiliar with methods of installing
electrical wiring, secure the services of a qualified electrician.
WARNING:
Don't overload, or else the switch may burn. Don’t use bulbs that not
dimmable, or else the switch may burn.
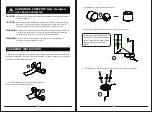
1. Align the longer side of Fabric Lamp Shade (AA) with Shade Ring (CC) and the shorter side
with Spider Fitting (BB) . Using the clips at top and bottom of Fabric Lamp Shade (AA) .Connect
Shade (AA) to Fitting (BB)and Ring (CC) .
2. Roll Fitting (BB) and Ring (CC) all the way around and
make sure that all the clips are fastened.
1
2
3. Close the Shade (AA) by fastening the velcro.
4. Secure the pole (B) to the table using the wing nut as shown above.
5. Turn the table over and then screw each leg (F) to the table top as shown above.
3
4
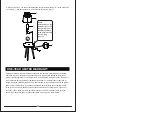
Insert the cord through the hole
in the table. Secure it by fastening
the nut. Plug the two parts of wire
together and screw to lock in
place.
5


