background image

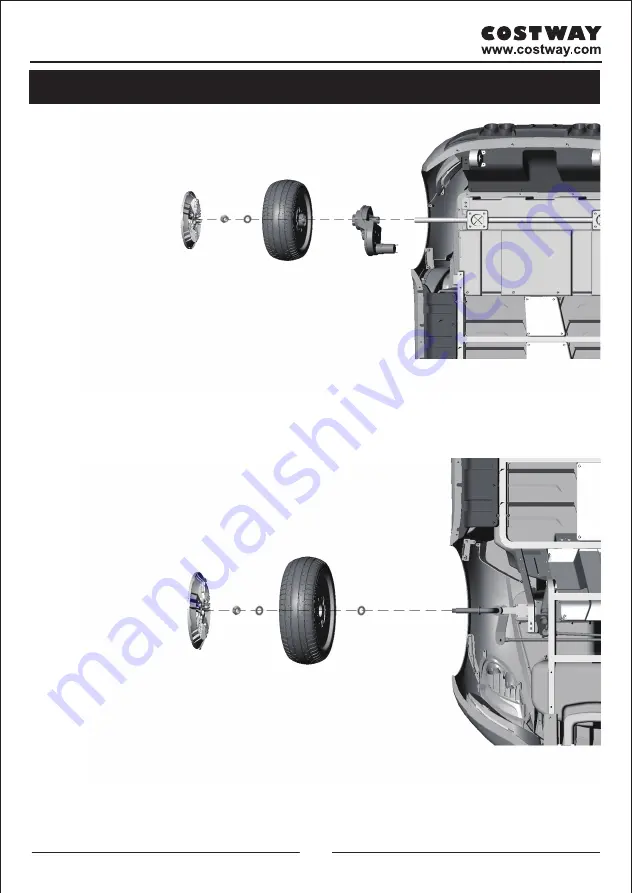
4. Wheels Assembling

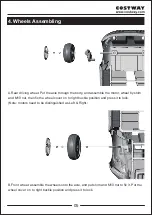
A.Rear driving wheel: Put the axle through the body, and assemble the motor, wheel by shim 
and M10 nut, then fix the wheel cover on to right buckle position and press it to lock.
(Note: motors need to be distinguished as Left & Right.

B.Front wheel: assemble the wheels onto the axle, and put shim and M10 nut to fix it. Put the 
wheel cover  on to right buckle position and press it to lock.

05

Summary of Contents for Honey Joy

Page 1: ...Kids Ride On Car TY327692 ...

Page 2: ...rts and hardware Please ensure that all parts are correctly installed incorrect installation can lead to a danger We recommend that where possible all items are assembled near to the area in which they will be placed in use to avoid moving the product unnecessarily once assembled Ensure a secure surface during construction und place the product always on a flat steady and stable surface Please use...

Page 3: ...lly It s dangerous to kids Adult assembly required Use care when unpacking as the small parts sharp edges of the parts to be assembled may pose a hazard Check if the charger is in good state including the wire socket and all details Stop use it if it looks broken in some way till it s fixed 2 Specifications Driving Motor 2 RS390SP 12V RPM16000 Steering Motor RS380SP 12V RPM5500 Battery 12V4 5ah 1 ...

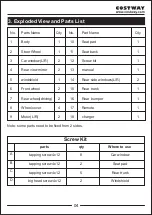
Page 4: ... 2 1 2 2 4 2 No 10 11 12 13 14 15 16 17 18 Part Name Seat pad Seat back Screw kit manual Rear side windows L R Rear trunk Rear bumper Remote charger Qty 1 1 1 1 2 1 1 1 1 Note some parts need to be fixed from 2 sides Screw Kit A B C D parts tapping screw 4x12 tapping screw 4x12 tapping screw 4x12 big head screw 4x12 qty 8 2 5 2 Where to use Car window Seat pad Rear trunk Windshield 04 ...

Page 5: ... by shim and M10 nut then fix the wheel cover on to right buckle position and press it to lock Note motors need to be distinguished as Left Right B Front wheel assemble the wheels onto the axle and put shim and M10 nut to fix it Put the wheel cover on to right buckle position and press it to lock 05 ...

Page 6: ... 12 tapping screws L R different Then put the rear view mirrors L R different onto right position of the door and lock it by buckling themselves A Put 2 rear side windows to related positions as picture shows and lock it by buckle L and R different and then assemble the rear trunk onto related positions then fix it by 4X12 tapping screw 06 ...

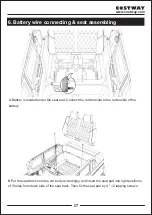
Page 7: ...insert the seat pad into right positions of 3 holes from down side of the seat back Then fix the seat pad by 4 12 tapping screws 6 Battery wire connecting seat assembling A Battery is located under the seat pad Connect the red terminal to the red buckle of the battery 07 ...

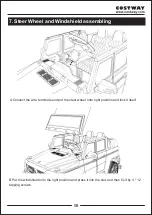
Page 8: ...nto the right position and press it into the slot and then fix it by 4 12 tapping screws 7 Steer Wheel and Windshield assembling A Connect the wire terminals and put the steer wheel onto right position and lock it itself 08 ...

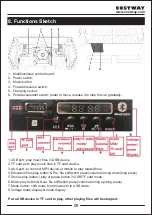
Page 9: ...play or pause button in USB TF card mode 6 Music play button Next file shift short press volume turning up long press 7 Mode button shift mode from blue tooth to USB mode 8 Voltage meter display mode display Put a USB device or TF card to play other playing files will be stopped 8 Functions Sketch 1 Multifunctional control board 2 Power switch 3 Music button 4 Forward reverse switch 5 Charging soc...

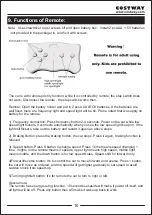
Page 10: ...e light still flickers take out the battery and restart it again as above steps 2 Braking Button press the braking button the car stops Press it again braking function is relieved 3 Speed button Press S button to change speed Press 1 time means speed changing 1 time 3 lights on the remote means 3 speeds upper light means high speed middle light means middle and the down button is for low speed Not...

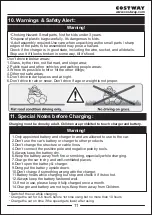
Page 11: ...es 8 Don t open the battery charger 9 Dong put the battery upside down 10 Don t charge if something wrong with the charger 11 Battery heats while charging but stop and check it if its too hot 12 Always keep the battery fastened well 13 If not in use please keep it fully charged once a month 14 Charger and battery are not toys Keep them away from Children 10 Warnings Safety Alert 11 Special Notes b...

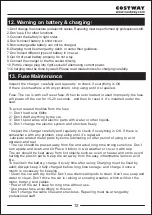
Page 12: ...car 3 Don t spoil wires and electric parts with water or other liquids 4 Don t change the electric system and structure freely Inspect the charger carefully and regularly to check if everything is OK If there is somewhere with any problem stop using until it s repaired Lubricate related metal parts by some lubricating oil after period of using to avid abrasion and rust The car should be placed awa...

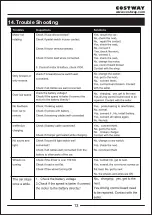
Page 13: ...www costway com 14 Trouble Shooting 13 ...

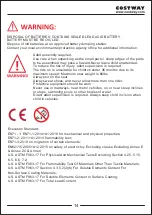
Page 14: ... be worn Never use in roadways near motor vehicles on or near steep inclines or steps swimming pools or other bodies of water Direct adult supervision is required Always keep child in vision when child in vehicles Execution Standard EN71 1 EN71 1 2014 A1 2018 for mechanical and physical properties EN71 2 2011 A1 2014 flammability test EN71 3 2019 on migration of certain elements EN62115 2005 A12 2...

Page 15: ......

Page 16: ...15 ...

Reviews: