background image

www.costway.com

11

Welcome to visit our website and purchase our quality products!

Reward Points

Exclusive Customer Service

Personalized Recommendations

Permanent Shopping Cart

Order History

We would like to extend our heartfelt thanks to 
all of our customers for taking time to assemble 

this product and giving us valuable feedbacks.

www.costway.com

Your suggestions and comments for COSTWAY are really important to us! 

We sincerely solicit you to go back to our shop and leave a good rating in just a 

simple click. It would be quite encouraging if you could kindly do so like below:

February 24, 2019

Great products so far. Fast delivery, easy setup, and working without any issues. 

Great products so far

With your inspiring rating, COSTWAY will be more consistent to offer you 

EASY SHOPPING EXPERIENCE, GOOD PRODUCTS and EFFICIENT SERVICE!
US office: Fontana, California
UK office: Ipswich

Summary of Contents for HW56102

Page 1: ...ND KEEP FOR FUTURE REFERENCE Visit us www costway com Follow Costway Please give us a chance to make it right and do better Contact our friendly customer service department for help first Replacements...

Page 2: ...nce Seperate and count all parts and hardware Read through each step carefully and follow the proper order We recommend that where possible all items are assembled near to the area in which they will...

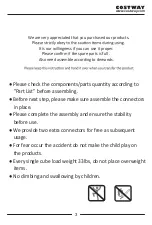
Page 3: ...ts parts quantity according to Part List before assembling Before next step please make sure assemble the connectors in place Please complete the assembly and ensure the stability before use We provid...

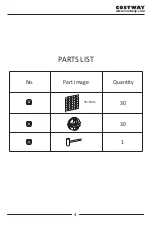
Page 4: ...4 www costway com PARTS LIST I A C B No Part image Quantity 30 30 1 35 35cm...

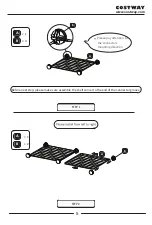
Page 5: ...w costway com 1 B 2 A 1 B 4 A STEP 2 STEP 1 A B Please pay attention to the connectors mounting direction B A Before next step please make sure assemble the shelf corner to the end of the connector gr...

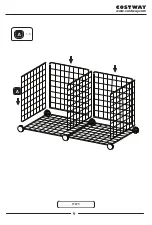
Page 6: ...www costway com 6 STEP 3 5 A A...

Page 7: ...www costway com 7 STEP 4 Please pay attention to the connectors mounting direction as the enlarged picture shows 2 3 A1 A B B A...

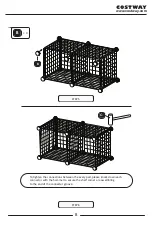
Page 8: ...way com 8 STEP 5 3 B STEP 6 To tighten the connections between the every part please knock down each connector with the hammer to secure the shelf corner are assembling to the end of the connector gro...

Page 9: ...www costway com 9 7 A 6 B STEP 7 A A B...

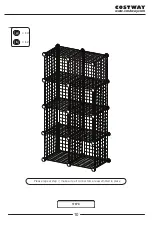
Page 10: ...www costway com 10 14 A 12 B STEP 8 Please repeat step 7 make sure all connectors are assembled in place...

Page 11: ...ostway com Your suggestions and comments for COSTWAY are really important to us We sincerely solicit you to go back to our shop and leave a good rating in just a simple click It would be quite encoura...

Page 12: ......

Reviews: