background image

USER'S MANUAL

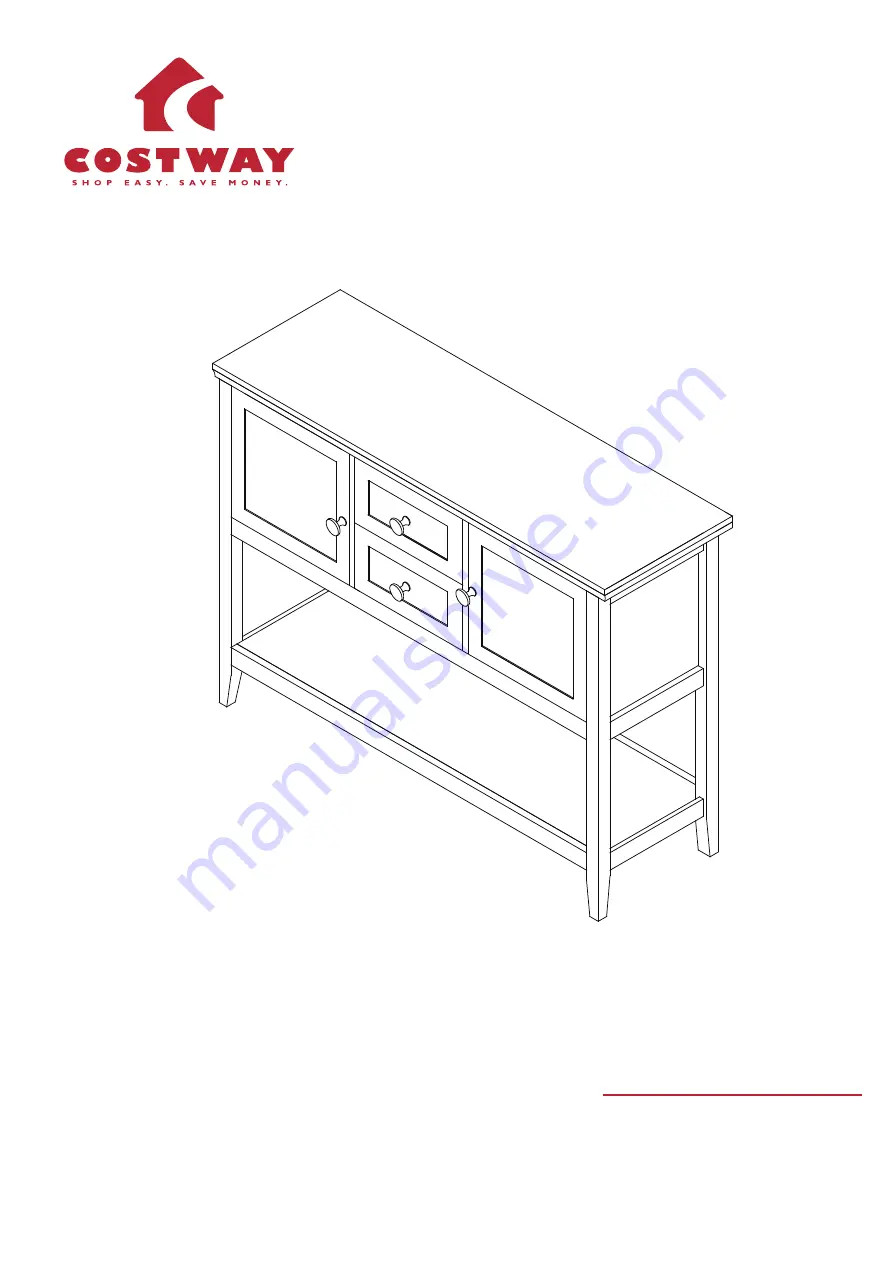
       Console Table

HW64005

Summary of Contents for HW64005

Page 1: ...USER S MANUAL Console Table HW64005...

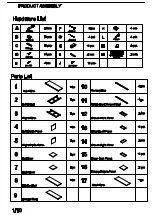
Page 2: ...s 4 pcs 4 pcs 4 pcs 34 pcs 300mm 2 1 pc 10 1 pc 3 1 pc 11 4 1 pc 12 5 1 pc 13 6 1 pc 14 7 1 pc 15 2 pcs 8 1 pc 16 1 pc 9 17 2 pcs 2 pcs 2 pcs 3 pcs 2 pcs Top Panel Left Panel Right Panel Left Divide P...

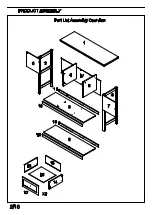
Page 3: ...2 10 Part List Assembly Overview PRODUCT ASSEMBLY 1 2 3 4 5 8 6 7 9 10 10 10 11 12 13 14 15 16 17 X2...

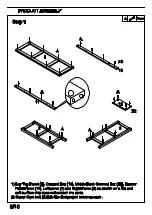
Page 4: ...X3 A A A A 2 3 A A 1 Lay Top Panel 1 Connect Bar 10 Middle Back Connect Bar 11 Drawer Front Panel 12 Left panel 2 and Right Panel 3 as shown on a flat and soft surface that does not scratch the parts...

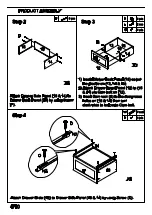
Page 5: ...e Panel 13 14 to Drawer Back Panel 15 by using Screw F 1 Insert Drawer Back Panel 16 as per the groove on 13 14 15 2 Attach Drawer Front Panel 12 to 13 14 via Cam bolt on 12 3 Insert Cam lock B to the...

Page 6: ...p 5 5 10 PRODUCT ASSEMBLY Step 6 Attach Hinge K and Magnetic Bar I to Door 6 7 by using Screw D as shown Attach Drawer Glide N1 to Left and Right Divide Panel 4 5 by using Screw D Back side with two h...

Page 7: ...Bottom Shelf 9 via Wood Dowel C and Cam bolt on 10 2 Insert Cam lock B to the designated holes on 9 then turn clock wise to lock onto Cam bolt 1 Attach Connect Bar 10 11 to Middle Shelf 8 via Wood Dow...

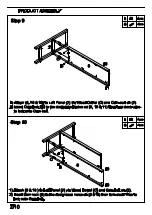
Page 8: ...eft Panel 2 via Wood Dowel C and Cam bolt on 2 2 Insert Cam lock B to the designated holes on 8 10 11 then turn clock wise to lock onto Cam bolt 1 Attach 9 10 to Left Panel 2 via Wood Dowel C and Cam...

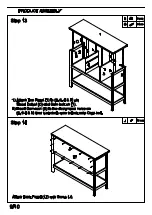
Page 9: ...9 8 1 Attach Right Panel 3 to 8 9 10 11 via Wood Dowel C and Cam bolt on 2 2 Insert Cam lock B to the designated holes on 8 9 10 11 then turn clock wise to lock onto Cam bolt 10 10 10 11 Attach Left a...

Page 10: ...PRODUCT ASSEMBLY Step 14 16 pcs J 4 5 2 3 1 Attach Top Panel 1 to 2 3 4 5 via Wood Dowel C and Cam bolt on 1 2 Insert Cam lock B to the designated holes on 2 3 4 5 then turn clock wise to lock onto Ca...

Page 11: ...E H Step 15 10 10 PRODUCT ASSEMBLY Step 16 2 pcs D L M 8 pcs 2 pcs 1 Attach Magnetic Catch H to Divide Panel 4 5 with Screw E 2 Attach Door 6 7 to Side Panel with Screw D 3 Attach Knob M to Door 6 7 w...

Page 12: ...ou could kindly do so like below February 24 2018 Great product so far Fast delivery easy setup and working without any issues Great products so far With your inspiring rating Costway will be more con...

Reviews: