
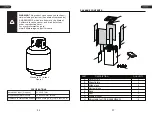
Hardware Used
Figure 2
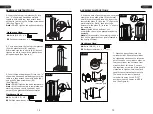
Ground fixer X 4
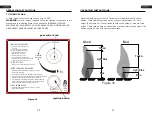
1. Side place the product base (E) on a
non-abrasive flat surface to prevent
scratching, unscrew the adjustable foot (H)
and remove from the base (E). Line up the
hole on the ground fixer (DD) with the
corresponding holes on the base (E), then
insert the bolt on adjustable foot(H) into
the holes and hand tighten them clockwise.
To prevent heater from strong wind or
incline ground, anchor the base securely to
the ground with long nails or screws (See
Figure 2).
Note:
long nails or screws are not included.
DD
H
E
DD
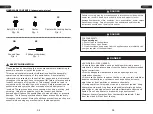
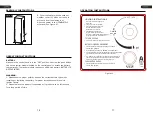
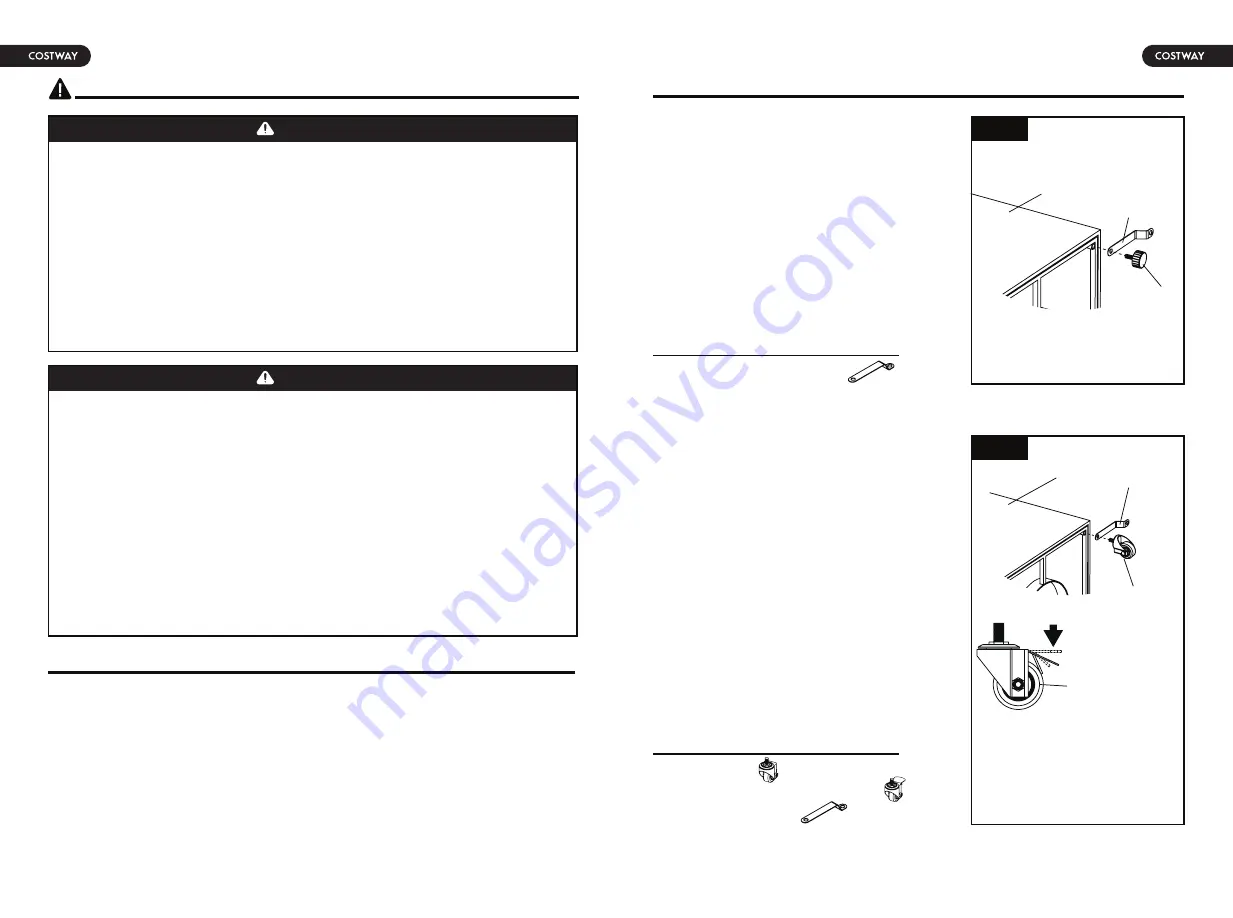
2. It is optional to replace the adjustable
foot (H) with casters (BB) and casters with
locking device (CC).
a. Remove the foot glider (H) from the base
(E), then install the two casters (BB) and
two casters with locking device (CC) with
the base, installation procedures are same
as step 1.
Note:
The two casters (BB) are installed on
two adjacent holes on the product base (E),
so are the two casters with locking device
(CC).
b. Make sure the locking device on the
casters (CC) are pressed down after
installation, so that the heater will not move
in any way (See Figure 3).
DD
BB
E
Hardware Used
Caster X 2
Caster with locking device X 2
BB
CC
Ground fixer X 4
DD
Figure 3
CC
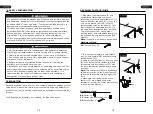
Carefully unpack all parts from the box, compare parts with package content
listed above, make sure all parts are present before beginning assembly of
product. If any part is missing or damaged, do not attempt to assemble the
product.
Tools Required for Assembly (not included): Phillips screwdriver.
PREPARATION
WARNING
WARNING
SAFETY INFORMATION
• This product is fueled by propane gas. Propane gas is invisible, odorless,
and flammable. An odorant is normally added to help detect leaks and can
be described as a “rotten egg” smell. The odorant can fade over time so
leaking gas is not always detectable by smell alone.
• Propane gas is heavier than air and leaking propane will sink to the
lowest level possible. It can ignite by ignition sources including matches,
lighters, sparks or open flames of any kind many feet away from the
original leak. Use only propane gas set up for vapor withdrawal.
• Store or use propane gas in compliance with local ordinances and codes
or with ANS/NFPA 58. Turn off propane when not in use.
• Alert children and adults to the hazards of high surface temperatures.
Stay away from these surfaces to avoid burning skin or igniting clothing.
• Carefully supervise young children when in the vicinity of the heater.
• Do not hang clothing or any other flammable materials from the heater,
or place on or near the heater.
• Replace any guard or protective device removed for servicing the
appliance prior to placing back in service.
• Installation and repair should be done by a qualified service person. The
heater should be inspected before use and annually by a qualified service
person. More frequent cleaning may be required as necessary. It is
imperative that the control compartment, burners, and circulating air
passageway of the appliance be kept clean.
ASSEMBLY INSTRUCTIONS
12
13


