BATTERY
WARNING:
1. Please observe proper polarity and use the correct battery type when
installing or replacing the battery. Improper installation could result in
ignition failure.
2. Please remove the battery if consumed or if product is to be left unused
for a long period of time.
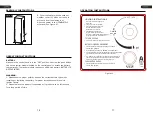
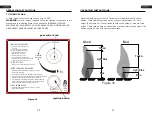
Make sure the control knob is in the “OFF” position. Unscrew the push button
cap on the ignitor module located on the control panel to access the battery
compartment. The ignitor module requires one AAA size battery. BATTERY IS
NOT INCLUDED.
Figure 10
OFF (APG.)
MAX
(MÁX.)
1 AAA
1.5V
IGNITOR
( Encendedor )
ON/MIN
(ENC./MÍN.)
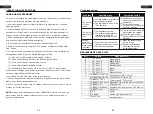
LIGHTING INSTRUCTIONS
1. Push in gas control knob slightly and
2. Turn gas control knob to “ON/MIN”.
3. Push in gas control knob all the way
4. If the burner does not light in 15
1. Push in gas control knob slightly and turn to “OFF”.
TO TURN OFF GAS
INSTRUCCIONES DE ENCENDIDO
PARA CERRAR EL GAS
1. Presione ligeramente la perilla de control del gas y gírela a la
2. Gire la perilla de control del gas a “ENC/MÍN” (encendido/mínimo).
3. Presione la perilla de control del gas hasta el fondo y mantenga presionada.
4. Si el quemador no se enciende en 15 segundos, suelte la perilla y esta
encender el quemador nuevamente, repita los pasos 1 al 3.
1. Presione ligeramente la perilla de control del gas y gírela a la
turn to “OFF”.
and hold. Continue to press the
ignition button for 15 seconds.
seconds, release the knob and it will
pop back out. Wait 5 minutes before attempting
to light the burner again, repeat step 1 to 3.
posición “APG” (apagado).
Siga presionando el botón de encendido durante 15 segundos.
volverá a su posición hacia afuera. Espere 5 minutos antes de intentar
posición “APG” (apagado)
OPERATION INSTRUCTIONS
OPERATION INSTRUCTIONS
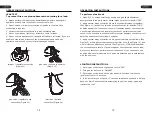
8. Cover the heater with the outdoor
weather cover (G) when not in use to
protect it from the elements or
when the heater is cool COMPLETELY
after use (See Figure 9).
Figure 9
G
ASSEMBLY INSTRUCTIONS
16
17


