6
www.costway.com
7
www.costway.com
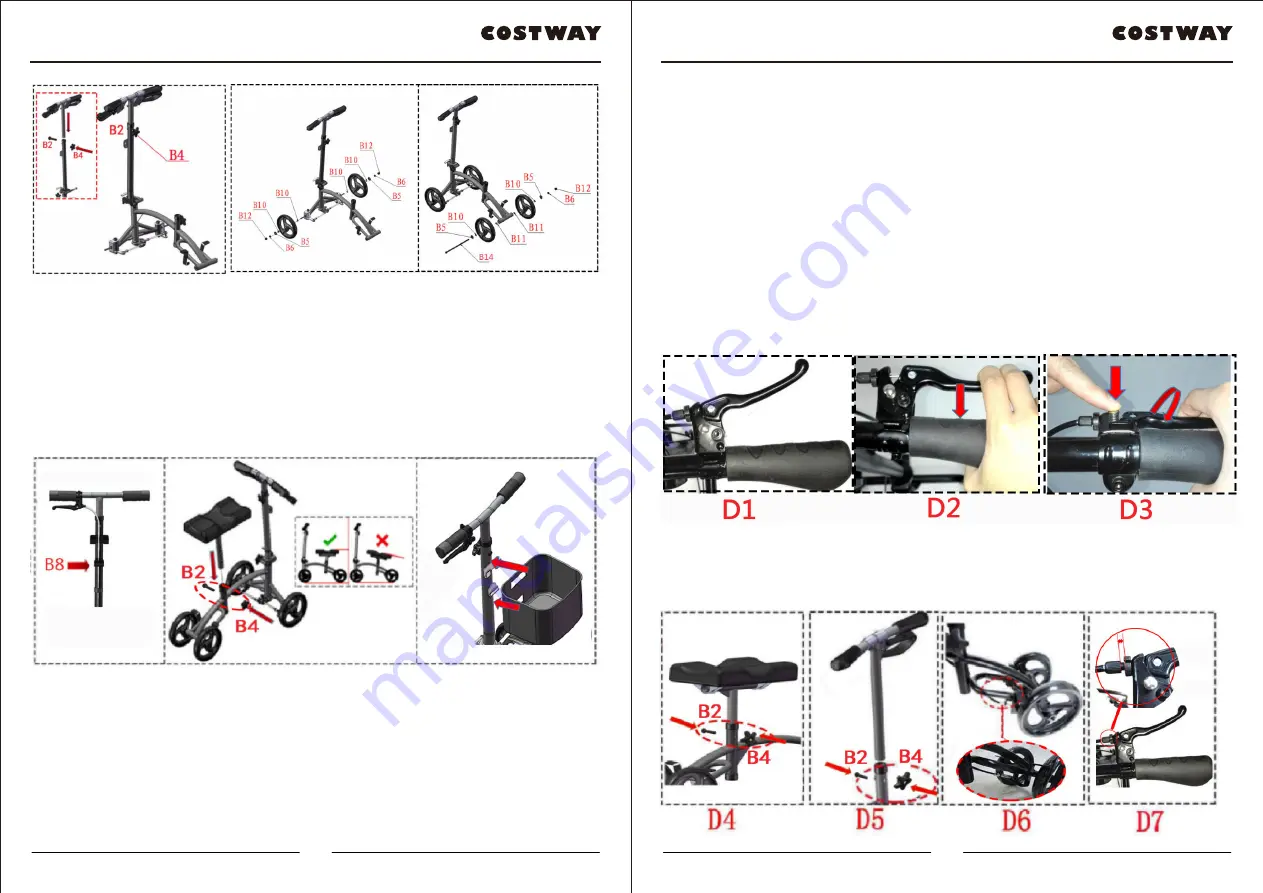
Figure 6 Figure 7
Step 5: As shown in figure 8, tie the brake cable with magic tape.
Step 6: As shown in figure 9, pay attention to the difference between front and
rear installation. The leg cushion assembly should be aligned with the
adjustment tube hole position of the frame, and be locked with the M8 five-star
knob and the outer hexagon screw M8 × 45. The installed leg cushion assembly
are basically in a horizontal state with the ground.
Step 7: As shown in figure 10, aim the iron basket at the two hooks on the
folding rod assembly to get stuck.
Figure 8 Figure 9 Figure 10
Ⅲ
. Post-installation Inspection:
1.Please refer to the manual diagram for comparison to check if the knee
walker-scooter is installed correctly or not.
2.Verify that all parts of the knee walker-scooter are fully assembled, and check
if there are any spare parts.
3.Check the installation of the knee walker-scooter for looseness. Tighten
screws and nuts if loose.
4.Check the appearance of all components of the knee walker-scooter for any
skew phenomenon, and appropriate adjustments can be made accordingly.
Ⅳ
. Partial Component Description: 1. Brake use method: As shown in the figure
below: D1: Normal use without braking, D2: Use the brakes as needed, D3:
Press down on the brake handle to continue braking (Note: the brake
self-locking function can only be used for smooth road surface and for slowing
down. When releasing the self-locking brake, just hold the handlebar and the
self-locking button will automatically pop off.)
2. Height adjustment of handle assembly and leg cushion assembly: please
unscrew the M8 five-star knob and the outer hexagon screw M8 × 45 to adjust
the height to the corresponding hole, and then lock. As shown in figure D4 and
D5:


