12
EN
GL
IS
H
5
After finishing work
1. Unplug the mains lead from the wall socket.
2. Pull the trigger so that any paint left in the spray gun runs back into the container.
3. Unscrew the container and pour any leftover paint back into its can.
4. Clean as much paint as possible off the container and suction tube using a soft
brush or cloth.
5. Pour solvent or water (depending on type of paint used) into the container and
screw it back onto the spray gun.
Warning:
Only use solvent with a flashpoint
above 21 °C.
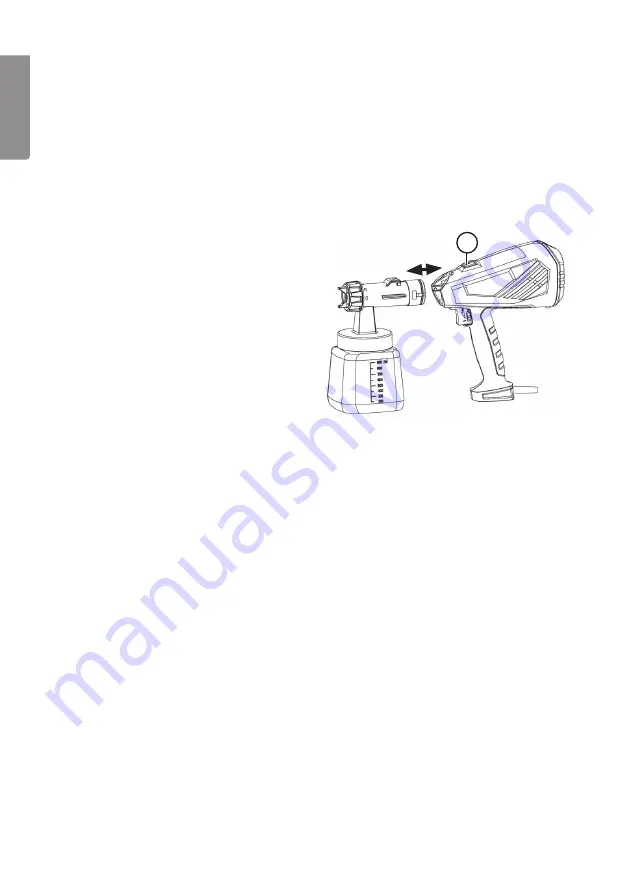
6. Detach the spray nozzle-container
assembly from the motor unit by
pressing in the release catch (5).
7. Reassemble the spray gun by inserting
the rear of the spray nozzle-container
assembly into the motor unit. Pressing
the release catch down will help them
connect more easily.
8. Plug the spray gun back into the wall socket, switch it on and spray the solvent or
water into another container or onto a cloth.
9. Repeat the above procedure until the solvent or water coming out of the spray gun
is clear.
10. Switch the spray gun off and pull out the plug from the wall socket.
11. Unscrew the container and dry it, making sure that the surface of the joint is clean
and free from paint residue.
12. Wipe the exterior of the spray gun with a cloth soaked in solvent or water.
13. Unscrew and remove the lock nut (3) and remove the air cap and paint nozzle.
14. Wash the loose components and paint needle in solvent or water. Do not use
metal tools to clean the spray gun.
Note:
Never immerse the motor unit of
the spray gun in water or other liquid.
15. Reassemble the spray gun when it is clean and dry.
Summary of Contents for 40-9132
Page 2: ...2 ...


