9
EN
GL
IS
H
10–30 cm
Preparation of the workpiece to be coated
• The quality of the finish will depend on how clean and smooth the surface is before
it is sprayed. Sand and fill rough or cracked surfaces if required. Remove all dust
from the work area before starting to spray, vacuum clean if possible.
• Cover all surfaces and objects that should not be sprayed with masking tape and
dust sheets or remove them from the work area.
• Cover all hinges, screw threads, etc.
Spray painting
1. Unscrew the paint container.
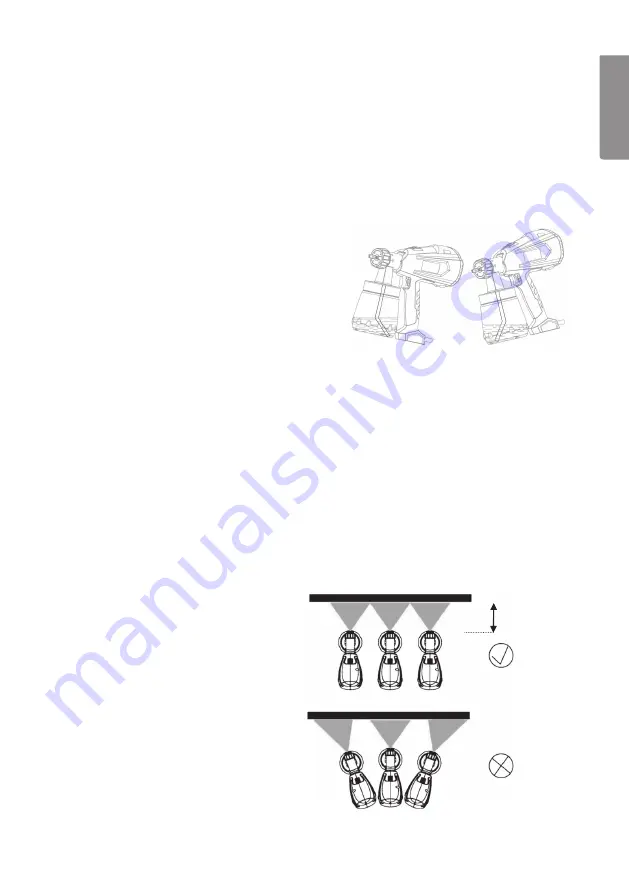
2. Turn the suction tube so that it is in
the optimum position for the work at hand:
-
When working on lying objects, turn
the suction tube forwards.
-
When working on upright objects, turn
the suction tube rearwards.
3. Place the container on a flat piece of paper
and pour in the paint (coating material).
4. Screw the container firmly back onto
the spray gun.
Switching the spray gun on
1. Connect the spray gun to a 230 V, 50 Hz power socket.
2. Aim the spray gun at the object to be painted.
3. Pull the trigger (4) until paint comes out. The trigger has two stages, the first stage
starts the motor, the second feeds the paint out.
Switching the spray gun off
1. Release the trigger to switch the spray gun off.
2. Unplug the mains lead from the wall socket.
Operating instructions
1. When working outdoors, pay
attention to the wind direction.
2. Begin by test spraying on a piece
of card to set the correct spray
pattern and feed rate before starting
to spray the object to be coated
(settings described in next section).
3. Hold the spray gun perpendicular
to the surface to be painted and at
a distance of 10–30 cm (see fig.).
Summary of Contents for 40-9132
Page 2: ...2 ...


