9
EN
GL
IS
H
3.2 Chain tension
Always pull the plug out of the wall socket before servicing and adjusting the product.
Wear protective gloves.
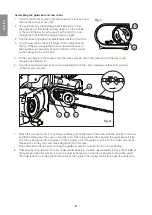
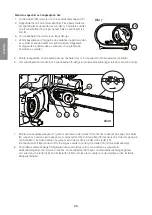
Adjusting the chain tension
1. First check the chain tension: The saw chain should be able to be lifted approximately 5 mm in the middle of
the guide bar when the tension is correct.
2. Adjust it if necessary: Undo the black locking knob (18) a little, adjust the chain tension by turning the outer
knob (19).
3. Tighten the locking knob (18) to keep the set tension. Always check that the chain is sitting properly on
the sprocket and in the guide track all the way around the bar before tightening the locking knob.
3.3 Topping up the chain oil
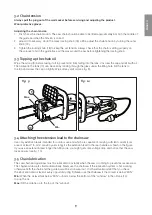
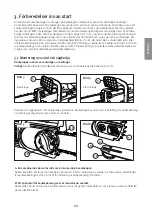
Wipe the oil cap (9) before taking it off to prevent dirt from falling into the tank. Unscrew the cap and refill with oil.
The oil level in the tank (10) can be seen by looking through the glass under the filling hole. Fill the tank to
the top and screw the cap on tightly. Wipe off any spilt oil. (see fig. 9).
3.4 Attaching the extension lead to the chainsaw
Use only extension leads intended for outdoor use and which are capable of carrying sufficient current (core
area of at least 1.5 mm², max 80 yards long), fix the extension lead to the rear handle as shown in the figure.
If you use an extension lead longer than 30 yards, you might get some voltage drop and notice that the saw
loses power. (see fig. 10).
3.5 Chain lubrication
The saw chain and guide bar must be lubricated constantly when the saw is running to prevent excessive wear.
The chainsaw lubricates itself automatically. Never use the chainsaw if the lubrication system is not working,
otherwise both the chain and the guide bar will be soon wear out. It is therefore important that you check
the lubrication and oil level at every oppurtunity. (Fig. 9) Never use the chainsaw if the oil level is below “MIN”.
Min:
When the oil level falls below “MIN” or 5 mm below the bottom of the “window” in the oil tank (10),
top up the oil.
Max:
Fill the oil tank up to the top of the “window”.
9
10
Max.
Min.
Fig. 9
Fig. 10
Summary of Contents for YT4755
Page 83: ...83...


