7
EN
GL
IS
H
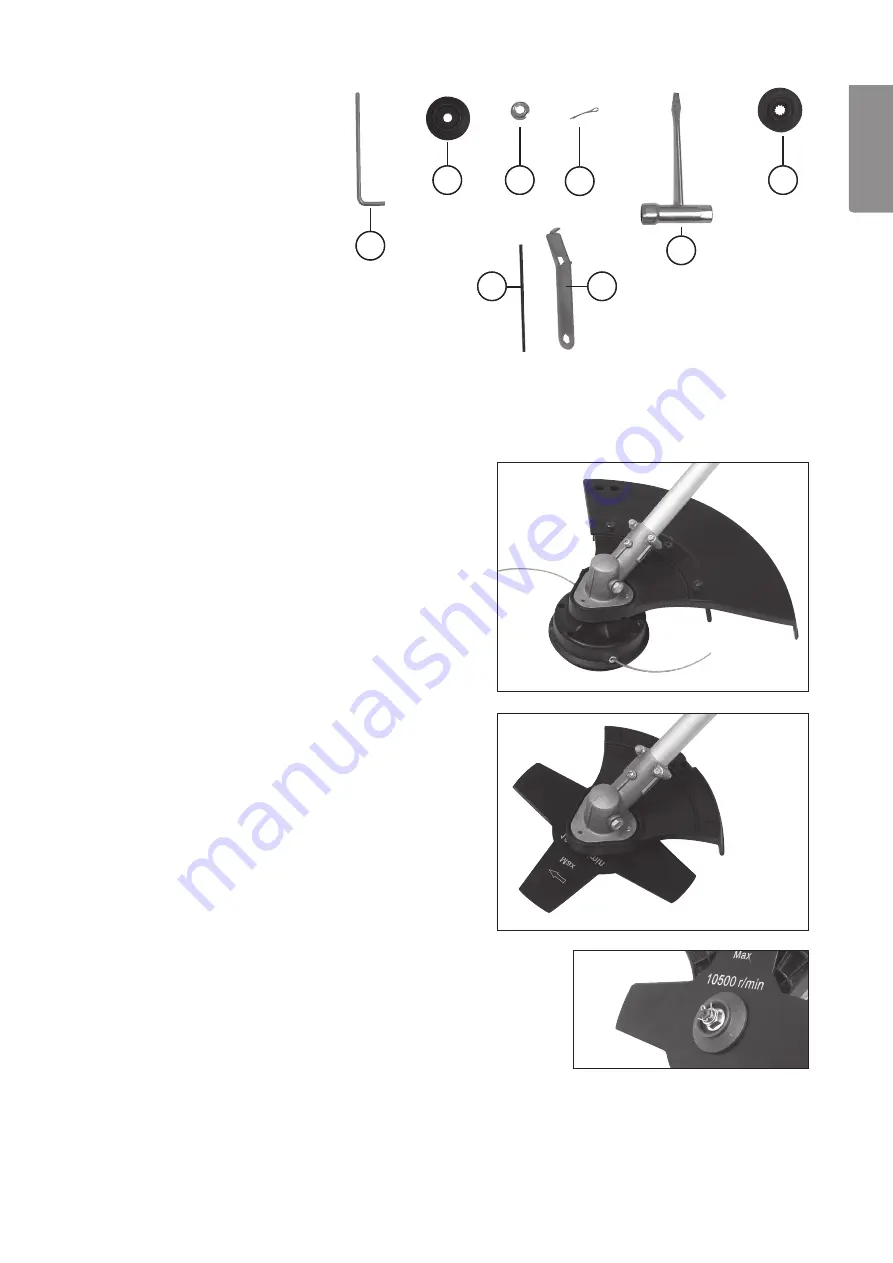
Accessories
18. Allen key
19. Outer flange washer
20. Nut
21. Cotter pin
22. Spark plug wrench
23. Inner flange washer
24. Drive shaft locking tool
25. Trimmer head spanner
5.4 Attaching the blade/trimmer head
Caution!
The brush cutter/grass trimmer must only be used with a nylon trimmer line or a four–bladed brush
cutter blade. No other types of cutting attachments may be used.
5.5 Attaching the trimmer head
1. Push the inner flange washer onto the drive shaft
with the flat side facing outwards. Lock the drive
shaft by poking the locking tool (24) through
the hole in the blade guard (attached under
the gearbox) and the hole in the drive shaft.
2. Screw the trimmer head on anticlockwise and
tighten it.
3. Make sure that both the blade guard (inner) and
trimmer guard (outer with line cutter) are attached.
5.6 Attaching the brush cutter blade
1. Push the inner flange washer onto the drive shaft
with the flat side facing outwards. Lock the drive
shaft by poking the locking tool (24) through
the hole in the blade guard (attached under
the gearbox) and the hole in the drive shaft.
2. Fit the blade onto the drive shaft so that the hole
in the centre of the blade locates on the protruding
inner flange washer.
3. Hold the blade in place and fit the outer flange
washer (with the flat side facing the blade).
4. Tighten the nut on the drive shaft using
the included spanner.
Note:
The nut has a left-hand thread).
5. Pass the split pin through the hole in the drive shaft
and open the ends to lock the nut.
6. Make sure that the blade is centred and screwed
on tightly.
7. Remove the outer trimmer guard (which the line
cutter is attached to). Remember to reattach
the trimmer guard if you change back to using
the trimmer head.
Caution
! It is very important that the brush blade
is centred on the inner flange washer; otherwise
the blade will vibrate and damage the product and
might even cause an injury.
10
18
10
23
10
21
10
20
10
19
10
22
10
24
10
25


