background image


IH2500E-A-WM


5   


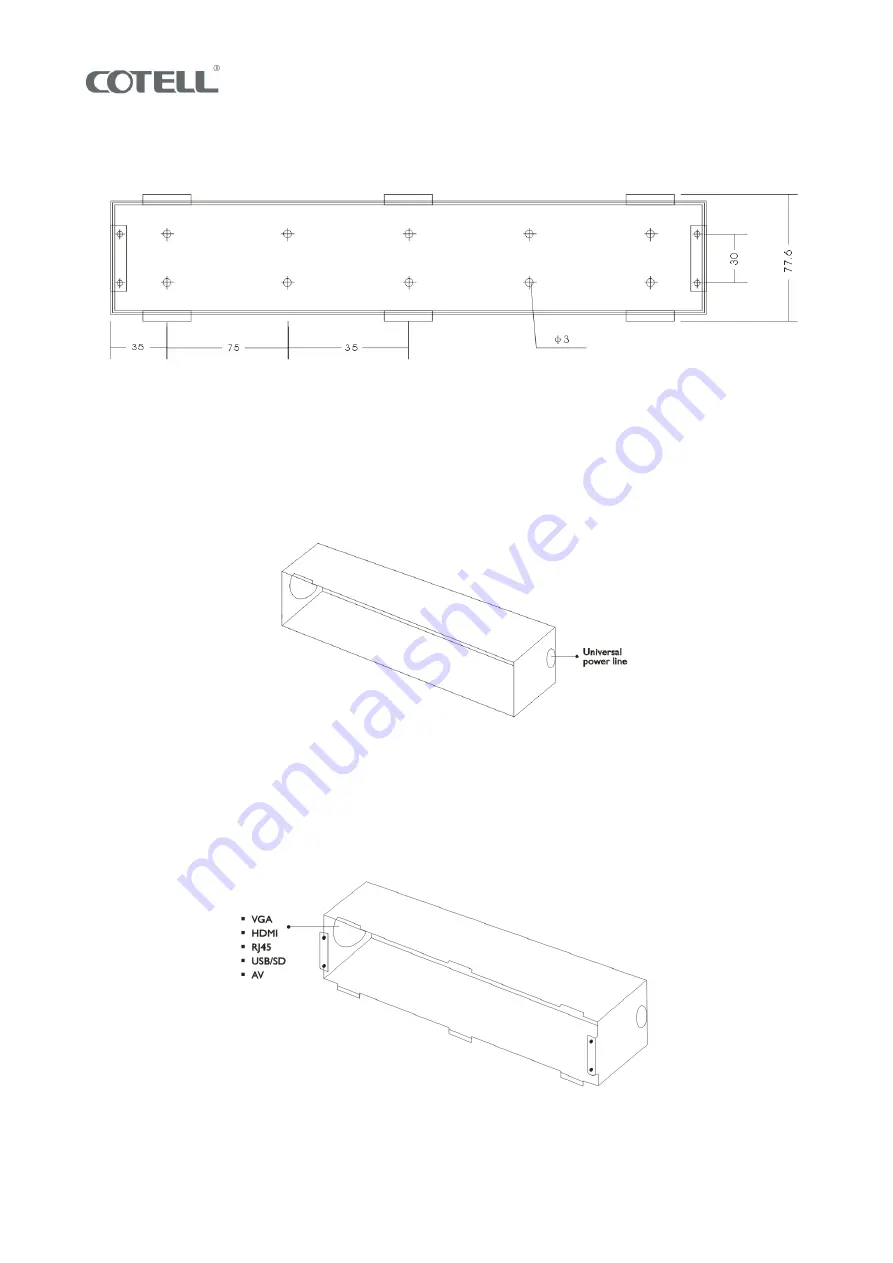
1. Fasten the bottom of the junction box to the wall 


2.

 Place the universal power cord through the junction box


3. Insert all the cables through the Junction box and ensure that they are securely fastened. 

Connect the other end of the cables to the relevant connections (Power, Internet & TV outlets) 


Summary of Contents for IH2500E

Page 1: ...IH2500E A WM 1 Installation Guide IH2500E Wall Mount...

Page 2: ...cable HDMI Cable User guide Screws AV Cable Bracket Faceplate IH2500E M WM FEATURES Wall mount Ergonomic design with stylish outlook High quality casing Customizable logo Dual universal power sockets...

Page 3: ...Video Audio Video input 4 S Video S Video input 5 VGA Audio VGA Audio input 6 RJ45 Internet connection 7 Universal Power Socket Universal power supply 110VAV or 220VAC 8 5V USB charger 5V charger 9 Un...

Page 4: ...IH2500E A WM 4 BRACKET DIAGRAM in mm INSTALLATION PROCEDURE Remove the bracket Create depression in the wall according to the size of the junction box in mm...

Page 5: ...x to the wall 2 Place the universal power cord through the junction box 3 Insert all the cables through the Junction box and ensure that they are securely fastened Connect the other end of the cables...

Page 6: ...he upper faceplate 5 Test all function to ensure they are workable OPERATION General 1 Turn the TV to Appropriate HDMI channel using the TV remote control 2 Plug in the device to any of the penal inpu...

Page 7: ...e HDMI2 input via the TV remote control However some Hospitality TV models now have the capacity to automatically detect when a live AV feed is connected to a port on the TV and subsequently these mod...

Page 8: ...REPAIR WORK IS REQUIRED OPENING OR REMOVING COVERS MAY EXPOSE YOU TO DANGEROUS VOLTAGES OR OTHER RISKS INCORRECT REASSEMBLE CAN CAUSE ELECTRIC SHOCK WHEN THE APPLIANCE IS SUBSEQUENTLY USED 6 UNPLUG TH...

Page 9: ...nt connectivity panel 4 Any damage resulting from improper connection of the Infotainment connectivity panel to other equipment 5 A Infotainment connectivity panel used in a harsh or corrosive environ...

Reviews: