background image

6

SA

LV

O

INSTRUCTION MANUAL

GB

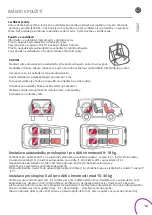
Installation of Group I for the children weight between 9-18 kg

Pull to unlock (

1.1

) and simultaneously pull and release the connector block (

1.2

). Rotate the connectors 

into position (

1.3

). Place the baby car seat in the car, (

1.4

) place the child in the seat (

1.5

). 

An unoccupied should still be  fastened with 3-point belt. Make sure luggage or other objects are properly

 secured.

Press the button to adjust the front impact shield according to your child size (

1.6

). Lock the belt with the 

audible sound „click” (

1.7

)

Installation of Group II-III for the children weight between 15-36 kg

Place the belt through the shoulder belt guide (

2.1

) place the belt through the lap belt guide. Place the child

 in the seat (2.2), lock the belt in the buckle with the audible sound „click”  (

2.3

).

Make sure the child sits in the safest position. Make sure the belt is not twisted. The lap belt should be worn over 

the hips. Adjust the baby seat to the correct height by pushing the head-rest adjusting button and moving the 

headrest (

3.1

). Check the correct position:

Head and backrest too high (

3.2

), head and backrest too low (

3.3

), head and backrest are at the correct height (3.4).

Correct belt routing

Make sure the belt is positioned in the green zone (

4.1

). Make sure the belt runs through both the shoulder 

belt guide and the lap belt guide (

4.2

). 

Sleeping position

Pull to unlock (

5.1

) and simultaneously pull and release the sleeping position block (

5.2

).

Normal position (

5.3

), sleeping position (

5.4)

.

Removing the baby seat from the car

Remove the belt from the belt guides (

6.1

), remove the seat (

6.2

).

Removing the cover

The cover is a safety feature. Never use a baby seat without it.

Pull the bottom part of the cover. Release it from the velcro (7.1). 2. Pull the top partof the cover.

 Start at where the arrow is located (7.2). 3. Take off the cover competely, then releasethe elastic band from the 

fixed button (7.3). 4. Release the elastic bands (7.4). Start at the top (7.5).

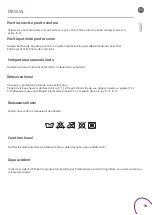
Refitting the cover

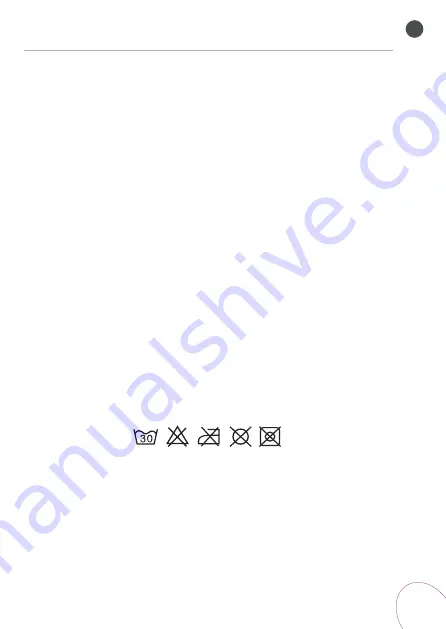
Refit the cover, using the previous instructions in reversed order. The cover of the baby seat should be 

washed in accordance with the instructions 

Cleaning the baby seat

Do not use any aggresive cleaning products; these may harm the construction material of the baby seat. 

Clean by hand with water and mild soap.

After an accdident

After an accident, the baby seat and your car seats belts should be replaced. Although  they may look 

undamaged, if you were to have another accident , the baby seat and your car seat belts may not be able 

to protect your child as well as they should.

Summary of Contents for SALVO

Page 1: ...SALVO Manual RO RO...

Page 2: ......

Page 3: ...Manual RO 4 7 10 13 16 19...

Page 4: ...A B C A 1 A 2 B 1 B 2 B 3 C 1 C 2 C 3 C 4 C 5...

Page 5: ...1 1 1 2 1 3 1 4 1 5 1 6...

Page 6: ...1 7 2 1 2 2 2 3 3 1 3 2...

Page 7: ...3 3 3 4 4 1 4 2 5 1 5 2...

Page 8: ...5 3 5 4 6 1 6 2 7 1 7 2...

Page 9: ...7 3 7 4 7 5...

Page 10: ...lik zgodnie z kierunkiem jazdy NIGDY nie u ywajcie Pa stwo tego fotelika bez oparcia chyba e jest u ywany w pozycji siedz cej z wykorzystaniem zag wka w samochodzie NIGDY nie u ywajcie Pa stwo tego fo...

Page 11: ...ni swojej roli w a ciwie Certyfikat jako ci Fotelik samochodowy zosta zaprojektowany przetestowany i certyfikowany wg wymog w Normy Europejskiej dla sprz tu ochronnego dla dzieci ECE R44 04 Znak test...

Page 12: ...a ciwej pozycji 3 4 Monta pas w Upewnij si e pas umiejscowiony jest w zielonej strefie 4 1 Upewnij si e pas przebiega przez prowadnice pasa piersiowego i pasa biodrowego 4 2 Pozycja do spania Poci gn...

Page 13: ...at as a backless baby car seat unless proper vehicle belt placement can be achieved do not use this baby car seat as a backless baby car seat unless it is used in a seating position with a vehicle hea...

Page 14: ...o perform as intended Certification The child safety seat has been designed tested and certified to the requirements of the European Standard for Child Safety Equipment ECE R44 04 The seal of approval...

Page 15: ...orrect belt routing Make sure the belt is positioned in the green zone 4 1 Make sure the belt runs through both the shoulder belt guide and the lap belt guide 4 2 Sleeping position Pull to unlock 5 1...

Page 16: ...7 SALVO SALVO RU a A 1 I A 2 B 1 B 2 B 3 C 1 C 2 C 3 O a a C 4 C 5 9 36 b y 9 o 6...

Page 17: ...8 SALVO RU NHTSA 5 o o o o o o o ECE R44 04 2 3 2 ECE R 16 3 12...

Page 18: ...9 SALVO RU I 9 18 1 1 1 2 1 3 1 4 1 5 o 3 1 6 1 7 II III 15 36 2 1 2 2 2 3 3 1 3 2 3 3 3 4 4 1 4 2 5 1 5 2 5 3 5 4 6 1 6 2 7 1 7 2 7 3 7 4 7 5 SALVO...

Page 19: ...tung Verwenden Sie diesen Sitz NICHT als den Sitz ohne Lehne bis Sie ihn in der Sitzposition mit der Kopfst tze in dem Wagen verwenden Verwenden Sie diesen Sitz NICHT als den Sitz ohne Lehne bis Sie d...

Page 20: ...e gem Anforderungen der Europ ischen Norm f r R ckhaltesysteme ECE R 44 04 entwickelt gepr ft und zugelassen Das Pr fzeichen E in einem Kreis und die Zulassungsnummer befinden sich auf dem Zulassungse...

Page 21: ...htige Lage der Gurte Sichern Sie sich dass der Gurt sich in dem gr nen Bereich befindet 4 1 Sichern Sie sich dass der Gurt durch den Diagonalgurt F hrung und Beckengurt F hrung eingef hrt ist 4 2 Schl...

Page 22: ...j m prvkem ochrany pro cestuj c ve vozidle je samostatn vozidlo D t nebude dostate n chr n no v po kozen m vozidle Spr vn nainstalov n autoseda ka zv ance na p e it ve v t in p pad Ujist te se e v ic...

Page 23: ...zadem je zak z no N kter vozidla nemaj mo nost instalace t to autoseda ky Pod vejte se na obr zky n e IInstalace autoseda ky pro skupinu I pro d ti s hmotnost 9 18 kg Pot hn te pro odemknut 1 1 ia so...

Page 24: ...tn po adavky Nikdy nepou vejte autoseda ku bez potahu 1 Vyt hn te spodn st potahu Rozpojte such zip 7 1 2 Vyt hn te horn st potahu Za n te v m ste ipky 7 2 3 Odstra te potah pln a pak st hn te elastic...

Page 25: ...daca copilul nu este in scaun Nu folositi scaunul cu alte accesorii Nu folositi scaunul mai mult de 6 ani sau daca observati distrugeri Daca masina a suferit un accident sa nu folositi scaunul auto I...

Page 26: ...potrivit pentru utilizarea pe scaune n linie cu direc ia de deplasare Setarea sau partea din spatela direc ia de deplasare este INTERZISE Unele autovehicule nu au capacitatea de a monta scaunul Uit t...

Page 27: ...caunul 6 2 Detasarea husei Husa este o protective nu folositi scaunul fara husa Trageti de la baza husei si desfaceti velcro 7 1 2 Trageti din partea de sus dupa semnele cu sageata 7 2 3 Z Indepartai...

Page 28: ...ego lp data zg oszenia data naprawy opis uszkodzenia piecz tka serwisu 1 2 3 I declare that I am aware of the warranty conditions Sold date Stamp and signature Buyer s Signature lp Report Date Repair...

Page 29: ...53 88 342 Wylatowo T 48 52 315 52 62 KRAK W Opiekun Klienta Kluczowego Artur Ku niar tel kom 48 516 034 432 a kuzniar semma pl Krak w 30 798 ul Christo Botewa 2B T 48 12 261 36 55 fotele samochodowe...

Reviews: