LOADING THE FEEDER
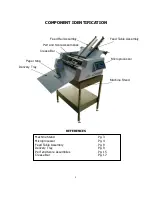
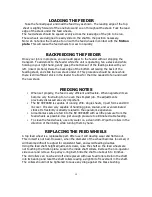
Take the fanned paper and load the feed tray as shown. The leading edge of the top
sheet is slightly forward of the one below and so on throughout the stack. Tuck the lead
edge of the stack under the feed wheels.
The feed wheels should be spaced evenly across the lead edge of the job to be run.
These wheels are designed to easily slide on the shaft to the position necessary.
Note: do not allow the machine to run with the feed wheels in contact with the
friction
plate.
This will cause the feed wheels to wear too quickly.
BACKFEEDING THE FEEDER
Once your job is in progress, you can add paper to the feeder without stopping the
transport. To add stock to the feeder while the unit is operating, fan a stack and while
holding in your right hand, gently grasp the bottom set of the feeding stack with your
left. (insert pic here) Raise the back edge of the bottom set raising the back of the
feeding stack, and slide the new stack under it. This procedure should be done while
there is still sufficient stock in the feeder to allow for the time needed to fan and insert
the new stack.
FEEDING NOTES
•
When set properly, the feed is very efficient and flexible. When neglected it can
become very frustrating to run even the simplest job. The adjustments
previously discussed are very important.
•
The EZ CREASER is capable of running 20lb. single sheets, 4 part forms and 100
lb cover. It is also very capable of handling gloss, coated, and even laminated
stocks. Its flexibility is directly related to the operator’s experience.
•
All carbonless sets are fed into the EZ CREASER with as little pressure from the
feed wheels as possible. Use just enough pressure to eliminate double feeding.
•
To clean the feed wheels, use only water on a clean cloth. Wipe the rollers in the
direction of the ribbing while turning them by hand.
REPLACING THE FEED WHEELS
A top feed wheel is a replaceable part. After use it will develop wear and flatten out.
This in itself is not bad. However, when the diameter of the wheel becomes too small, it
will become difficult to adjust for consistent feed, and avoid feeding doubles.
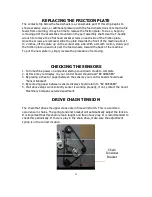
Using the feed shaft height adjustment screws, raise the shaft so the feed wheels are
not touching the friction plate. Loosen the inside shaft collars. Remove the non-operator
side cover and remove the pulley o-ring belt. Slide the shaft out about 6 to 8 inches.
The old rollers can now be slid off and replaced with new feed rollers. Return the shaft
into its bearing and reset the shaft collars leaving a slight bit of movement in the shaft.
The collars should not be tightened to cause any drag against the brass bushing.
12

