background image

4


SAFETY PROCEDURES 

BEFORE USE: 

Read through the owner’s manual. Follow instructions CAREFULLY.

NEVER use a wet area. Electric shock could occur.

Use a GROUNDED outlet and a GROUNDED circuit. Do no use ungrounded

equipment on the same circuit.

Always use a dedicated line. DO NOT use with line splitting surge protector.

DURING USE: 

Keep fingers and hands away from score blades,  perf blades, and rubber

rollers.

Keep cords clear of moving parts.

AFTER USE: 

Turn off machine at the side panel, then unplug the main power cord. This

will prevent damage to your machine by power/voltage spikes.

To unplug cords, always grasp the plug body, never pull on cords to

disconnect. Wire fatigue and possible shock could result from improper

disconnect procedures.

BE ALERT! BE CAREFUL! 

CARE AND MAINTENANCE


The PERFMASTER AIR V2 is a precision machine. It is very important to keep it free of 

excessive dust, dirt and foreign matter. We recommend that you keep the machine 

covered

 when not in use.  

BEARINGS/BUSHINGS: The bearings are sealed roller bearings and are designed to 

be self lubricating, however dirt and dust can get into them causing clogging and dirt 

build up. It is recommended to oil them daily under heavy use or monthly under light 

use. The Bushings are Bronze and do require lubrication more frequently.  Oil these 

once a week under heavy use. 

RUBBER ROLLERS: These tend to harden when exposed, and in use, use “water to 

clean them before and after each use. This will increase the life and require less 

replacement. “Do not use Blanket Wash or Other Cleaners.” 

REMOVEABLE SCREWS: When these show signs of wear or stripping, replace as soon 

as possible. If these strip or hollow out they can be costly to remove. If you do keep 

your Perfmaster Air V2 clean and in top condition, it will give you years of service. 

Summary of Contents for Perfmaster Air V3

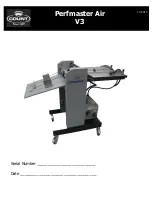
Page 1: ...Serial Number ___________________________ Date ___________________________________ 12 2015 Perfmaster Air V3...

Page 2: ...8 PUMP CONTROLS 9 PULSED FEED CONTROLS 9 FEED TABLE Component Identification 10 Adjusting Feed Rails 11 Micro Skew Adjustment 12 Setting the Automatic Feeder 12 Height Adjustment Caliper 12 Loading th...

Page 3: ...11 Sheet Pulsed Stream Feet per Sec Perf Mode variable 23000 sph 32000 sph SPECIFICATIONS Net Weight PERFMASTER AIR V2 350 lbs Overall Dimensions 32 Lx27 Wx26 D Boxed Dimensions 48 Lx48 Wx52 H Min She...

Page 4: ...ER AIR V2 is a precision machine It is very important to keep it free of excessive dust dirt and foreign matter We recommend that you keep the machine covered when not in use BEARINGS BUSHINGS The bea...

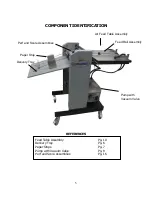
Page 5: ...Air Feed Table Assembly Delivery Tray Pump with Vacuum Valve Perf and Score Assemblies Paper Stop Feed Table Assembly Pg 10 Delivery Tray Pg 6 Paper Stops Pg 7 Pump with Vacuum Valve Pg 9 Perf and Sco...

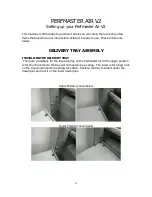
Page 6: ...low DELIVERY TRAY ASSEMBLY INSTALLING THE DELIVERY TRAY There are 2 positions for the receiving tray on the Perfmaster Air V2 the upper position is for short runs where the tray will not need to be as...

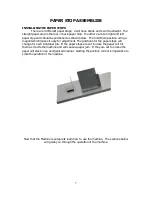
Page 7: ...et which makes it easy for adjustment The positions for the paper stops will change for each individual job If the paper stops are set to close the paper will hit them as it exits the machine and will...

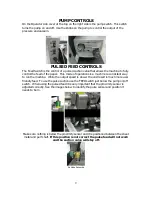
Page 8: ...the bottom on the right side is the main power switch This is the on and off power for the machine Also there is a 3A fuse SPEED CONTROL Speed control is done with a knob on the top of operator side...

Page 9: ...stent way to run the machine While the output speed is slower the end result is much more user friendly feed To use the pulse suction use the FEED switch just below the pump on off switch When using t...

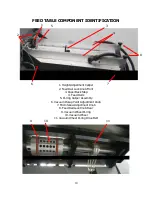
Page 10: ...ed Rail Lock Knob Front 3 Paper Back Stop 4 Feed Rails 5 O ring Caliper Assembly 6 Vacuum Pickup Point Adjustment Knob 7 Micro Skew Adjustment Knob 8 Feed Rail Lock Knob Rear 9 Vacuum Wheel O ring 10...

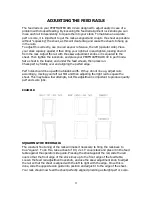
Page 11: ...n Check perf by folding over and aligning the perfed edge Perf holes should line up within a blade s width If they do not line up adjust rails accordingly moving your left rail first and then adjustin...

Page 12: ...tock If during the feeding you begin to get doubles lower the feed wheels just enough to stop the double sheeting The paper between the friction plate and the auto feed wheel must move freely and shou...

Page 13: ...r and back stop Do not pinch the paper as it will affect the feeding consistency FEEDING NOTES When set properly the feed is very efficient and flexible When neglected it can become very frustrating t...

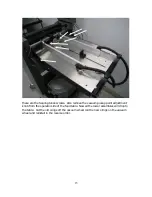
Page 14: ...he oring pulley and over teh machein drive pulley To replace the vacuum wheel drive orings you must remove the table To remove the feed table you must take off all of the pressure adjustment brackets...

Page 15: ...the vacuum pickup point adjustment knob from the operator side of the feed table Now all the lower assemblies will drop to the table Cut the old orings off the vacuum wheel roll the new orings on the...

Page 16: ...iption H 0215 Screw 10 32x1 2 button head socket H 0250 Screw 10 32x 1 1 2 socket cap H 0270 Screw 1 4 20x1 4 socket set H 0275 Screw 1 4 20x1 4 socket set H 0278 Screw 1 4 20x1 4 socket half dog H 04...

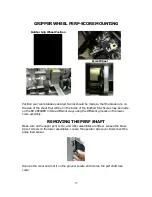
Page 17: ...ASER in three different ways using the different grooves on the lower score assembly REMOVING THE PERF SHAFT Make sure all the upper perf score and roller assemblies are lifted Loosen the brass tip se...

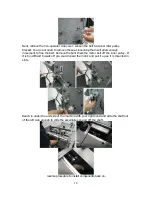
Page 18: ...belt Remove the belt Walk the motor belt off the inner pulley If it is too difficult to walk off you could loosen the motor and pull it up as it is mounted in slots Reach in under the exit side of th...

Page 19: ...eel pressure 2 Align feed rails check for squareness This can be checked by the lead edge of the paper feeding into the machine should line up with the front edge of the feed plate 3 Not enough pressu...

Page 20: ...251 Wedcor Avenue Wabash Indiana 46992 Website www countmachinery com Email Info martinyale com Fax 260 563 4575 M S027959 Rev 1 1 31 2017...

Reviews: