background image

Version 

2.0b 


38


MAINTENANCE REQUIREMENTS 


GENERAL REQUIREMENTS 

The Harvester Model HR-01 has minimal maintenance requirements; however, failure to perform cleaning or 
maintenance items will lead to degraded performance and potential safety hazards for both the home and its 
occupants.  The Harvester stove should not be operated routinely without thorough monthly cleaning (or more 
often) depending on frequency of use. 
 
The three most common maintenance chores will be: 
 

a)


Refilling the hopper with fuel as needed. 

b)


Cleaning the firebox and glass as required, satisfying the customer. 

c)


Emptying the ash bin to ensure ash buildup does not interfere with operation. 

 
Country Flame strives to use high quality low maintenance components in the Harvester. 


STOVE DOOR INSTALLATION 

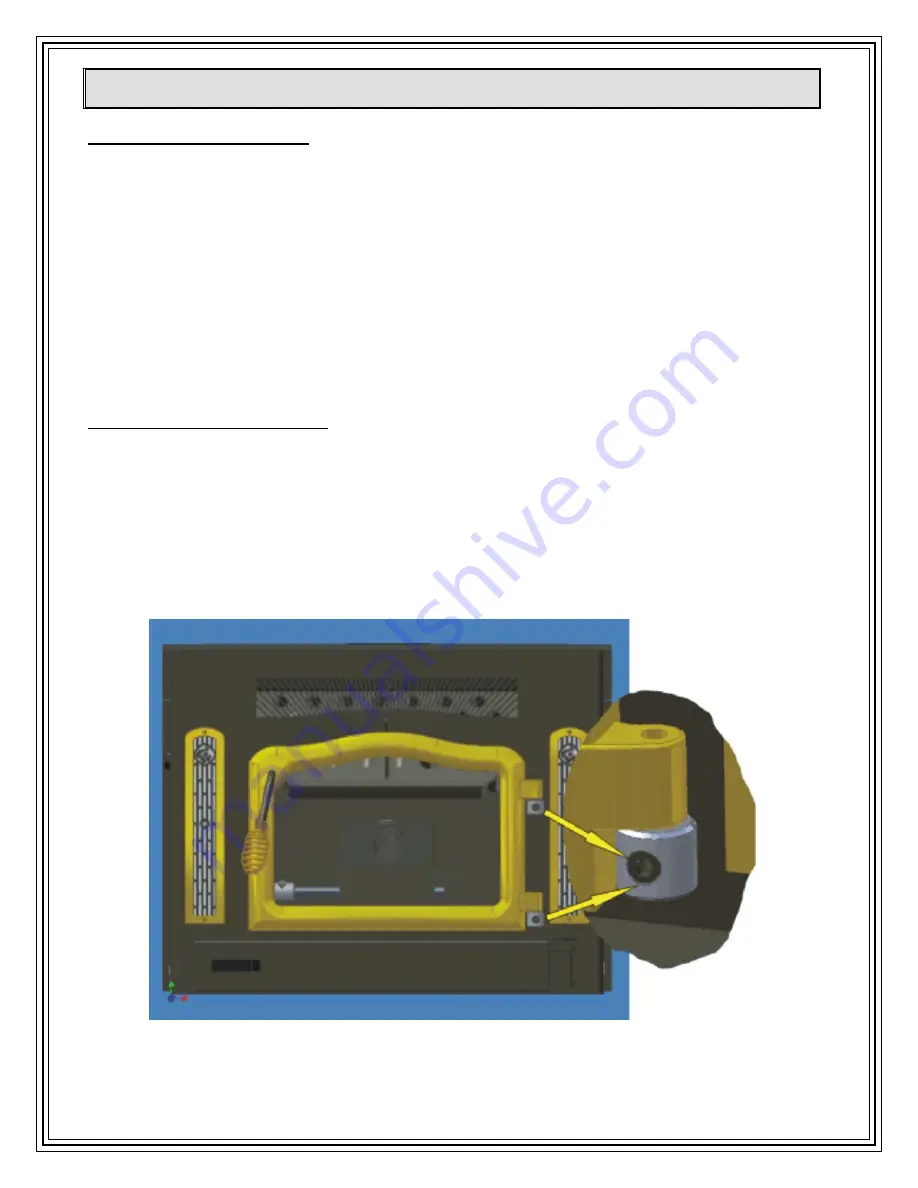
The Harvester door has been mounted and checked for proper fit at the factory.  If the door is removed for any 
reason, care must be taken in reinstalling the door to ensure proper alignment and fit.  Setting the door is quite 
simple.  Ensure the door is in the fully open position.  Once done, align the female portion of the door hinge 
with the male portion of the stove hinge.  Gently lower the door hinges over the stove hinge pin.  Once the 
door hinges have been set, the door can be closed to check for proper fit.  The Harvester door installation 
should now be complete.   To remove the door, simply lift up on the door from the stove hinges.  Store the 
door in a secure place.  If the door is left sitting, ensure that the door cannot fall and injure someone or 
damage the door or glass.  The Harvester door has been adjusted at the factory.  If the door fit is not 
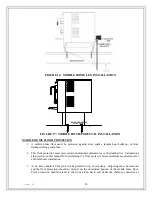
satisfactory, the homeowner can adjust the door using the hinge screws, refer to FIGURE 19. 


FIGURE 19:  DOOR ALIGNMENT POINTS


Summary of Contents for HR-01

Page 1: ...NTRY FLAME COUNTRY FLAME TECHNOLOGIES INSTALLATION OPERATION AND MAINTENANCE MANUAL WARNING If the directions in this manual are not followed exactly a fire may result causing property damage personal injury or loss of life FOR YOUR SAFETY Do not store or use gasoline or other flammables vapor or liquids in or around the vicinity of this appliance Installation and repair must be performed by a qua...

Page 2: ...ion or maintenance of this product WARNING After operation always allow the Harvester stove to completely cool before performing any maintenance operations WARNING The HR 01 stove requires reliable electric energy to properly operate If electrical power is not available DO NOT operate a Harvester stove with only natural draft WARNING Only a certified professional should install the HR 01 stove and...

Page 3: ... appliances compete for fresh air in the home Consult with a professional to ensure positive air flow is provided to the stove during operation WARNING The Harvester s exhaust system works with a negative combustion chamber pressure and a low positive chimney pressure It is very important that the stove s exhaust and chimney system be airtight and properly installed The chimney joints should be se...

Page 4: ... RETAIN this MANUAL for future reference as needed and ensure that the model and serial number of the Harvester is written down for use in the future should maintenance be required EPA STANDARDS The Country Flame Harvester meets rigorous emission standards All Country Flame Harvester Model HR 01 stoves conform to United States Environmental Protection Agency standards LISTING TESTING AGENCY The Ha...

Page 5: ...Version 2 0b 5 CERTIFICATION SAFETY LABEL sample ...

Page 6: ...RTUP 15 PRIMING 15 FIRST FIRE 15 ASH REMOVAL 16 CONTROL BOARD 16 STOVE ELECTRICAL DIAGRAM 21 STOVE SPECIFICATIONS 22 ELECTRICAL REQUIREMENTS 22 PLATED Gold or Nickel DOOR CARE 22 OPTIONAL FEATURES 22 OPTIONAL THERMOSTAT OPERATION 22 HARVESTER IS COLD 22 HARVESTER IS HOT 23 CHANGE HEAT LEVEL thermostat active 23 CHANGE HEAT LEVEL thermostat inactive 23 COMBUSTION FRESH AIR CONTROL 23 INSTALLATION 2...

Page 7: ...CATIONS 40 GASKET REPLACEMENT 40 APPENDIX A TROUBLESHOOTING GUIDE 41 APPENDIX A TROUBLESHOOTING GUIDE CONT D 42 APPENDIX B MAINTENANCE GUIDE 43 APPENDIX B MAINTENANCE GUIDE CONT D 44 APPENDIX B MAINTENANCE GUIDE CONT D 45 APPENDIX C TECHNICAL SPECIFICATIONS 46 APPENDIX D HARVESTER THEORY OF OPERATION 47 STARTUP PHASE 47 BURN PHASE 47 APPENDIX D THEORY OF OPERATION cont d 48 COOL DOWN PHASE 48 FAUL...

Page 8: ...re on both sustaining the volume and the quality of fuel raw materials needed to meet the needs of the fuel market Transportation costs associated with moving the raw materials to the pellet mill significantly impact the local and regional availability of pellet fuel Research has proved that there are many agricultural based crops and crop byproducts that can be utilized to fuel biomass heating st...

Page 9: ...he instructions and specifications included in the operating and maintenance instructions 2 To conditions resulting from failure to provide reasonable and necessary maintenance for the Harvester Model HR 01 in accordance with the operating and maintenance instructions 3 To conditions resulting from the alteration or modification of any Harvester Model HR 01 by anyone other than an authorized Count...

Page 10: ... involved Such costs or expenses are NOT covered by this warranty and Country Flame is not liable for any of them 5 Limits on Damages In no event shall Country Flame be liable for damage to property lost profit injury to goodwill or any other special incidental or consequential damages resulting from any defective Harvester Model HR 01product or any breach of the above express warranties Some stat...

Page 11: ...aler s Name City State Zip Date of Purchase Model No Serial No The express warranties made by Country Flame Technologies do not apply unless this warranty card is received by Country Flame Technologies from the original retail purchaser no later than thirty 30 days subsequent to the date the Country Flame product was originally purchased Signature Date Place Stamp Here ...

Page 12: ...g and understanding this manual Failure to adhere to all safety notes and instructions contained herein can impact homeowner insurance void warranty and create hazardous situations leading to smoke damage fire or even death The Model HR 01 was designed as a freestanding model stove The stove has optional legs or a pedestal base The legs come in a variety of finishes Contact Country Flame or one of...

Page 13: ...ve s operation will be erratic at best Is power quality power reliability or routine winter storm conditions a cause of power problems in a specific locale If it is the homeowner will need to provide backup power to ensure stable operation of the Harvester Fortunately there are simple and reliable power backup solutions readily available Today a homeowner can choose from a variety of cost effectiv...

Page 14: ... motor Auger motor 110 degree room air heat sensor 250 degree over temp heat sensor 160 CFM room air blower 1 outside air Vacuum tube orange 3 Exhaust tube Wiring harness Stir rod motor Potentiometer 22 tooth sprocket 11 tooth sprocket Stir rod chain Vacuum switch Mounted on inside of back panel above outside air tube 120V receptacle 6 ampere fuse Thermostat plug ...

Page 15: ...m should be shut off Once priming is completed the next step is to prepare the Harvester for burning corn FIRST FIRE Country Flame recommends using wood pellets to start the Harvester Corn Stove Pellets should be added in layers with igniter gel or igniter bricks sandwiched between the pellets inside the burn pot It is important that the firebox has a hot pellet fire going before corn fuel is fed ...

Page 16: ...f the cover This allows the ash pan cover to be lowered to the floor allowing easing removal of the ash pan itself Always remove ashes after they have been allowed to cool properly Hot ash is dangerous to both surrounding areas and occupants and can cause fires or severe burns Wait until the fire has been out for several hours before removing the ash pan After the ash has been allowed to cool remo...

Page 17: ...Fuel Control The fuel control is a signal provided from the Control Board to the Auger Feed Motor The Control Board controls the amount of time that the Auger Feed Motor is on and thereby controls the amount of fuel fed to the fire pot Room Air Control The room air control is a signal provided from the Control Board to the Room Air Fan The Control Board controls the phase angle and thereby the amo...

Page 18: ...d in FIGURE 6 Intelli Choice Country Flame Logo AC Power is present when logo is lit Igniter Symbol Igniter Light Red when Igniter is on Auger Feed Symbol Auger Feed Light Green when Auger is on Heat Up Switch High Heat Setting Red When Lit Medium Heat Setting Yellow When Lit Low Heat Setting Yellow When Lit Heat Down Switch ON OFF Switch DC Power on Light Red System Off Green System On Yellow Sys...

Page 19: ...e used to turn the stir rod of the Harvester model In all other pellet stoves these switches only function as heat up and down switches DC POWER LIGHT This is a 3 color light when AC power is applied A red light indicates that the Control Board has DC Power available but the system is off A green light indicates that the System is on A yellow light indicates that the combustion air should be clean...

Page 20: ...itional information about the major components on the component side of the control board AC Transformer Converts 120VAC To 9 6VAC for Board operation 7 Segment Display Used for Providing Trouble Codes AC Motor Igniter Control Control Board Serial Number Personality Module Socket Molex Connector used to interface stove wiring harness FIGURE 7 CONTROL BOARD COMPONENT SIDE ...

Page 21: ...DIAGRAM FIGURE 8 provides the Harvester electrical schematic of the components and sensors that are either operated or monitored by the Country Flame control board Please refer to this diagram when necessary FIGURE 8 ELECTRICAL DIAGRAM ...

Page 22: ... can be permanently scratched and the finish ruined A damaged door can be returned to Country Flame for refinishing but repair is expensive Proper care of the Harvester plated door and other plated trim will ensure these parts will survive a lifetime of use A painted Harvester door requires no specific care OPTIONAL FEATURES There is an ever growing list of options for Country Flame stove products...

Page 23: ...ts the stove to Heat 1 If the operator changes the heat level to 1 while the thermostat is calling for heat it will become the new Thermostat Heat Level But because this is the same setting as when the thermostat stops calling for heat the operator will get no indication that the thermostat is in control of the stove CHANGE HEAT LEVEL thermostat inactive If the operator makes a change to the heat ...

Page 24: ...recommends the use of a Hearth Industry Professional that is certified to install pellet burning products Check with the local dealer or contact Country Flame if there is any question about the installation the installer or the product being installed Maintain the clearances shown in FIGURE 10 Follow the chimney manufacturer s installation instructions when installing the chimney system Inevitably...

Page 25: ...g vent system installation e Never use a vent system with an inside diameter that is smaller than the Harvester flue outlet f When vent systems pass through a ceiling use a Firestop Support assembly g Use 1 4 sheet metal screws to secure locking vent system joints along with RTV and tape h Never penetrate the inner lining of a vent system with any screws i Never install single wall pipe to a Harve...

Page 26: ...when measured from the floor to the alcove ceiling In an alcove installation side clearances of fourteen inches from the stove to combustibles and rear clearances of six inches from the stove to combustibles must be maintained as a minimum Alcove clearances require the use of listed UL 641 Type L or type PL vent systems Contact a certified installer or local building inspector to obtain informatio...

Page 27: ... is greater than the R value tested material defined in STEP 1 then the alternate floor protection is acceptable d EXAMPLE i The tested material was inch thick with a k factor of 0 84 ii The R value of the tested material was R 1 0 84 x 3 4 0 893 iii The proposed alternative floor protector is 4 inch brick material with a C factor of 1 25 over 1 8 inch mineral board with k factor of 29 iv The 4 in...

Page 28: ...hermal conductivity of 1 0 Btu in hr ft2 0 F 4 88 kg cal hr m2 0 C or less b All clearances and thicknesses are minimums larger clearances shall be permitted c Any material used to close up an opening for the connector shall be of noncombustible material The installer should have significant experience and knowledge in pellet vent system variations To maintain your Country Flame Warranty it is imp...

Page 29: ...proper planning can lead to expensive problems Consult with a professional FIGURE 13 FLEXIBLE LINER VENT SYSTEM INSTALLATION FIGURE 13 demonstrates a freestanding connection to an existing masonry fireplace chimney The freestanding connection will require the use of at least one clean out tee located at the back of the Harvester The diameter of the clean out tee pipe and other vent pipe will be de...

Page 30: ...nd approved for use in pellet and corn stoves and low temperature venting systems Type L vents is rated for temperatures up to but not exceeding 5700 F Pellet venting systems feature a complete product line that includes wall thimbles for horizontal through the wall installations support boxes for both flat and cathedral ceiling installations and even decorative wall thimbles and ceiling covers ar...

Page 31: ...de combustion air may be required if 1 The Harvester does not draw steadily smoke rollout occurs fuel burns poorly or back drafts occur whether or not combustion is present 2 Existing fuel fired equipment in the house such as fireplaces or other heating appliances smell do not operate properly suffer smoke rollout when opened or back draft occurs whether or not combustion is present 3 The home is ...

Page 32: ...cturer s chimney products Do not deviate from the vent system manufacturer s installation instructions 4 All mobile home Harvester installations or stove replacements require a permit to be obtained from the local code department and require as a minimum at least a final inspection before operation of the stove is authorized Use only licensed contractors to perform the installation work Further an...

Page 33: ...me exterior wall FIGURE 16 and FIGURE 17 demonstrates both options 3 Install a mesh screen or an approved fresh air cap on the outside of the mobile home combustion air tube This cap will keep foreign material birds or small animals out of the fresh air system Do not use mesh screen from windows as it has too small a hole 4 If operation of the Harvester freestanding stove causes room air starvatio...

Page 34: ...ain minimum requirements as a thermal barrier Calculations are provided in this manual for determining if a floor protector meets minimum requirements for a mobile home installation 3 At no time should a floor protector be placed on top of carpeting Carpeting must be removed and the floor protection should sit directly on the uncarpeted portion of the mobile home floor Floor protection should exte...

Page 35: ...alling a Harvester system into a mobile home 4 A mobile home vent system must serve only one appliance The vent system must extend at least 1 foot above the highest point on the roofline where it passes through the roof The vent system should be at least 2 feet higher than any part of a roof or building within a 10 foot clearance around the chimney The minimum chimney vertical height is 8 feet and...

Page 36: ...E 4 and detailed in FIGURE 18 are for EXAMPLE only Vent systems are affected by local site conditions and local codes Consult a certified professional and insure that any mobile home Harvester vent system installation meets all federal state and local building codes Failure to follow the chimney manufacturer s installation instructions will void Country Flame s product warranty Failure to utilize ...

Page 37: ...Version 2 0b 37 FIGURE 18 MOBILE HOME HARVESTER FREE STANDING VENT INSTALLATION ...

Page 38: ...The Harvester door has been mounted and checked for proper fit at the factory If the door is removed for any reason care must be taken in reinstalling the door to ensure proper alignment and fit Setting the door is quite simple Ensure the door is in the fully open position Once done align the female portion of the door hinge with the male portion of the stove hinge Gently lower the door hinges ove...

Page 39: ...rated continuously on low heat setting the door glass will get dirty quicker than when a medium to high fire is fueling the firebox In order for glass to remain clean a high temperature fire must be maintained in the firebox CAUTION Do not clean hot glass If the door glass does require cleaning use an authorized stove glass cleaner Contact Country Flame or one of its local authorized dealers to ob...

Page 40: ...ts CAUTION Do not attempt to clean hot glass Do not abuse strike slam shut or operate the Harvester stove with any broken glass in the appliance GASKET REPLACEMENT Remove the doors from the unit Place the doors face down on a protective surface to ensure no marring or scratching occurs during gasket replacement To replace the Thermoglass knitted rope and tape gasket first remove all of the old mat...

Page 41: ...ot at the normal rate the auger may need to be cleaned This may be due to fines in the fuel Stove Performance If your stove is not working effectively You may be using the wrong fuel Check that you are using the correct fuel Either 2 Yellow Shelled Corn with a moisture content of 14 or less 12 preferred or Pelletized wood fuel with a maximum moisture content of 8 may be used Your Country Flame Dea...

Page 42: ...r fuel may be damp or you may be using the incorrect fuel Your Corn Pellet Stove Smokes You have used the incorrect starter fluid Only use the approved pellet starter gel Your Country Flame Dealer can advise you on where to find this Your Corn Pellet Stove Smokes Check that the chimney is clean and free of soot and fly ash build up Your stove exhaust system works with a negative combustion chamber...

Page 43: ...for a thorough cleaning Also check the drop tube where the corn drops into the firepot for blockage Thorough Cleaning Remove the ash pan using a glove Turn latching handle and slide the ash pan out of the ash pan drawer Dump the ash pan into a fire safe covered container The firepot may be lifted out first loosen bolt on the agitator shaft hub and slide hub to the side and dump using a glove With ...

Page 44: ...ation which will collect in the exhaust venting system The exhaust venting system should be inspected at least once every year to determine if cleaning is necessary Air Intakes When starting to use the stove at the beginning of the season check to ensure that the fresh air intake is clear and unobstructed Oiling the Room Air and Exhaust Blowers Both the room air exhaust blowers need to be oiled at...

Page 45: ...t Gasket material and cement may be obtained from your dealer Replacing the Glass Remove the door gasket you may need to use pliers and then remove the glass retaining clips and remove glass Replacement glass should be 0 200 5mm thick Overall size of the glass is 16 405mm wide by 11 279mm high cut to an irregular shape to fit the door front Your unit uses KERA LITE or a similar ceramic type high t...

Page 46: ...t on the chimney height Flue Type Type L or PL double wall vent Type L or PL single wall stainless steel liner Air Inlet 1 1 2 Sch 40 Black Iron pipe Auger Type 1 1 8 cup Auger Feed System Controls Electronic Integrated Feed Rate Blower Speed Controls Electrical 120 Volts 3 Amperes and 60 Hz Measurements UNIT BODY HEIGHT 22 75 HEIGHT ON PEDESTAL 33 75 HEIGHT ON LEGS 31 25 UNIT WIDTH REAR 25 5 WIDT...

Page 47: ...llow more time to elapse and then repeat pressing the on off switch until rapid flashing of the igniter light and release Again the control system will switch to number 3 heat setting and begin burning corn if proper minimum temperature of the system has been achieved with the startup fire BURN PHASE Multiple heat lights indicate the control panel burn phase There are four yellow lights and one re...

Page 48: ...ndition 1 requires the system to properly proceed through cool down phase By allowing cool down to occur the control panel will automatically shut off the system In order for system shut off to occur all electronic controls must sense safe system temperatures In the event safe temperatures are not sensed by the system the control panel will continue to operate in the cool down phase until such tim...

Page 49: ...er to enhance routine cleaning or maintenance during the shutdown phase In addition the manual stir control can be utilized to facilitate starting a fire by rotating the stir arm to enhance air flow during the startup phase In order to manually turn the stir arm the up and down red and blue heat arrows must be simultaneously pressed while the control is in only the OFF PHASE or the STARTUP PHASE A...

Page 50: ...Ash content Refers to the non combustible materials in a fuel which reduce the heating value per unit of weight Biomass All forms of organic matter including wood agricultural crops and residues animal dung and human waste Carbon Dioxide A heavy colorless gas that does not support combustion and dissolves in water to form carbonic acid Combustion Combustion refers to the rapid oxidation of fuel ac...

Page 51: ...m The combustion and makeup air fans in addition to everything else within a stove are giant vacuum cleaners sweeping in any dust dirt and vapors that happen by In time the systems air path becomes partially obstructed starving the system for air and causing the fuel air ratio to become rich Excess air ensures that complete combustion can occur at all times regardless of changes in environmental v...

Page 52: ... Turbulence Temperature Time It requires turbulence in the fuel air path to ensure that fuel and air molecules are thoroughly mixed to sustain the burn process In addition it takes a certain amount of temperature defined as Ignition Temperature to sustain the burn if volatile and carbon matter and it takes a certain combustion temperature to ensure volatile and carbon matter is released from the f...

Page 53: ...logs enhance the amount of energy released during the burn cycle because of the uniformity of product the reduced moisture content and the variation in materials used to produce the wood pellet These variations allow the turbulence in the burn system to ensure a better agitation of fuel with air and a more rapid and efficient burn As other biomass fuels are utilized optimum mixes of pellets will e...

Page 54: ...1 PP 352 VACUUM SENSOR SWITCH 1 PP 347 2500 F OVER TEMPERATURE SENSOR 1 PP 12 1100 F EXHAUST ROOM AIR SENSOR 1 25 0052 00 OWNERS MANUAL 1 PP 989 AC RECEPTACLE 1 PP 995 Intelli Choice CONTROL BOARD 1 PP 1029 WIRING HARNESS 1 PP 40 DOOR FRAME ONLY 1 PP 87 NC DOOR ROPE GASKET 1 PP 1192 ASH PAN DOOR HANDLE 1 CB 62 CLEAN OUT PLUGS 2 PP 535 AUGER MOTOR ASSEMBLY 1 PP 27 VACUUM HOSE 1 PP 48 NON ETCHED DOO...

Page 55: ...NT PARTS cont d REPLACEMENT PARTS Part Number Description Number per HARVESTER PP 538G SIDE TRIM GOLD 2 PP 538N SIDE TRIM NICKEL 2 PP 538 SIDE TRIM BLACK 2 PP 53 SIDE GLASS NON ETCHED 2 PP 54 SIDE GLASS ETCHED 2 PP 185 SIDE TRIM CUSTOM 2 ...

Page 56: ...Version 2 0b 56 APPENDIX G LABELS REPLACEMENT LABELS Part Number Description Number per HARVESTER PP 483 CAUTION LABEL 1 PP 484 CAUTION LABEL 1 PP 35 0300 13 ATTENTION LABEL 1 ...

Page 57: ...Version 2 0b 57 APPENDIX G LABELS cont d REPLACEMENT LABELS Part Number Description Number per HARVESTER PP 486 ELECTRICAL LABEL 1 ...

Reviews: