-3-
TOOLS AND MATERIALS NEEDED FOR INSTALLATION
You will need a drill with a 1/8” bit to install sheet metal screws into connector pipe. A 5/16” socket/wrench or screw driver to install ped-
estal trim, room air deflector, and blower assembly described below. A 1/2” socket/wrench to install flue collar. A non-combustible floor
protector as specified in this manual. All chimney and chimney connector components required for your particular chimney installation.
The stove is attached to the shipping pallet by two bolts located under the pedestal trim piece. See the pedestal trim assembly section for
more details.
ASSEMBLY
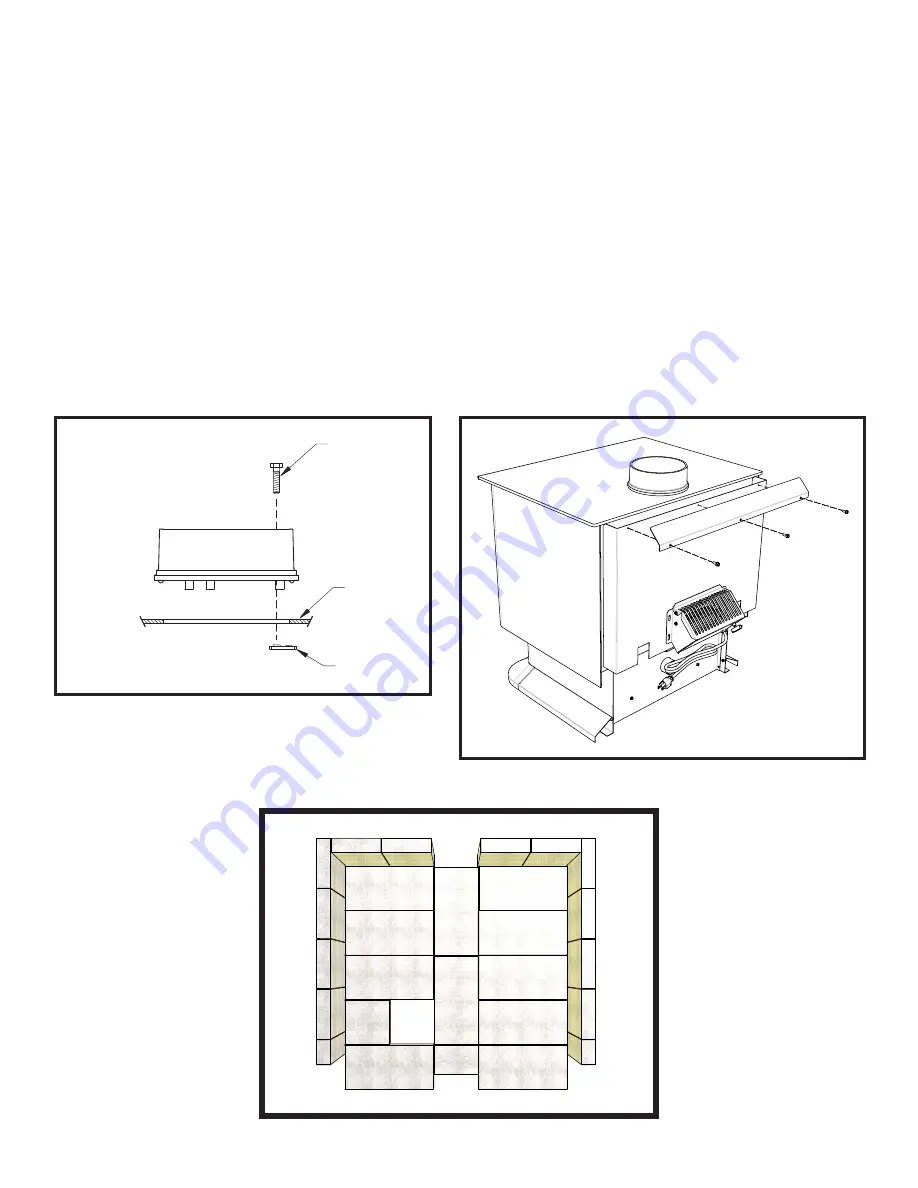
Flue Collar Assembly:
1. Mount the flue collar to the top of the unit as shown using the (3) 5/16-18 x 1-1/2 bolts, (3) washers, and (3) weld
tabs provided in the parts box.
Room Air Deflector Assembly:
1. Locate the Room Air Deflector. Using the three(3) 1/2 Tek Screws provided, mount the deflector to the unit as
shown in the diagram.
Firebrick Configuration:
1. Replace the Firebrick as shown in the illustration below.
Side view of flue collar
mount to heater top
Brick Configuration
HEATER
TOP
WELD
TAB
5/16-18 x 1-1/2
BOLT


