FRANÇAIS
26
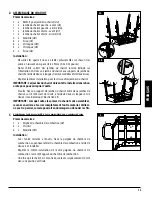
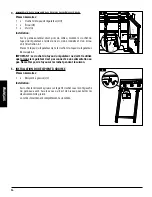
4. MONTAGE DU CROCHET DU TUYAU DU RÉGULATEUR
Pièces nécessaires :
1 x Crochet de tuyau de régulateur
(#11)
1 x Écrou
(#F)
1 x Vis
(#G)
Installation
:
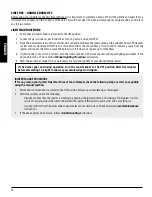
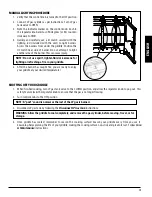
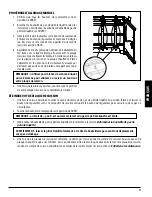
• Sur le panneau latéral droit, près du milieu, montez le crochet du
tuyau du régulateur à l’aide d’une vis, d’une rondelle et d’un écrou.
Voir l’illustration 4-1.
• Placez le tuyau du régulateur dans le crochet du tuyau du régulateur.
Remarque 4-2.
IMPORTANT : Le crochet du tuyau du régulateur ne doit être utilisé
que lorsque le régulateur n’est pas connecté à une alimentation au
gaz. Ne mettez pas de tuyau sur le crochet pendant la cuisson.
5. INSTALLATION DU RÉCIPIENT À GRAISSE
Pièces nécessaires :
1 x Récipient à graisse
(#3)
Installation
:
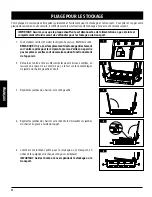
• Accrochez le récipient à graisse sur le petit crochet sous le côté gauche
du panneau avant. Assurez-vous qu’il est de niveau pour éviter les
déversements de graisse.
• L’unité est maintenant complètement assemblée.
Attach the leg support brackets (11) using screws (E) and nuts (F).
Attach the handles (4) from underneath using screws (G), washers (H) and nuts (F).
Further install the rgulator hose hook (5) with a screw (G) and a nut (F).
4
Flip and put the BBQ into standing position as shown below.
Hang the oil drum 8) onto the oil drum hook as shown.
Secure the legs by tightening the pre-installed wing nut.
To attach the regulator to the gas cylinder, it is tightened in an anti-clokcwise
direction.
Read “Setting up the Barbecue” before using your barbecue
2
1
Flip and put the BBQ into standing position as shown below.
Hang the oil drum 8) onto the oil drum hook as shown.
Secure the legs by tightening the pre-installed wing nut.
To attach the regulator to the gas cylinder, it is tightened in an anti-clokcwise
direction.
Read “Setting up the Barbecue” before using your barbecue
5
Attach the handles (4) from underneath using screws (G), washers (E) and nuts (F) to
secure the handles.
Further install the regulator hose hook (5) with a screw (G) and a nut (F).
3
G
11
F

