ENG
LISH
8
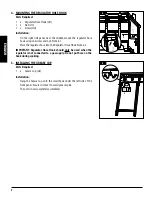
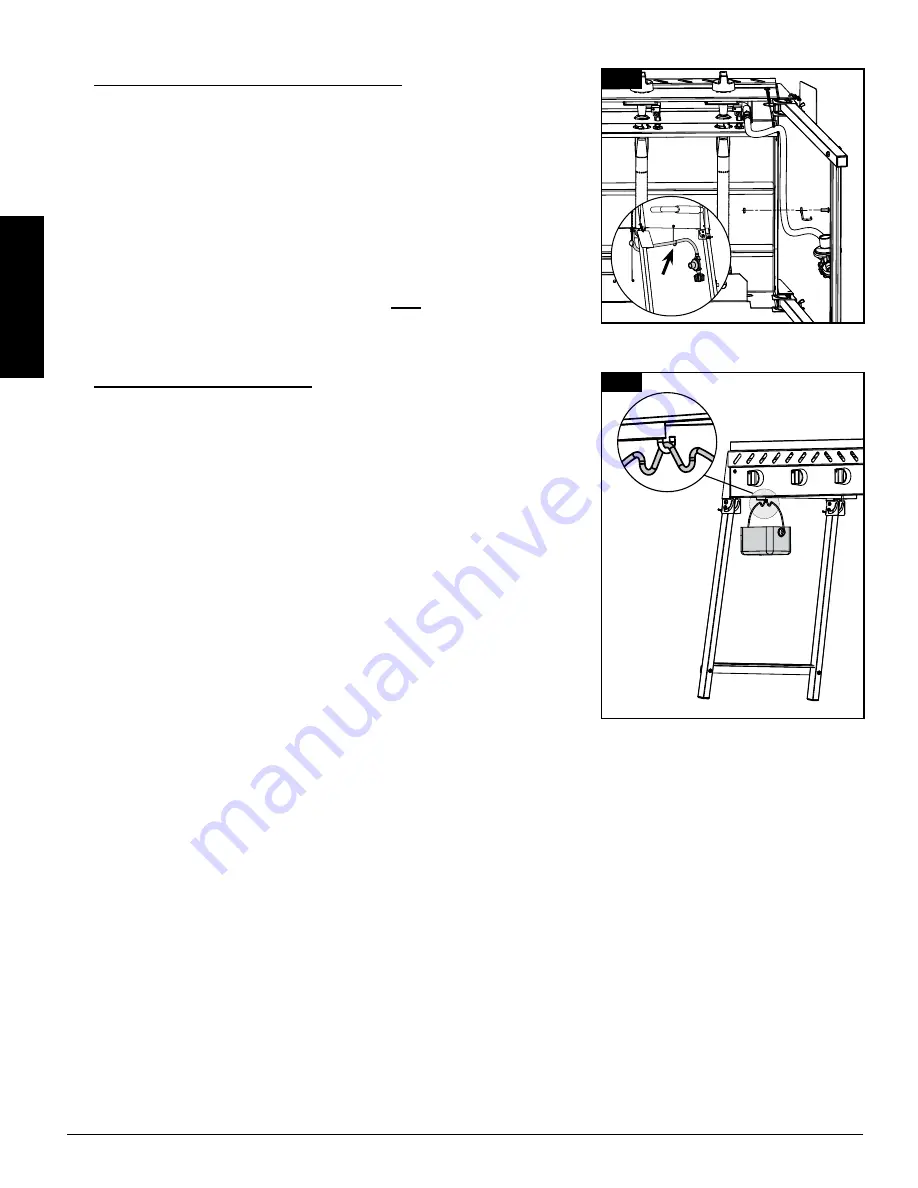
4. MOUNTING THE REGULATOR HOSE HOOK
Parts Required:
1 x Regulator Hose Hook
(#11)
1 x Nut
(#F)
1 x Screw
(#G)
Installation:
• On the right side panel, near the middle, mount the regulator hose
hook using one screw and nut. Note 4-1.
• Place the regulator hose into the Regulator Hose Hook. Note 4-2.
IMPORTANT: Regulator Hose Hook should only be used when the
regulator is not connected to a gas supply. Do not put hose on the
hook during cooking.
5. INSTALLING THE GREASE CUP
Parts Required:
1 x Grease Cup
(#3)
Installation:
• Hang the Grease Cup onto the small hook under the left side of the
front panel. Ensure it is level to avoid grease spills.
• The unit is now completely assembled.
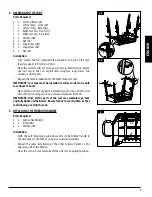
Attach the leg support brackets (11) using screws (E) and nuts (F).
Attach the handles (4) from underneath using screws (G), washers (H) and nuts (F).
Further install the rgulator hose hook (5) with a screw (G) and a nut (F).
4
Flip and put the BBQ into standing position as shown below.
Hang the oil drum 8) onto the oil drum hook as shown.
Secure the legs by tightening the pre-installed wing nut.
To attach the regulator to the gas cylinder, it is tightened in an anti-clokcwise
direction.
Read “Setting up the Barbecue” before using your barbecue
2
1
Flip and put the BBQ into standing position as shown below.
Hang the oil drum 8) onto the oil drum hook as shown.
Secure the legs by tightening the pre-installed wing nut.
To attach the regulator to the gas cylinder, it is tightened in an anti-clokcwise
direction.
Read “Setting up the Barbecue” before using your barbecue
5
Attach the handles (4) from underneath using screws (G), washers (E) and nuts (F) to
secure the handles.
Further install the regulator hose hook (5) with a screw (G) and a nut (F).
3
G
11
F


