#7 BOLT M6*14
14
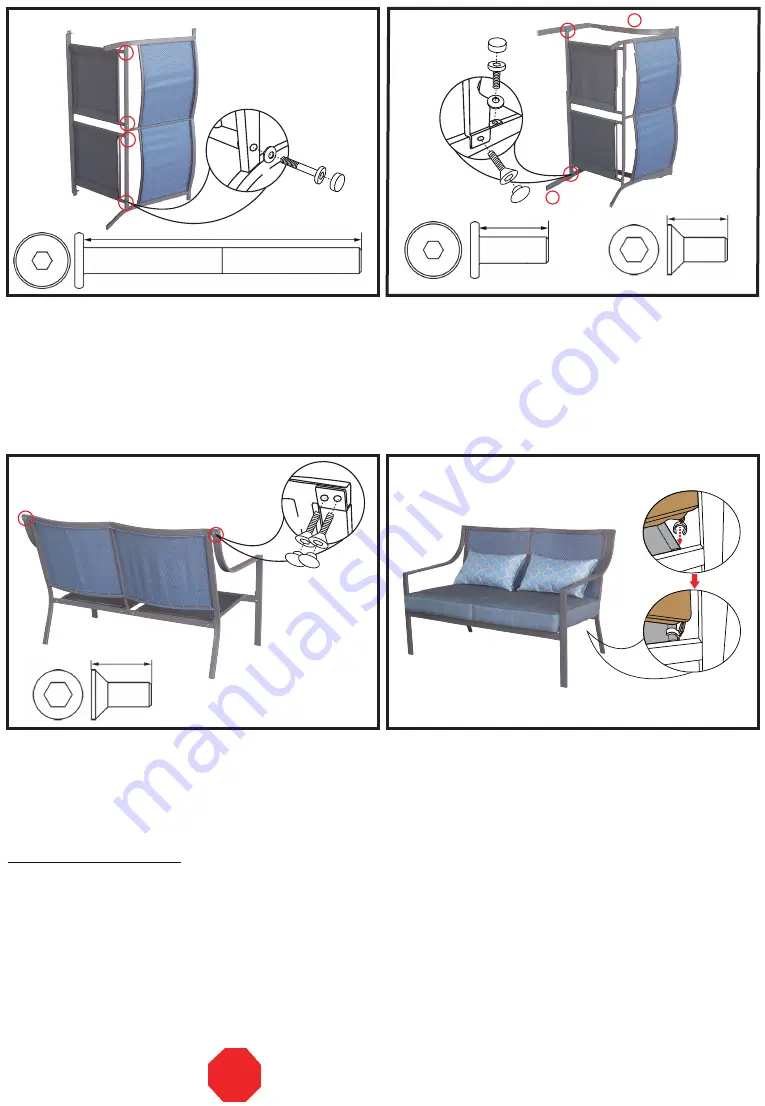
Step 6:
Place the seat cushions (#13) and the pillows (#14) onto
the bench. Secure the cushions to the bench by using
the plastic clamps. See Figure 6.
FIGURE 3
STOP
DON’T RETURN TO STORE!
PAGE 2 OF 3
Cleaning and Maintenance
•
Wash frame and fabric parts with mild soap and water, rinse thoroughly, and dry completely. Do not use bleach,
acid, or other solvents on the frame or fabric parts.
•
Cushions may be washed on the surface only by using mild soap and water or commercial foaming upholstery
cleaner if necessary. If washed, rinse well and hang to dry. Do not machine wash or dry.
•
We recommend the use of furniture covers when not in use.
•
Inspect and tighten all bolts and fasteners on a regular basis to ensure the proper performance and safety of
your bench.
•
In order to prolong the life and beauty of your bench, we recommend that it be stored in a dry and protected
area during off season periods.
Step 3:
Fasten the legs (#3 and #4) to the seat assembly (#2) by
using bolts (#6 and #7) and washers (#8). Keep the
bolts loose. See Figure 3.
Note:
The labels marked “L” and “R” on the legs (#3 and #4)
should coincide with Figure 3 to ensure proper assembly.
Step 5:
Fasten both the left leg (#3) and the right leg (#4) to the
back assembly (#1) by using bolts (#7).
Make sure that
all of the bolts have been tightened completely and
cover them with bolt caps (#9 and #10).
See Figure 5.
Step 2:
At the rear of the seat, fasten the back assembly (#1) to
the seat assembly (#2) by using bolts (#5) and washers
(#8). Keep the bolts loose. See Figure 2.
FIGURE 2
FIGURE 4
FIGURE 5
8
5
9
4
3
2
2
1
R
L
#5 BOLT M6*65
65
9
6
8
7
10
#6 BOLT M6*16
16
7
7
10
3
4
1
10
#7 BOLT M6*14
14
14
14
13
13


