background image

11

www.covad.net/onlinesupport

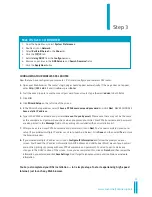
Step 3

CONFIGURING YOUR WIRELESS DSL ROUTER

Now that you have configured your computer, it’s time to configure your wireless DSL router.

1.

Open your Web browser. The router’s login page should appear automatically. If the page does not appear,

enter 

http://192.168.1.1 

and click

Go

or press

Enter

.

2. 

You’ll be asked to enter a username and password for your router. Type the word 

admin

in both fields.

3.

Click

OK

.

4.

Click

Wizard Setup

on the left side of the screen.

5.

In the Wizard Setup window, select

I have a PPPoE username and password

and click

Next

. NEVER CHOOSE

I

have a static IP address

.

6.

Type in the PPPoE username and password 

we sent to you by email

. Please note these may not be the same

as the username and password you chose when you placed your order. Your PPPoE username and password

are also printed in the 

Message

field on the packing slip included with your installation kit.

7.

After you’ve entered your PPPoE username and password, click on 

Next

. You’ve now completed your router

setup (if you ordered multiple IP addresses, skip to number 8 below). Click

Done

and then select

Yes

to close

the browser window.

8.

If you ordered multiple IP addresses, click on 

Configure IP Information

and follow the prompts on your

screen. You’ll need the IP address information (LAN IP Address and LAN Subnet Mask) we sent you by email

and on the packing slip (along with your PPPoE username and password). You don’t need to make any

changes to the DHCP section of this screen. Once you’ve completed this, click on 

Finish

and then review the

information you entered and click

Save Settings

. Don’t forget to reboot your computer to obtain new network

information.

You’ve just completed your DSL installation — in 3 simple steps. To start experiencing high-speed
Internet, just launch any Web browser.

MAC OS X v10.1 OR HIGHER

1.  From the Apple Menu, select

System Preferences.

2. Double-click on 

Network.

3. Select

Built in Ethernet

in the 

Show

list.

4. Click the

TCP/IP

tab.

5. Select

Using DHCP

from the 

Configure

menu.

6.  Remove any entries in the 

DNS Servers

and 

Search Domains

fields

.

7. Click the 

Apply Now

button.

Summary of Contents for Network Adapte

Page 1: ...User Guide 3 Simple Steps to Setting Up Your DSL Connection...

Page 2: ...llation CD Please make sure you choose to always PERMIT UNLOCK the application to run This will ensure a quick setup of your DSL connection Mac Users Please Use This Simple User Guide for Installation...

Page 3: ...SL router How to Set Up Your Email 12 Configuring your email program Get to Know SMART 13 Get instant online support with our SMART Account Manager Frequently Asked Questions 14 Quick tips to help you...

Page 4: ...rating systems may be compatible we have only provided instructions for those listed below FOR WINDOWS Minimum System Requirements 350 MHz Intel Pentium II processor or equivalent 128 MB RAM 30 MB ava...

Page 5: ...g slip included in your installation kit Please note that your PPPoE username and password may not be the same as the username and password you chose when you placed your order If you ve followed all...

Page 6: ...quipment connected to the phone line you ll be using for DSL with the exception of the DSL port on your router Install DSL filters on the following devices Telephones regular and cordless Answering ma...

Page 7: ...he router s power switch to the ON position The DSL light at the front of the modem will turn green in about five minutes Wait until the green light becomes steady not blinking Important The DSL light...

Page 8: ...Mac Users To connect your computer using a wireless interface first follow 5 above to connect your computer using Ethernet Continue through Step 3 to complete the setup of your wireless DSL router Nex...

Page 9: ...ystem display the Microsoft Orb in the lower left corner of the screen rather than a Start button 1 Select Start and then Control Panel OR Start and then Settings Control Panel 2 Select Network and In...

Page 10: ...rnet Protocol TCP IP by clicking on it do not uncheck the check box 7 Click on Properties 8 Select Obtain an IP address automatically 9 Select Obtain DNS server address automatically 10 Click OK and c...

Page 11: ...me and password click on Next You ve now completed your router setup if you ordered multiple IP addresses skip to number 8 below Click Done and then select Yes to close the browser window 8 If you ord...

Page 12: ...cation simply follow the prompts on your screen When you get to a screen asking you to type in your server information username and password please enter the following Incoming or POP mail server pop3...

Page 13: ...eed connection 2 Online Support Instead of picking up the phone save time by visiting our Online Support Center You ll find answers to commonly asked technical and customer service questions as well a...

Page 14: ...ment part sent to you right away __________________________________________________________________________________________________________ How do I connect additional computers to my router To connec...

Page 15: ...to configure my router when I ordered a static IP address We provide fixed IP addresses for the service you ordered using Point to Point Protocol over Ethernet or PPPoE for short We have configured o...

Page 16: ...r When the Internet light on the router turns green launch your Web browser __________________________________________________________________________________________________________ What do the light...

Page 17: ...______________________ NIC or Network Interface Card A small piece of hardware also referred to as an Ethernet card that acts as an interface between your computer the local area network your computer...

Page 18: ...mail addresses Use the space below to record your additional email addresses and passwords For more information on additional email accounts please visit SMART Account Manager at www covad net and cli...

Page 19: ...Copyright 2007 Covad Communications Group Inc All rights reserved CBS01003...

Reviews: