Page 5
For technical questions, please call 1-888-866-5797.
Item 56184
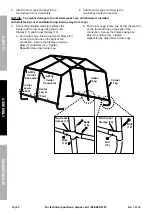
NOTICE: To prevent damage to the material, make sure all hardware is installed
with Bolt facing cover and Nuts facing inside, away from cover.
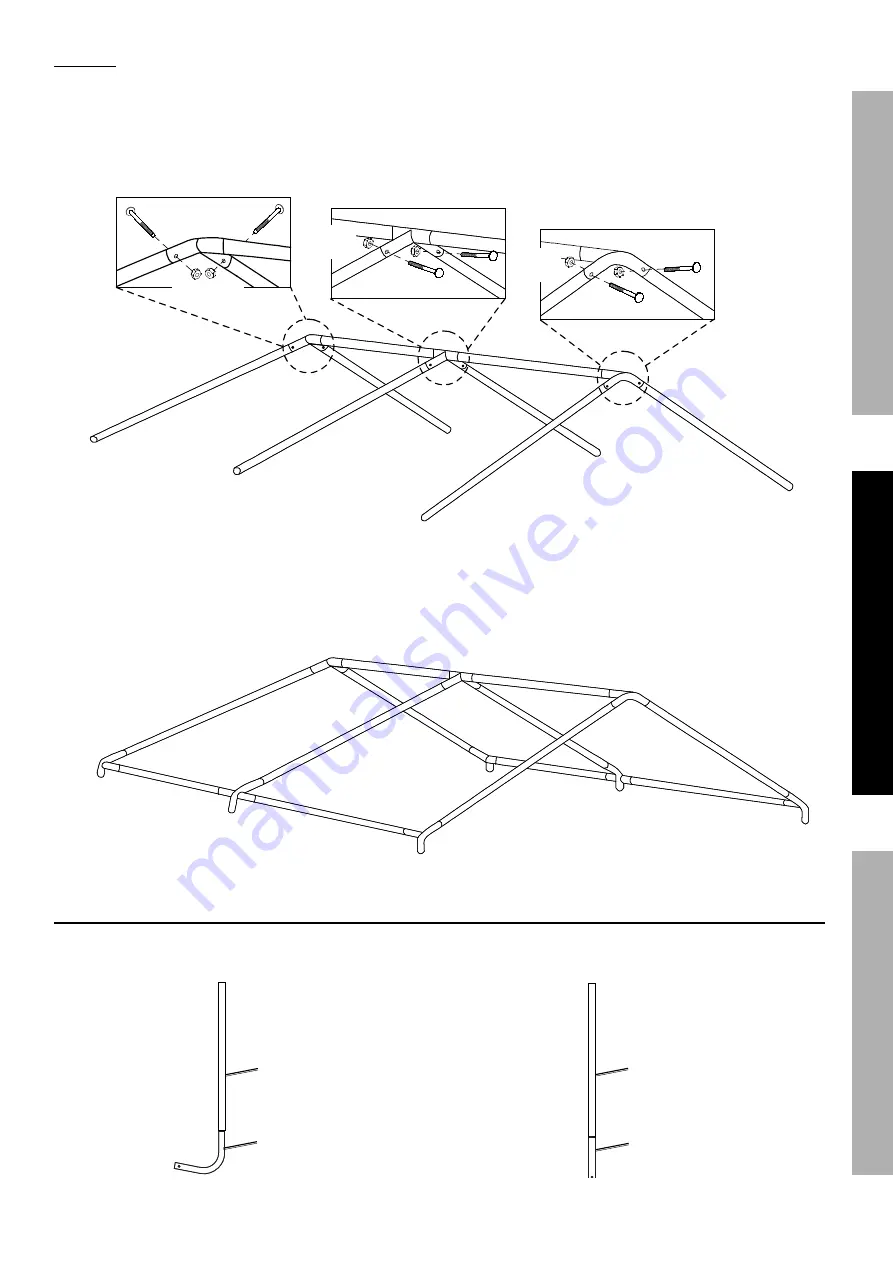
2. Connect four Rafters (1) to two 3-Way Rail
Connectors (3) using four Bolts (13) and Nuts (14).
3. Connect two Rafters (1) to one 4-Way Rail
Connector (4) using two Bolts (13) and Nuts (14).
4. Connect two Top Rails (2) to tie the 4-Way
Rail Connector assembly and two 3-Way
Rail Connector assemblies together. Slide
the Rails into the Connector openings
and push all the way in to secure.
3
4
3
1
1
1
1
1
1
2
2
Nuts (14)
Bolts (13)
Bolts (13)
Bolts (13)
Nuts
(14)
Nuts
(14)
3
4
3
5. Connect four 3-Way Corner Connectors, one
to each of the four outside corner legs.
6. Connect two 4-Way Center Connectors, one
to each end of the inside center legs.
7. Using four Top Rails (2), connect one between
each Corner and Center assembly, tying them
together. Slide the Rails into the Connector
openings and push all the way in to secure.
5
2
6
5
2
5
6
5
2
2
Assemble and Attach Legs
1. Attach four Corner Feet (7) to
the four corner Legs (2).
Corner
Foot (7)
Leg (2)
2. Attach two Center Feet (8) to
the two center Legs (2).
Leg (2)
Center
Foot (8)
SAFETY
MAINTENANCE
ASSEMBL
Y


