background image

14

-  The maximum number of files and folders that can be recognized by 

the product: 70,000 / 70,000 (microSD)

-  Disconnect the product after performing ‘Safely remove hardware’ 

function.

-  The following message may appear randomly, but it does not indicate 

that the product is malfunctioning. Please try again. 

-  If your operating system does not display the‘Safe To Remove 

Hardware’window, disconnect the player after all transfer 
operations are completed.

-  Only simple file transfer operation is available for Linux and 

Mac OS.

CONNECTING AND DISCONNECTING FROm THE PC

Basic Use

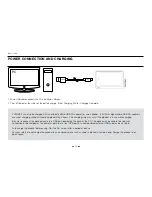
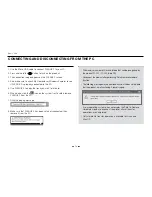
1.  Use the Micro USB cable to connect PLENUE 2 to your PC.

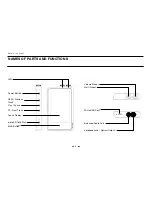
2. Press and hold the


PC

PC CONNECT

PWR BUTTON

SIDE BUTTON

BODY

(좌측면엔 특징 없음)


button to turn on the product. 

3.  The connection image appears on the PLENUE 2 screen.

4.  Also make sure to check My Computer or Windows Explorer to see 

if PLENUE 2 is properly connected to the PC.

5. Use PLENUE 2 to copy the track you wish to listen to.

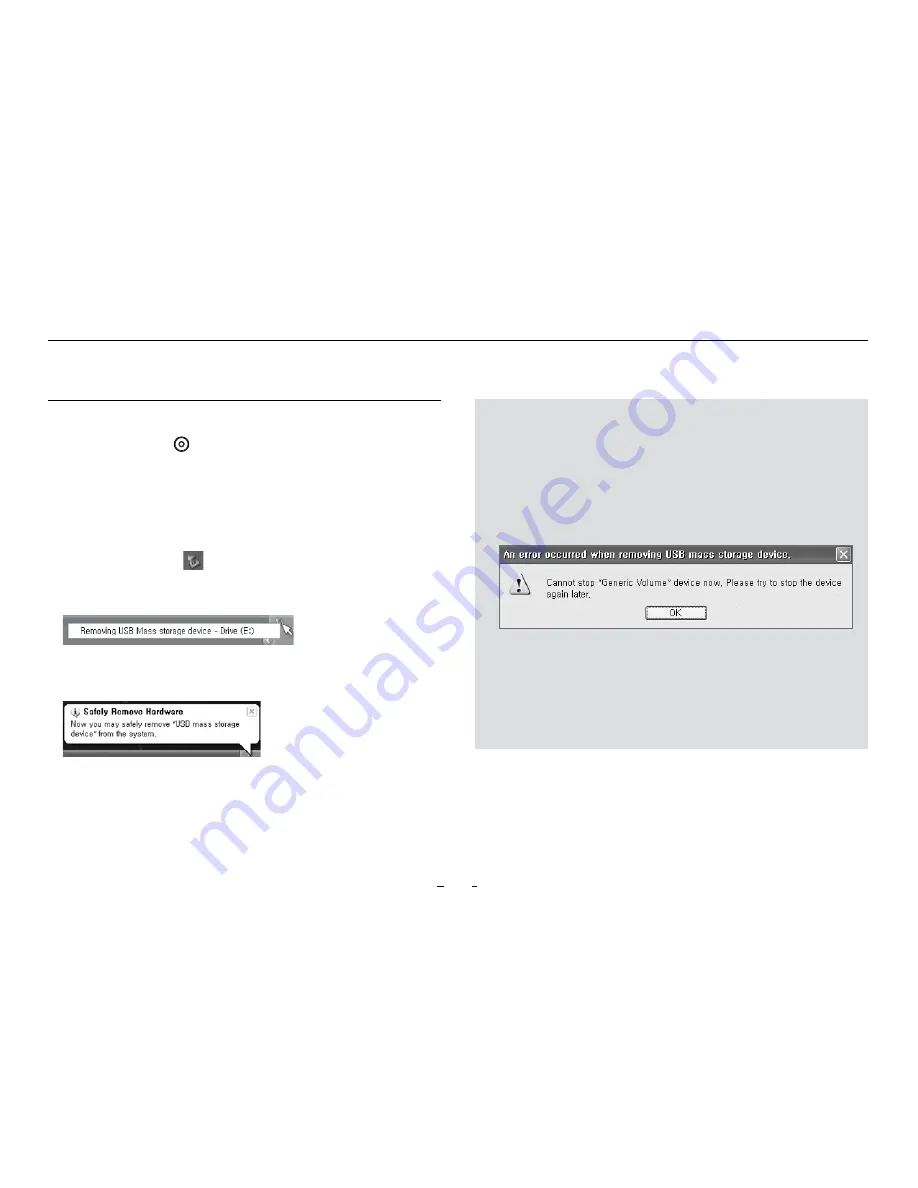
6.  When done, click the 

 icon on the system tray to safely remove 

PLENUE 2 from the PC.

7.  Click the popup message. 

8.  Make sure that PLENUE 2 has been safely disconnected, then 

remove it from the PC. 

Summary of Contents for PLENUE 2

Page 1: ...USER S GUIDE ver 1 0 EN 2...

Page 2: ...ual product THANK YOU FOR PURCHASING A COWON PRODUCT We do our utmost to deliver DIGITAL PRIDE to our customers This manual contains information on how to use the product and the precautions to take d...

Page 3: ...orized reproduction or distribution of its contents in whole or in part is strictly prohibited Our company complies with the Music Industry Promotion Act Game Industry Promotion Act Video Industry Pro...

Page 4: ...fication Troubleshooting 26 Before you start 5 Precautions Package Contents Names of Parts and Functions Buttons Basic Use 13 Power Connection and Charging Connecting and Disconnecting from the PC Ins...

Page 5: ...rovided for the correct use of the product as well as user safety be sure to familiarize yourself with them The company will not be held responsible for any accident that may occur due to the failure...

Page 6: ...please use the genuine charger offered by COWON When connecting to a PC use only USB ports on the mother board or a USB Host card Using an external USB hub may not guarantee proper operation e g USB p...

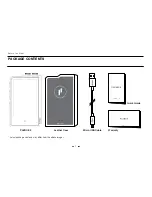
Page 7: ...7 PLENUE 2 Leather Case Quick Guide Warranty Micro USB Cable Actual package contents may differ from the above images Package Contents Before You Start ver 1 3W 2 ver 1 0W C NECT TTON TTON...

Page 8: ...BODY PC PC CONNECT PWR BUTTON SIDE BUTTON BODY PC PC CONNECT PWR BUTTON SIDE BUTTON BODY Power Button LED REW Previous Track Play Pause FF Next Track Multi Button Touch Display microSD Card Slot Volu...

Page 9: ...ore 4 Multi Button can be adjusted in Settings System Multi Button All Physical buttons can be locked except the Power button Button lock can be adjusted in Settings System Button lock Multi Button 4...

Page 10: ...heel to select a JetEffect 7 preset 3 PREV NEXT Turn the Multi Wheel to select the previous next song You can customize the function of the Multi Wheel from Settings System Multi Wheel Note that the M...

Page 11: ...g playback to rewind or fast forward 5 Brightness Adjust the brightness of the screen in 10 levels You can customize the function of the Multi Wheel from Settings System Multi Wheel Note that the Mult...

Page 12: ...swiping up or down on the volume control screen Each level adjusts the volume by 0 5dB Alternatively touch the volume icon on the top status bar during music playback to be redirected to the volume c...

Page 13: ...is in use while charging Be sure to connect the device directly to a USB port located on the back of the PC The device may be unable to establish a connection or be charged as the power supply from a...

Page 14: ...fer operation is available for Linux and Mac OS Connecting and Disconnecting from the PC Basic Use 1 Use the Micro USB cable to connect PLENUE 2 to your PC 2 Press and hold the PC PC CONNECT PWR BUTTO...

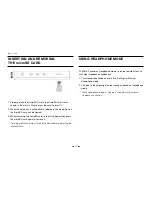
Page 15: ...icroSD card again to remove it For data protection always turn off the power before removing the microSD card PLENUE 2 provides Headphone mode to increase output for use with high impedance headphones...

Page 16: ...nect the receiver to the balanced audio port and check the icon status in the upper right corner of the screen The status icon in the upper right corner of the screen will change when a receiver is co...

Page 17: ...e root folder of PLENUE 2 4 Once the product is safely disconnected remove the Micro USB cable 5 When you turn on the product the firmware upgrade process will start 6 When firmware upgrade is complet...

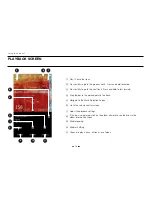
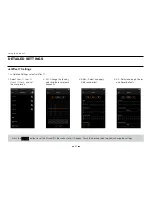
Page 18: ...hold to fast forward Drag the bar to the desired point in the track Navigate to the Music Selection Screen Go to the volume control screen Adjust the playback settings If this icon is displayed click...

Page 19: ...ck lists by folder View track lists added to Favorites View all tracks saved in the product View track lists by artist View track lists by album View track lists by genre View track lists by CUE SACD...

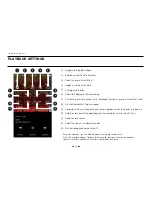
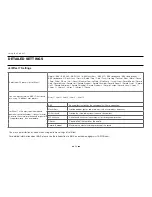
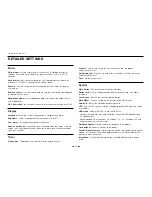
Page 20: ...wind Fast Forward speed Remember the last played track and resume playback when the power is turned on Skip the silent part of the beginning and the ending for a track max 500ms Select the level meter...

Page 21: ...ettings 2 Select User 1 User 2 User 3 User 4 and set the user presets 1 In Detailed Settings select JetEffect 7 3 EQ Change the tone by adjusting the level of each frequency 4 BBE Select and apply BBE...

Page 22: ...ent user presets User 1 User 2 User 3 User 4 User 16 JetEffect 7 is the most sophisticated and powerful sound technology It brings listeners closer to the natural presence and impact of a live perform...

Page 23: ...nt of time Auto off If there is no activity for a set amount of time the product automatically turns off Auto display off If there is no activity for a set amount of time the screen automatically turn...

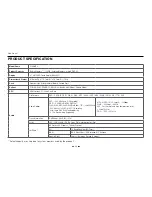
Page 24: ...ng DSD 5 64MHz DSD64 DSD128 FLAC WAV AIFF ALAC WV WavPack TTA 24bit 192kHz 352 8 384kHz FLAC WAV 1 2 Sampling 32bit float WAV WAV Tag Supporting 5 1Ch Downmixing Supporting MP3 MPEG 1 2 2 5 Layer 3 32...

Page 25: ...yback Time Approximately 9 hours MP3 8 5 hours 24bit 96kHz FLAC 2 Charging Time Approximately 3 hours with 5V 2A or higher Micro USB DC adapter Output Port Earphone Jack 3 5mm Optical Output 3 5mm Bal...

Page 26: ...ser mode Please note that System folder will not appear in the Browser Troubleshooting Computer cannot recognize the player when connected If connection is unstable due to frequent disconnects connect...

Page 27: ...www COWON com...
Reviews: