25
have a 1/8” to ¼” gap between the electrode and contact
point.
•
Check for a loose wire connection at the electrode box.
•
Check to see if debris is blocking the electrodes.
•
If the igniter is not working, can you light the grill with a lighter?
Flare-ups
•
Check flavorizers and cooking grates for excess food or
grease build-up.
•
Ensure grill is not placed directly in the path of wind.
•
Be sure drip tray is clean
Note: Some flare-ups may be inevitable if cooking greasy
foods.
Yellow Flames
•
Check the burner inlet for obstructions, particularly at air inlets
for each burner.
•
Grill may be in an area that is too windy.
Flame blows out on low setting
or has uneven heat distribution.
•
Check for spider webs or insect nest in venturi and clean
venturi.
•
A cold grill needs to be preheated for 5 minutes on high
setting.
•
Venturi may be misaligned and needs to be lined up over
orifices.
•
Windy weather will require you to move grill away from the
wind.
•
Lack of fuel. Check to see cylinder valve is open and cylinder
has fuel.
Low heat with the knob on
“HIGH”
•
Check to see if the fuel hose is bent or kinked.
•
Make sure the grill area is clear of dust.
•
Check your gas supply and gas pressure.
•
If it is only one burner that appears low, make sure the orifice
or burner is clean.
Grill is Too Hot
•
Excess grease build-up causing grease fires.
•
Damaged or faulty regulator.
•
Replace with factory authorized parts.
•
Cook on a lower temperature setting.
Flame behind control panel or
control knob area.
IMMEDIATELY shut off cylinder valve and allow grill to cool.
•
C
heck for spider webs or insect nest in venturi and clean
venturi.
•
Gas is leaking from a faulty connection. Tighten connections
with an adjustable wrench and replace damaged parts.
Perform a leak test on all connections before cooking on grill
again.
•
Venturi may be misaligned and needs to be lined up over
orifice.
Fire at any connection.
IMMEDIATELY shut off cylinder valve and allow grill to cool.
•
Gas is leaking from a faulty connection. Tighten connections
with an adjustable wrench and replace damaged parts.
•
Perform a leak test on all connections before cooking on grill
again.
Summary of Contents for C1C28LP
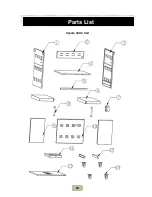
Page 30: ...28 Coyote CCX2 Cart Parts List ...
Page 31: ...29 Coyote CCX2 LP NG ...

