background image

Summary of Contents for 113.235501

Page 1: ...e right side of housing You should record both model and serial number in a safe place for future use FOR YOUR SAFETY READ ALL INSTRUCTIONS CAREFULLY S CRRFT3M SCROLL assembly o operati repair parts Sears Roebuck and Co Hoffman Estates ILo 60179 U S A Part No SP5693 Printed in U S A ...

Page 2: ...to reach them To avoid injury or death from electrical shock GROUND THE SAW This saw has an approved 3 con ductor cord and a 3 prong grounding the plug Use only 3 wire grounded outlets rated 120 volts 15 amperes arnps The green conductor in the cord is the grounding wire To avoid electrocution NEVER connect the green wire to a live terminal Make sure your fingers do not touch the ptug s metal pron...

Page 3: ...y parts are movir_g AVOID ACCIDENTAL STARTING P aake sure switch is OFF before plugging saw into a power outlet Plan your work USE HE RIGHT TOOL Don t force too or attachment to do a job it was Rot desigr_ed to do Use this scroli saw to cut only wood woodqike products plastics and non ferrous metals CAUTION This saw is NOT designed for cutting ferrous metals like iron or steel When cutting non fer...

Page 4: ... NG THE SAW Wait for all moving parts to stop MAKE WORKSHOP CHILD PROOE Unplug the saw Lock the shop or ON OFF knob_ Store the key away from children and others not qualified to use the tool DON T OVERREACH Keep good footing and balance Keep your face and body to one side of the blade out of line with a possible thrown piece if the blade should break WHENEVER SAW IS RUNNING WARNING Don t let famil...

Page 5: ...oving the plug to or from the outlet Plug power cord into a 120V properly grounded type out let If the outlet you are planning to use for the power tool is of the 2 prong type DO NOT REMOVE OR ALTER THE GROUNDING PRONG IN ANY MANNER Use an adapter as shown below and always connect the ground ing tug to known ground 11is recommended that you have a qualified electrician replace the TWO print outlet...

Page 6: ...nterior Cuts 1 7 Maintenance 18 Wiring Diagram 1 8 Recommended Accessories l 9 Trouble Shooting 1 9 Repair Parts 20 Notes 22 Service Information 24 unpackingand checking contents TOOLSNEEDED MEDIUM FLAT BLADESCREWDRIVER WARNING For your own safety never connect plug to power source outlet until all assembly steps are complete and you have read and understand the safety and operational instructions...

Page 7: ...nderstand the safety and operating instructions 1 Lift the saw by the frame and base and place scroll saw on work bench 2 Familiarize yourself with the controls and features of this scroll saw indicated in the illustration TENSION KNOB FRAME LIFT HERE ARM BEARINGS GUARD MOUNTING HOLES STATIONARY BLADE HOLDER BLADE SWITCH SWITCH KEY BEVEL SCALE BEVEL POINTER TABLE LOCK KNOB BASE LIFT HERE ...

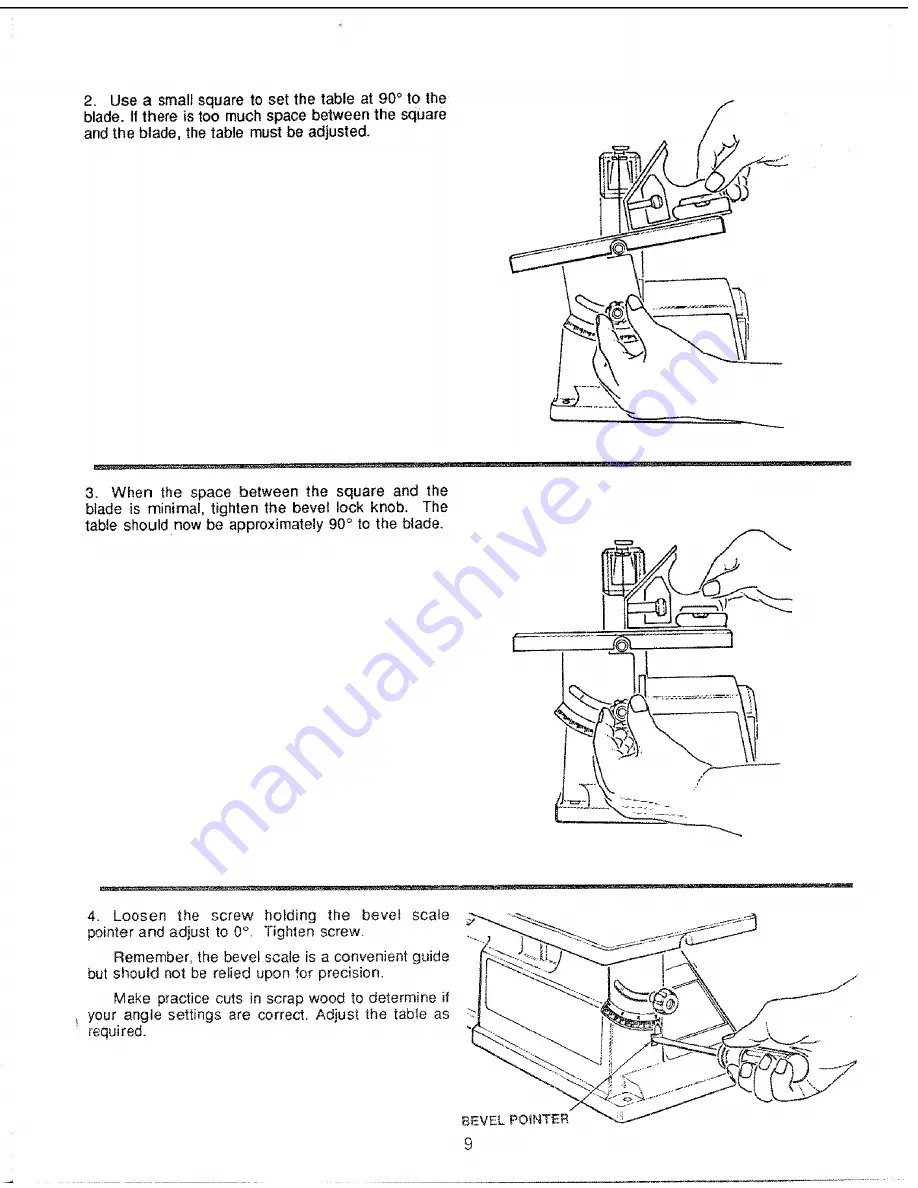
Page 8: ...setting the approximate table angle for bevel cutling When greater precision is required make practice cuts and adjust the table as necessary for your requirementS BEVEL SCALE TO ALIGN THE BEVEL INDICATOR 1 Loosen the table bevel iock knob and move the table until it iS approximate y perpendicular or at a right angle to the blade BEVEL LOCK KNOB 8 ...

Page 9: ...he blade is minimal tighten the bevel lock knob The table should now be approximately 90 to the blade r 4 Loosen the screw holding the bevel scale pointer and adjust to 0 Tighten screw Remember the bevel scale is a convenient guide but should not be relied upon for precision Make practice cuts in scrap wood to determine if your angle settings are correct Adjust the tabte as required ...

Page 10: ...h the access hole in the SLIGHT PRESSURE HERE table Slight downward pressure against the upper arm may be helpful when removing blade from upper_ ___ holder t ovD _ ___ F BLADEGUARD REM E 3 Look at the blade holders closely and notice the blade slots and pin recesses in the blade holder The blade holder is made so you can position the blade for cutting from the front or one side of the saw Cutting...

Page 11: ...tighten the blade tension by turning the tension knob clockwise F _ just until you feel the s_ack in the blade is removed t BLADE GUARD REMOVED FOR CLARITY Double check to see that pins are properly located in the slots Then turn the tension knob an additior_al two full turns clockwise This amount of blade tension should do well for most cutting operations and blades Before applying power use scre...

Page 12: ...r we highly recommend the use of such a pad to FLAT WASHER reduce noise and vibration Description Qty Soft foam pad such as carpet padding 24 X 12 112 _ 1 DO NOT Over tighten mounting bolts leave some Cushion in the foam pad for absorbing noise and Vibration 4_ If you prefer to mount y0ur saw to aleg set we rec ommend the leg set for bench top tools which is available through Sears Retail Stores T...

Page 13: ...hands from blade contact 4 ON OFF SWITCH The On Off Switch has a locking feature THIS FEATURE IS 6 BEVEL POINTER tNTENDED TO HELP PREVENT UNAUTHORIZED AND POSSIBLY HAZARDOUS USE BY CHILDREN AND OTHERS 5 TABLE LOCK KNOB Loosening the knob allows table to be tilted up to 45 for beve cutting Tightening the knob locks the table in the position you have selected 6 BEVEL POINTER Indicates what angle you...

Page 14: ...switch in OFF position hold switch IN with one hand REMOVE key with other hand WARNING For your own safety always lock the switch OFF when machine is not in use Remove key and keep it in a safe place Also in the event of a power failure all of your lights go out turn switch off remove the key and store it remote from the scroll saw This will prevent the machine from starting up again when the powe...

Page 15: ...intended to cut and the radius size of curve which can be cut with that blade o Wider blades can t cut curves as tight or small as thinner blades Narrower blades work well only on thinner wood material 11 This saw uses 5 inch long pin end type blades only See your Sears Retail Store for accessory blades 12 Blades wear faster when cutting plywood which is very abrasive when sawing wood which is thi...

Page 16: ... wood dust and start a fire To avoid this Disconnect any dust collecting hose from the saw o Remove all traces of wood dust from inside the saw Remove all traces of metal dust from on or around the saw before sawing wood again Never use this tool to finish pieces too small to hold by hand Use extra supports tables saw horses blocks etc for any workpiece large enough to tip when not held down to th...

Page 17: ...ey Wait for all moving parts to stop With a flat blade screwdriver turn motor shaft by hand by inserting into the slotted end of motor shaft located at the center of the motor housing Do this while backing up the workpiece Before removing loose pieces from the table turn saw off and wait for all moving parts to stop BEFORE LEAVING THE SAW Wait for all moving partsto stop MAKE WORKSHOP CHILD PROOF ...

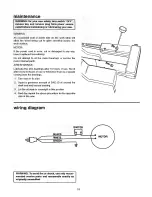
Page 18: ...motor bearings or service the motor internal parts ARM BEARINGS Lubricate the arm bearings after 10 hours of use Re oil after every 50 hours of use or whenever th ere is a squeak coming irom the bearings 1 Turn saw on its side 2 Squirt a generous amount of SAE 30 oil around the shaft end and bronze bearing 3 Let the oil soak in overnight in this position 41 Next day repeat the above procedure for ...

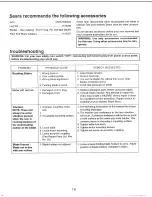
Page 19: ...blade application 4 Twisting blade in wood _ Damaged cord or plug 2 Damaged motor 1 Improper mounting of the saw 1 2 Unsuitable mounting surface 3 Loose table 4 Loose motor mounting 5 Loose eccentric coupling See Repair Parts List Key No 35 1 Blade holders not aligned I Adjust blade tension 2 Reduce teed rate 3 Use narrow blades for cutting thin wood wide blades for thicker wood 4 Avoid side press...

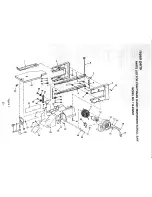
Page 20: ... 1 1 44 40 35 35 32 36 22 23 24 22 22 7_ 6 12 22 2 _ if 4 0 o_ m r 9 m 0 0 r ...

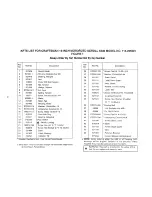
Page 21: ...ard hardware item may be purchased locally 1 Stock item may be secured through the Hardware department of most Sears Retail Stores Key No 26 27 28 29 3O 31 32 33 34 35 36 37 38 39 40 41 42 43 44 45 Part No STD601103 STD551025 821522 821510 821520 821532 821524 102570 821512 821521 STD315485 66036 60326 STD600803 STD551208 821546 9 26879 821418 821448 821889 SP5693 Description Screw Pan Hd 10 32 x ...

Page 22: ...00 366 PART 1 800 366 7278 For in homemajor brand repair service Call 24 hours a day 7 days a week 1 800 4 REPAIR 1 800 473 7247 For the location of a Sears RepairService Center in your area Call 24 hoursa day 7 days a week 1 800 488 122 2 For information on purchasinga Sears Maintenance Agreementor to inquire about an existingAgreement Call 9 am 5 pro Monday Saturday 1 800 827 6655 SEARS Ame ica ...

Reviews: