background image

Summary of Contents for 113.299780

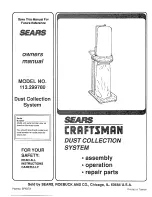
Page 1: ...ay be found on the motor cover You should record both model and serial number in a safe place for future use FOR YOUR SAFETY READ ALL INSTRUCTIONS CAREFULLY DUST COLLECTION S YS TEM assembmy ooperation parts orepamr Sold by SEARS ROEBUCK AND CO Chicago IL 60684 U S A Part No SP5373 Printed in Taiwar_ ...

Page 2: ...o not vacuum or use this Dust Collection System should has missing parts has been dropped dam neariiammable orcombustlble iiquids gases gaso aged left outdoors or dropped into water return it to a Sears Service Center line or other fuels lighter fluidi cleaners oiFbased paints natural gas _hydrogen or explosive dusts like n t _ _ _ _ h _l gust magnes umous_ gram ous t orgun Powoer a dobr on cord o...

Page 3: ...lectrical shock Use indoors in dry area Do not use outdoors or on wet surfaces Sparks can ignite vapors from flammable products Do not use around flammabie products If connected to a circuit protected by fuses use time delay fuses with this appliance Electrical 120 volts 60 Hz AC onty 7 amp BEFORE EACH USE 1 inspect your Dust Collection System if any parts are missing bent or faiJin any way or any...

Page 4: ...twear s recommended Wear protective hair covering to contain long hair Roll long sleeves above the elbow 12 USESAFETY GOGGLES Head Protection wear safety goggles mUstcomply with ANSI Z87 1 at all times Everyday eyeglasses only have impact resistant lenses they are NOT safety glasses Also use lace or dust mask if cutting operation is dusty and ear protectors plugs or muffs during extended periods o...

Page 5: ...llowing signal words are used to indicate the lever of risk _ DANGER Means that if the safety information is not followed someone will be seriously injured or killed _ WARNING Means that ifthe safety information is not followed someone could be seriously injured or killed _ CAUTION Means that if the safety information is not followed someone may be injured TABLE OF CONTENTS ITEM PAGE WARRANTY INFO...

Page 6: ...xibte Hose 4 Inch _ _1 R Adapter __ _ _ _ 1 S O Ring _ _ 1 TION SYSTEM IN DURING ASSEMBLY CAN RESULT IN ELECTRICALSHOCK ORYOUR FINGERS HAND OR ARM BEING CUTOFF FROM FAN BLADE CON TACT DO NOT PLUG IN THE COLLECTOR AT ANY TIME DURING ASSEMBLY THE DUST COLLEC TION SYSTEM SHOULD ONLY BE PLUGGED tN WHEN IT IS TO BE USED LIST OF PARTS IN LOOSE PARTS BAGf Key Description Qty Q Hex Nut M6x 1 5 3 8 16 2 R ...

Page 7: ...osite side i MOUNTING REAR FIXED CASTERS 1 Locate the following items from the loose parts bag Descrlptlon Qty A Fixed Casters 2 B Flat Washers 1 4 x 1 2 4 C Lockwashers 1 4 4 D Hex Head Screws M6 x 1 12 4 2 Position Fixed Casterunder rear of Base Plate so that holes on Caster bracket and Base Plate line up 3 Install hex screw lock washer and flat washer as shown Tighten securely using an adjustab...

Page 8: ...ry keep hands away from fan blade 3 Place lockwasher and flat washer on hex screw and insert through the holes in the Support Leg and secure to the threaded holes inthe Filtration Housing as shown 4 Use same method to attach Right Support Leg A B Items are shown actual size LEG BRACKET I C 5 Secure hex screwswiththe use of adjustable wrench MOUNTING LEG BRACKET 1 Locate the following items from th...

Page 9: ... threaded hole of nfet Guard Bracket 6 Repeat step 5 to attach other screw below Inlet Guard 7 Tighten all screws on Legs Inlet Guard and Filtration Housing secu rely LIIIiiiiiiiii iiiijljl iiii iii ii i ii ii A R Items are shown actual size c D MOUNTING BASE PLATE 1 Locate the following items from the loose parts bag Description Qty A Flat Washers 5 I_6x 11 16xl 16 4 B Hex Screws M8 x 1 25 12 4 2...

Page 10: ...ag Holder in place with adjust able wrench A Items are shown actual size HEX N UT_ _ LOCKWASH ER _e FLAT WASHER _ i i FILTER DUST BAG HOLDER 1 Locate thefollowingDescription items fromtheioose pa_bag A A HexScrews M6x1 25 _4 Itemsareshownactual size B Lockwashers 1 4 _dia 4 C HexNuts M6xl 4 C 2 Attach the ends of the Handle to the ReliefFlangeson the side of Filtration Housing as shown 3 lnsert he...

Page 11: ... EXTENSION UPPER FILTER DUST BAG ASSEMBLY 1 Disconnect the Adjustable Band Clampand insertthe end through the loops provided at the opening of the Filter Dust Bag 2 Invert the Filter Dust Bag and slip the open end of the Bag over the 1 Relief on the top opening of the Filtration Housing 3 Secure the Bag by adjusting the rectangular barto the fourth set of hooks 4 Pull the lever tight until it seat...

Page 12: ...ose to rain Store in doors Unplug power cord before changing clean ing or emptying the filter dust bag or chip bag I S i j 1 Open Clamp and insert Hose by slipping Clamp over Hose Attach to Inlet Guard and tighten Clamp with a straight blade screwdriver Use this same process to Connedt Adapter Tighten both Clamps securely to increase air velocity and reduce leakage The Adapter will permit easy dis...

Page 13: ...HE KEY IS LEFT iN THE SWITCH ALWAYS REMOVE KEY WHEN THE DUST COLLECTION SYSTEM IS OFF AND KEEP IT OUT OF THE REACH OF CHILDREN _ WARNING THE DUST COLLECTION SYSTEM WILL START IMMEDIATELY WHEN THE POWER COMES BACK ON AFTER A BLACKOUT IF THE KEY IS LEFT ON IN THE SWITCH ALWAYS TURN THE SWITCH OFF AND REMOVE THE KEY i ii _ Turning Switch OFF i i i i Turning Switch ON Removing Switch Key MOVING THE DU...

Page 14: ... connect this plug to a 2 pole receptacle as shown below if a properly grounded outlet is not available The temporary adapter should be used only until a properly grounded outlet can be installed by a qualified electrican The green colored rigid ear lug or the like extending from the adapter must be connected to a permanent ground such as a properly grounded outlet box cover When ever the adapter ...

Page 15: ...Band through the hole and slide the opposite side under Dust Chute Extension Seat as shown FILTERIDUST BAG REMOVAL _ CAUTION If using t his Oust Collection System to help keep airborne wood dust In heavy usage within acceptable limits you must regularly monitor air borne dust and maintain Dust Collection System to avoid exceeding dust t mits Each application is unique Your maintenance schedule mus...

Page 16: ... If any servicing other than the above cleaning be comes necessary it should be performed by an author ized Sears Service Center NOTE The speed of this motor cannot be regulated or changed troubleshootinq MOTOR _ 1 Excessive sawdust in air PROBLEM 1 PROBABLE CAUSE REMEDY SUGGESTED r I Excessive impeller j noise 1 Loose connectors 2 Filter dust bag and or chip collection bag releasing sawdust t Pic...

Page 17: ...ndersize extension cord or extension cord too long General overloading of Power company facilities 1 Low voltage 2 Windings burned out or open 3 Starting switch will not operate Switch contacts working properly Capacitor is bad 1 Motor overloaded 2 Improper cooling Air circulation restricted through motor due to sawdust accumulating inside of motor 1 Voltage too low to permit motor to reach operat...

Page 18: ... i i parts PARTS LIsT FOR CRAFTSMAN DUST COLLECTION SYSTEM f MODEL 113 299780 _ E 45 i i i 18 ...

Page 19: ...7 28 29 30 31 32 33 34 35 36 37 38 39 40 41 42 43 44 45 46 47 48 Part No D esCraptIon 819198 819196 819207 819199 819203 STD541037 STD551037 STD541837 819200 819186 819170 819169 819165 819185 819173 819188 819167 819174 46 57509 3 819267 819268 819269 508298 SP5373 Wash r Flat 5 16 x 1 16 3 32 Leg Caster Fixed Base Cas er Pivoting Nut Hex 3 8 16 Washer Flat 3 8 x 3 4 x 3 32 Nut Acorn 3 8 16 Brack...

Page 20: ...und on the Motor Cover of your Dust Collection System WHEN ORDERING REPAIR PARTS ALWAYS GIVE THE FOLLOWING INFORMATION PART NUMBER PART DESCRIPTION MODEL NUMBER 113 299780 NAME OF ITEM Dust Collection System All parts listed may be ordered from any Sears Service Center and most Sears stores If the parts you need are not stocked locally your order will be electronically transmitted to a Sears Repai...

Reviews: