background image

Summary of Contents for 135.17240

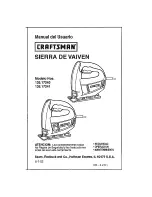
Page 1: ...41 CAUTION Read understand and follow all Safety Rules and Operating Instructions in this manual before using thinproduct oSAFETY OPERATION MAINTENANCE ESPAI_OL Sears Roebuck and Co Hoflman Estates IL 60179 U S A 5 7 02 ...

Page 2: ...r h c_ the date of purchase RETURN IT TO THE NEAREST SEARS STORE INTHE UNITED STATES and Sears will replace it free of charge If this CRAFTSMAN Sabre Saw is used for commercial or rental purposes thiswarranty applies for only 90 days from the date of purchase This warranty gives you specific legal rights and you may also have other rightswhich vary from state to state Sears Roebuck and Co Dept 817...

Page 3: ...ladzedoutlet Do notchangethe plugin anyway Doubleinsulation eliminates theneed forthe threewiregrounded powercordandgrounded powersupply system Applicableonlyto ClassIt doubleir_ulated tools Beforeplugginginthe tool be certainthat theoutlet voltagesupplied iswithinthe voltagemarked on the tool sdata plate DO HOTuse AConly ratedtoolswitha DC powersupply Avoidbodycontactwith groundedsurfaces such as...

Page 4: ...welr P _ll backlong _if K _p yo_ zaii do_i zg andglov_ aw _ ore ovh g _ _ Loose clothes jewelry or longhaircan be caught nmovingparts Avoidaccidentalstarting BESURE switchis Off beforeplugging In Carrying toolswithyourfinger on theswitch or plugging in tootsRat havethe switchinthe On position in viresaccidents Removeadjusting keys or wrenches before turning the tool On Awrenchor a keythatisleftat ...

Page 5: ...rs Maintain tools with care Keep cutting tools sharp and clean Properly maintained toolswith sharp cuing edges are less likelyto bind and are easier to control Check for misalignment or binding of moving parts breakage of parts and any other condition that may affect the tool s operation If damaged have the tool serviced before using Many accidentsare caused by poorly maintained tools Use only acc...

Page 6: ...the gear housing and the saw blade holder The reciprocatingblade holder can pinch your fingers DO NOT use dull or damaged blades Bent blade_ can break easily or cause kickback BEFORE starting to cut ALWAYS turn the saw On and allow the bladeto come to full speed The saw can chatter or vibrate if the blade speed is too slow at the beginning of the cut and possibly cause kickback ALWAYSwear safety g...

Page 7: ..._Toreduce your exposure to these chemicaJs Work in a weB ventilated area and work with approved safety_uipment such as those d _t m_ _t _e s_r_ i _ly designed to filter outmlcro _ _pic p _tides The label on your tool mm include the following symbols V Volts A Amperes Hz Hertz W Wa_ rain Mir_tee Alternating current __ _ Direct current no No loadspeed Class II conetru_on Jmin Revolutions or Strokes ...

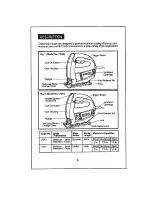
Page 8: ... Openings Change Cover i iii _L Fig 2 Model Nor 17241 variable orSwitch Plunger Toot Less Change Cover I ii ii ii II I I IU III ModelNo Blade l hicknesses 17240 Minimum Srren Maximum i 5ram 17241 Minirrejm Srnm Maximum 15ram Orbit Conlrol Lever Blade Slroks Maximum Capacities Actlc_n Length Standard 5rd in Wood Aluminum Steel 2 in 1 2 in ll Fin Orbilal 98 in Wood Aluminum_Steel 2 in 1r2 in 1 4 in ...

Page 9: ...cover up usi_ your index and middle fingers 2 Insert blade to full depth w_ the teeth facing in thedirection of the cut See Fig_3 3 Release the tooHess blade change cover to secure the blade in place Blade Storage Compartment Figure 4 Your sabre saw comes equipped with a blade storage compartment on the backside of the saw See Fig 4 1 To open the door pullthe tab on the door downward towards the f...

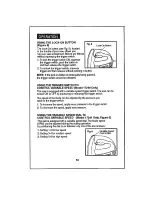
Page 10: ...H TO CONTROL VARIABLE SPEED Model 17240 Only This saw is equipped with a variable speed trigger switch The saw can be turned ON or OFF by squeezing or releasing the trigger switch_ The speed of the blade can be adjusted by the pressure you apply to the trigger _Nitch 1 To increase the speed apply more pressure to the trigger switch 2 To decrease the speed apply less pressure_ USING THE VARIABLE SP...

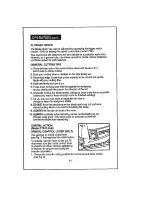
Page 11: ...f the cut 6 Gradually buildup the blade speed cuttingas close tothe line as possible unless you want to leave enough room for finished sanding 7 As you cut you may need to repos tionthe vise or clamps to keep the workpieoe stable 8 DO NO force the saw because the blade teeth may rub and wear without cutting which may result in breaking the blade g ALWAYS let the saw do most of he work 0 ALWAYS cut...

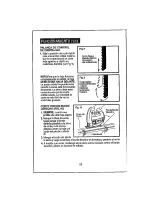
Page 12: ...cur The speed of cutis easiertosee inthickermateriats Fig 8 Smooth cutting l solt metals reduced splintering Fastcuing _ft and hardwoods CUTTING WITH A STRAIGHTEDGE FIG 10 1 ALWAYSuse a rough cut blade wheneverpossible 2 MarkLheline of cut then position thestraightedge paralleltocutlineandat the same dietanceas betweenthebladeand the sideedge of theeaw foot OR 3 Mark thesideedge ofthe saw footand ...

Page 13: ...ine of cut NOTE We do not recommend using a scroll blade for plunge cuffing IMPORTANT DO NOT try to plunge cut into hard materials such as steel TO MAKE SHARP CORNERS I Cut up to the corner then back up slightly before rounding the corner 2 After the opening is complete 90 back to each corner and cut it from tile opposite direc Jon to square it off_ BEVEL OR ANGLE CUTTING 1 Disconnect cord from po...

Page 14: ...od When Cutting Extruded_umlnum or Angle Iron 1 ALWAYSclamptheworkina benchviseandsaw closeto thevisejaws When SawingTubing with a Diameter LargerThan the Depth of the Saw Blade 1 Cut throughthe wall of the tubingand then inert the blade into the cut and rotate the tube as you saw USING THE EDGE GUIDE AND CIRCLE CUTTING GUIDE This special accessory sold separately can be used for fast accurate str...

Page 15: ... edge guide into the hole in the center of the circle In order for the edge guide to cut a circle the metal center point MUST BE in alignment with saw blade see Fig 17 6 Measure the distance from the selected hole to the blade this distance is equal to the circle radius 7 Insert plug into power source 8 Hold the saw firmly squeeze the trigger switch and slowly push the saw forward NOTE To make a h...

Page 16: ...y two to six months depending on the amount of t0ol usage Only use replacement brushes lhat are specially designed for use with your CRAFTSMAN Sabre Saw BEARINGS After about 300 to 400 hours of operation or at every second brash change the bearings should be replaced by Sears or other qualified repair personnel Bearings which become no sy due to heavy load or very abrasive material cutting should ...

Page 17: ...sive voltage drop loss ofpower or overheatin_Gfounded tool_ must use 3 wife e_eneton_ords thathave 3 prong plugs and receptacles NOTE The smaller the gauge number the greater capacity of the cord 16 gauge wire has more capacity than 18 gauge wire Volt_ l LLN _l 0 120V 2GtL 240V G0I1 AWG Mornthan0 18 Notmorethan 6 Morethan6 Hot more then10 18 Morethan10 Notmorethan12 t8 M0te than 12 14 Notmore 1ban...

Page 18: ..._ r Jctt Our Home For repairof carry rn products liko vacuums lawn equipment and electronics call or go on line for the nearest Sears Parts and Repair Center 1 800488 1222 Anytime day or night UoSA c nly To pu rcb_ a F o_ec bn _reem_nt oj3a product s_ v _ by S_ re 1 800 827 6655 U S_ 1 800 361 6665 C_T a_ Para pedrservk io der_ _ar _ Y_ a domidlio y para ord_ar piezas 1 888 SU HOGAR s_ Au f ar _la...

Page 19: ...0 135 17241 ATENCION Lea cutdadosamente todas las Regtas de Segurldad y las lnstrucclones antes de usar esta herramienta SEGURIDAD OPERACION MANTENIMIENTO Sears Roebuck and Co Hoffman Estates IL 60179 U S A 5 7 02 0M 4281 ...

Page 20: ... partir de un a5o desde la fecha de compra DEVUELVALA AL ALMACEN SEARS MAS CERCANO EN LOS ESTADOS UNIDOS y Sears la reemplazar_ gratuitamente_ Si eBta Sierra de VAIVEN CRAFTSMAN se usa para propbsito8 comercides o de alquiler esta garantia es v_ lida durante 90 dfas desde la facha de compra Esta garantia le otorga derechostegale_ eepecificos y ueted puede adem_ tenet otros derecho_que varian de un...

Page 21: ...decuado No modifique el enchufe de ninguna manera El aislamiento _ doble elimina la necesidad del cord6nel_ctricotrifilarpuesto a tierra y del sistema de aJirnentaci6n de energia puesto a tierra Esto s61ose aplica a tas herramientasde Class I1 deb e aslamiento Antes de enchufarla herFarnienta ASEGURESE qua el voW_ de enchufe es el mismo rnarcadoen a p aca de la herrarnienta NO USE henamientas qua ...

Page 22: ...interrupter estden la poslci6n Off apagado antesde enchufarla herramienta Se puedeproducirun accidentesi transporta Is herramfentaconsu dedoen el interrupterosi enchufa la herramienta cuandoel interrupterest en a posici6n On encendtdo o RemuevalasIlavesdeajuste o Ilavesinglesas antes deporteren marchala hp_amienta Si oe dejaunallavsmgiesao unaIIavedeajusteen unapiezamovil o enunapiezagiratona dela...

Page 23: ...amientascortantss deben mantenemeafiladasy limpias Lasherramientas quese mantienen biencuidadas y bien afiladastienenmenos probabilidades deatascarsey se puedencontro ar m sf cilmente Verifiqueel hay piezasdesalineadaso atascadas si hay piezas quebrantadaso si exists cualquier otra situaci6n que puedaafectar el funcionamientodela herramienta Si estdda_ada II_velaa repararantes de usarla nuevamente...

Page 24: ...i_lras m 8se acerca su mano a la hoja se aleja de su vista Mantenga SIEMPRE sus manos enb e la envoltura del sn_ranaje y el sostenedor de ta hoja de la sierra El sostenedor de la hota a su vez puede pinchar sue dedos NO use hoJas en malas condiciones L_ hojas dobtadas pueden romperse o devolverse con facilidad ANTES de comenzar a cortar SIEMPRE prenda la sierra ON y deje _ue la hoja funcione a tod...

Page 25: ...e trabaj o Para reducir su exposic on a estos qu_micos trabaje en un _ea bien venUlada y trabaje con equipo de seguridad aprobado como por ejemplo m_cams para polvo dise6adas especificamente para filtrar las part_culasmicroso6picas_ La etiqueta en su herramienta puede incluir los siguientes slmbolos V Voltios A Amperes Hz Hertz W Watts min Minutos _ Corriente Alterna Corriente Directa no Velocidad...

Page 26: ...len_ iii i _ _ _ _ i ii J p ii Rg 2 Modelo No 17241 Seleclorde ControldeVelocidacl VariableGaJillo BorOnde 8Ioq_o Er voltura det Enmmajo OJtierla de Carr_o de Preslllapara s_l _Ita_ la Base j Jl I II I _ Modelo Gmsorde Acc_6n No laHoja delaHoja 17240 M nimo Smm Estd r_ar M_imo l 5n zn iM nimo 8ram Orbital M ximo l 5rrrn 7a4 1 m 5 8 _adera Aluminio _ro i ill pulgada 2pulgadas2pulgadas ll4pdgadas 5 ...

Page 27: ...nserte la h ja hasta el fondo osn los dientes en dlrecci6n del corte Ver Fig 3 3 SueltB la cubiertade cambio de hoja sin herramienta para asegurar qu_ ia hoja e_t bien pue_ta Compartimento para Almacenar ta Hoja Figura 4 Su sierra de VAIVEN viene equipada con un compartirnen tppara almacenar en la parte trasera de su sierra VerFig 4 1 Para abrir ia puerta abra la pr_illa de la puerta hacia abajo d...

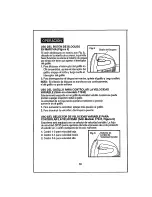
Page 28: ...ROLAR LA VELOCIDAD VARIABLE 61o en el modelo 17240 Estasierraest equipada con ungati lo de veloc_d variable La sierra 8e puede prendero apagar al apretar o scltarel ga_Uo La veloddad de la hoja puede ajustarse mediante la presi6n que 8e le da al gatillo 1 Para aumentar la veJocidad apiique m_s presibn al gati lo 2 Para disminuir la velocidad disminuya la presi6n USO DEL SELECTOR DE VELOCIDAD VARIA...

Page 29: ...ente aumente la velocidad de la hoja cortando tan cerca de la linea como sea posible a menos que desee dejar espacio suficiente para terminar lijando 7 A medida que corta puede que necesite acomodar nuevarnente la prensa de tornillo o mordaza para mantener la pieza de trabajo eatable 8 NO fderce la sierra porque et dienle de la hoja puede friccbnarse y gastarse sin cortar to cual puede hacer que s...

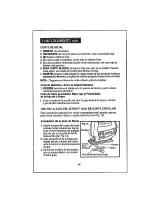
Page 30: ...ibremente La sierra debe estar cortando para que la aoci6n orbital suceda La ve oc idad de oorte es m s fficil de vet en materiales grueso a_ CORTE CON UN BORDE DERECHO FIG 10 1 SIEMPRE cuando sea po_de use una hoja _pera 2 Marque la linea de corte uego ponga e horde derecho paralelo a la linea de cortey a ta misma distancia entre la hoja y el bords del pie de la _ierra O 3 Marque el borde del pie...

Page 31: ...o en la pieza de trabajo 7 Luegocomience a cortar en la l nea de corte NOTA No se recomienda usar hoja de espird para cortee per_ etra nt_ tMPORTANTE No trate de hater cortes penetrantes en materialee duros tales como e acero ANGULOS DEFINIDOS 1 Corte basra el ngulo luego relmceda un poco ant_s de redondear el _gulo 2 Despu_s que ta apertura est_ completan_ te abierta retr oct acada _julo y c6rtdo...

Page 32: ... amordace el trabajoen una prensa de banco y con ia cierra cerca de la prensa de banco Code deTubos de Didmetro Mayor que la Profundidad de la Hoja de la Sierra 1 Corte a trav_ de la muralla de tube y luego inserts la hoja en el corte y gire el tube mientras usa la sierra USO DE LA GUIA DEL BORDEY GUIA DE CORTE CIRCULAR Este accesorio especial se vends separadamente puede usarse para corte circula...

Page 33: ...el circulo_A fin de que la gu a de horde corte un circulo el punto de centro de metal D EBE estar ailneado con la hoja de la sierra vet Fig 17 6 Mida la distancia de de etoriticio __et_ado a La boj a _ distar cia es iguatd radiodel ctrcuJoo 7 Enchufe 8 Mantenga ta sierra firme apriete el gatillo y lentamente empuje la sierra hacia detanteo NOTA Para hacer un oriflcio corte desde adenl_o del ctrcu ...

Page 34: ...uchas horas de _r ido flable Para mantenor la eficiendadel motoral m _Jmo recomendamosclueexamine las escobillas cada _is mese_dependiendo en el uso de la herramlenta Use s61oescobiltae de recarnbiodisefiadasexclusivamentepara su Sierra de VAIVEN CRAFTSMAN COJINETES De_pu_ de 300 o 400 hora_ de funcionamiento o despu_s del segundo cambiode cepillos loscojinetes deben ser reemplazados pot personal ...

Page 35: ...ta Esto evitara la baja de voitaje falta de poder o calentamiento Las herramienta5 a tierra deben usar cordones de extensi6n de 3 cables que tengan enchufes de tres puntas y recept_ules_ NOTA Mientr_ menor el calibre mayor la capacidad del cord6n Un cord6n de calibre 16 tiene m s capacidad que uno de 18_ i L _ CalibreMintmo paraCordones de Extensidn AWG V01tioe Largo Totalde laCumdaan Pies _ 26 61...

Page 36: ...ctslikevacuums lawn equfpment and electronics call or go on line for the nearest Sears Parts and Repair Center 1 800 488 12 22 Anytime dayor night U S A only To purchase a protectionagreement ona product serviced by Sears 1 800 827 6655 _j s A 1 800 361 6685 Canada Parape_ serviciodereparack_n a dorr_ cilio yparaorden_piezas 1 888 SLI HOGAR m _z 78_6427 AuCanadapoLrserviceen frar_ts H_0 LE 4tOYERM...

Reviews: