background image

Summary of Contents for 137.215360

Page 1: ...s Belt Disc Sander read this manuai and follow all its Safety Rubs and Operating _nstructions o Safety Instructions o _nstallation o Operation o Maintenance o Parts List o Espa_oi 1 81 848 1882 Sears Roebuck and Co_ Hoffman Estates_ _L 0 79 USA Part No 1372t5360001 ...

Page 2: ...E RIGHTTOOL Don t force tool or the attachment to do a job for which it was not designed USE PROPER EXTENSION CORD Make sure your extension cord is in good condition When using an extension cord be sure to use one heavy enough to carry the current your product will draw An undersized cord will cause a drop in line voltage resulting in loss of power and overheating The table on page 5 shows the cor...

Page 3: ...anding on the upward side of the disc could cause the workpiece to fly out of position resuking in injury SAVE THESE NSTRUCT ONS GROUNDING DNSTRUCTIONS IN THE EVENT OF A MALFUNCTmONOR BREAKDOWN grounding provides a path of least resistance for electric current and reduces the risk of electric shock This tool is equipped with an electric cord that has an equipment grounding conductor and a groundin...

Page 4: ... replaced and assembly is complete Carefully unpack the belt disc sander and all its parts and compare against the illustration below To protect the belt disc sander from moisture a protective coating has been applied to the machined surfaces Remove this coating with a soft cloth moistened with WD 40 To avoid fire or toxic reaction never use gasoline naphtha acetone lacquer thinner or similar high...

Page 5: ...tched Reapply light pressure to the belt and maintain belt tension between t 4 to 2 deflection 5 IMPORTANT Do not over tighten belt tension because it does not require excessive tension to function properly Excessive tension will reduce motor and belt life After correct tension is obtained tighten lock nut 3 and position sanding arm 2 in the horizontal position by loosening the two hex screws 1 Re...

Page 6: ... slotted hole into the threaded hole in the side of the sanding arm Tighten hex bolt securely i i t0 ADJUSTMENTS To avoid injury always keep the plug disconnected from the power source and the switch turned OFF until the sander is completely assembled and adjusted properly ADJUSTRNG TABLE SQUARE WITH SANDING DiSC F_G L 1 Using a combination square 1 place one side of the square on the table 2 with...

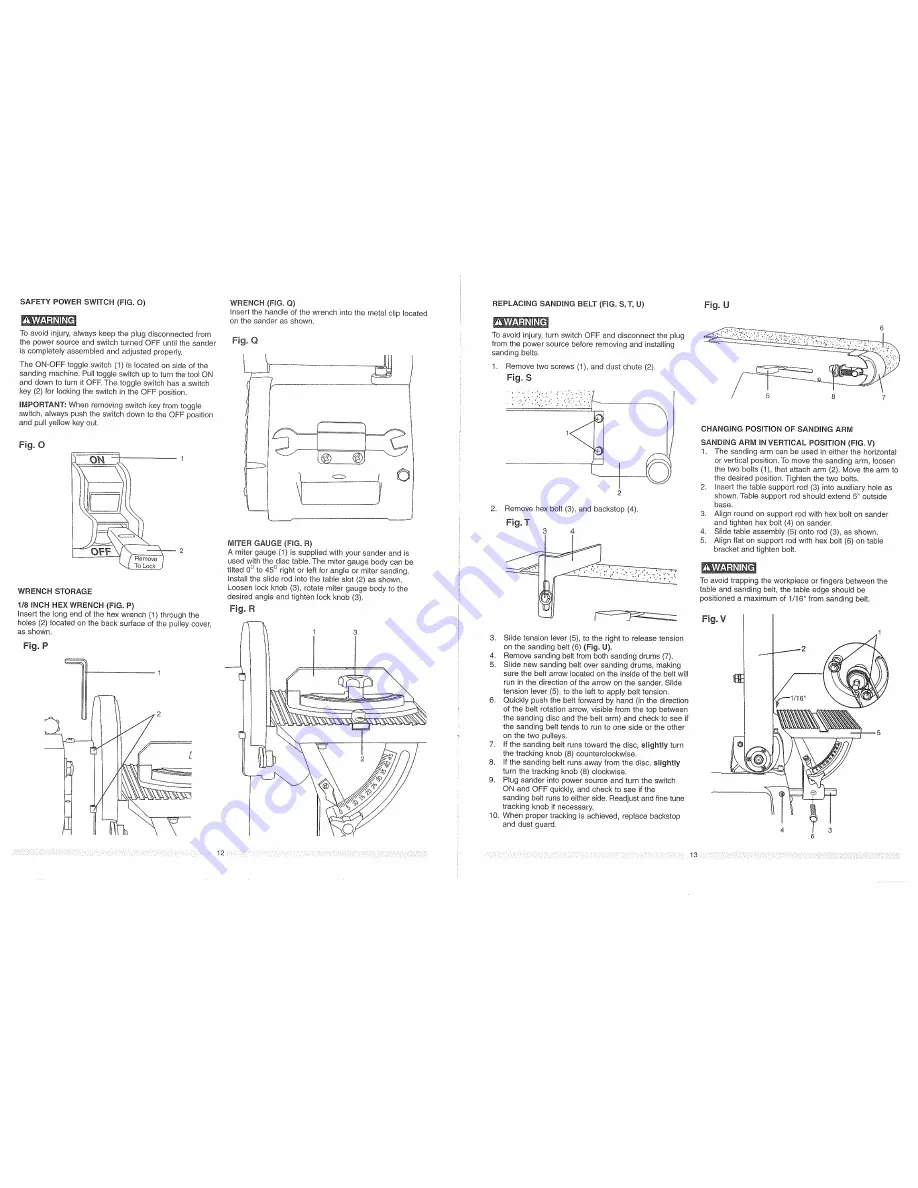
Page 7: ... 5 Slide new sanding belt over sanding drums making sure the belt arrow located on the inside of the belt will run in the direction of the arrow on the sander Slide tension lever 5 to the left to apply belt tension 6 Quickly push the belt forward by hand in the direction of the belt rotation arrow visible from the top between the sanding disc and the belt arm and check to see if the sanding belt t...

Page 8: ... the work or fingers between the backstop and sanding belt Fig X SANDING INSIDE CURVES FIG Y Freehand sanding of inside curves can be sanded on the idler drum 1 Never attempt to sand the ends of a workpiece on the drive drum To avoid injury do not apply the end of the workpiece to the idler drum This could cause the workpiece to fly up or cause kickback Fig Y SANDING OUTSIDE CURVES FroG Z Freehand...

Page 9: ...justments or repairs All repairs electrical or mechanical should be attempted only by qualified service technicians Contact the nearest Sears Service Center PROBLEM Motor will not run PROBABLE CAUSE REMEDY 1 Defective or broken ON OFF switch 2 Defective or damaged switch cord 3 Defective or damaged switch relay 4 Burned out motor 5 Blown house fuse 1 3 Replace all broken or defective parts before ...

Page 10: ...68QBDK24 Pan hd screw 10 x24 I 4 26 2701 FBD106 Hex nut M6xl 0 1 86 16004901 Needle pointer 27 2669SBDA41 Pan hd screw M6xt O 20 1 87 26010BDK55 Hex hd bolt 5 16x18 3 4 28 2668QBDK17 Pan hd screw 8 x32qi2 2 88 16004801 Tabte support 29 1771150l Disc cover 1 89 15908101 Hex soc hd cap bolt 10 x32 0 59 36 15904601 Disc sanding 1 90 2504MB0005 External tooth lock washer 1 1 1 1 1 1 1 1 2 2 31 1590450...

Reviews: