7
TECHNICAL DATA
OPERATING INSTRUCTIONS
41771 4V screwdriver
Charger voltage
Rated voltage
Battery capacity
Rated speed
Max torque
Machine weight
Charging time
Charger protection class
Charger output
120 V~ 60Hz
4 V
1.5 Ah Li-ion
180 /min
31 inch-lbs
1.05 lbs
3-5 hours
II/
5 V 500 mA
NOTE:
Before using the tool, read the instruction book carefully.
Intended Use: The power tool is intended for driving in and loosening
screws as well as for drilling in wood, metal and plastic.
Inspect the Screwdriver before using to ensure all the parts are running smoothly
and there are no abnormal sounds or sparks.
WARNING: Before using screwdriver to drive fasteners into walls, check
behind walls for wire and other electrical shock hazards or plumbing.
!
8
OPERATING INSTRUCTIONS cont.
BEFORE OPERATING THIS TOOL
A) CHARGE THE BATTERY
The battery charger supplied is only for the Li-ion battery installed in the
tool. Do not use another battery charger. The Li-ion battery is protected
against deep discharging. When the battery is empty, the tool is
switched off by means of a protective circuit: The tool will not turn on when the
trigger is engaged. When the Battery Pack is charged for the first time or after
prolonged storage, the Battery Pack will accept a 100% charge only after
several charge and discharge cycles.
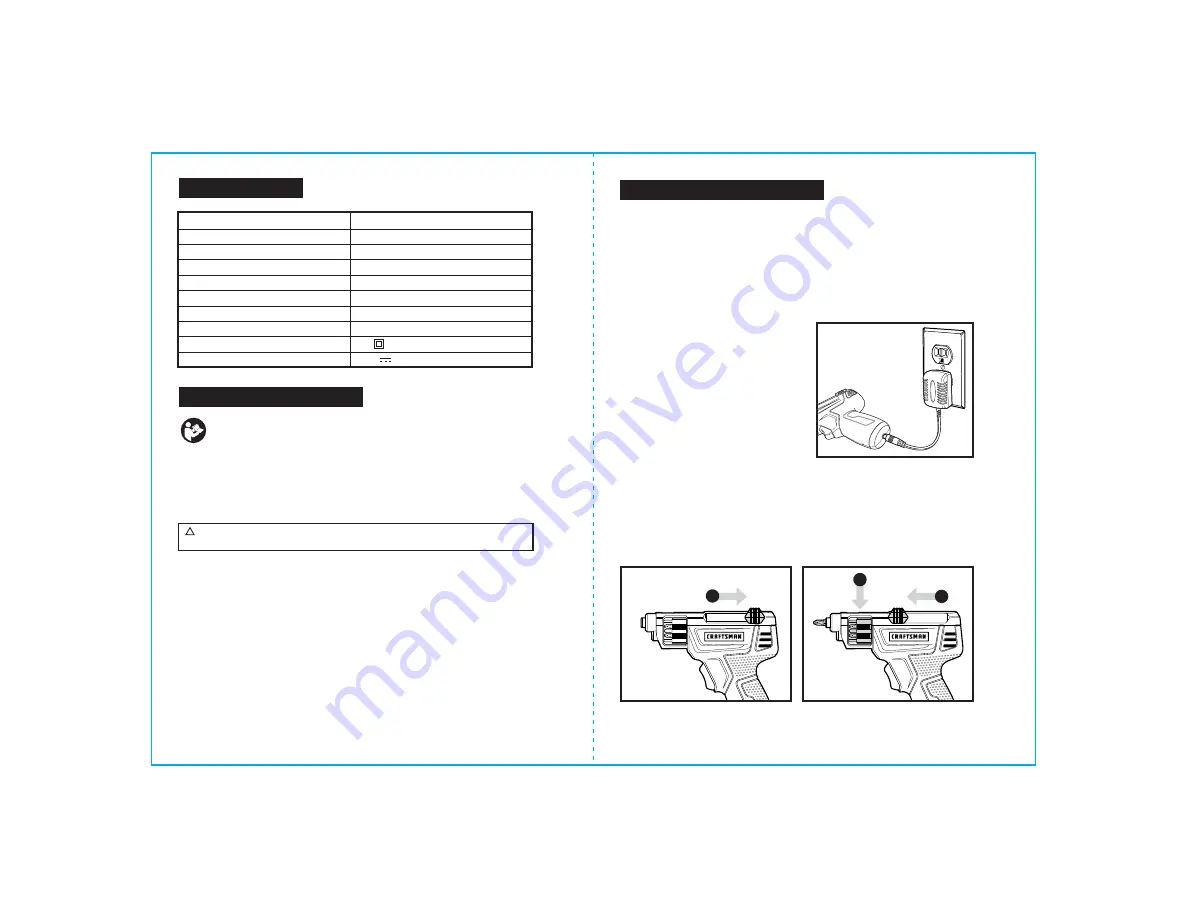
B) CHARGING (See Fig. 3)
Plug the charger plug into a suitable
power outlet. Next, connect the
charger to the Charging Socket on the
screwdriver; the indicator will illuminate
Red during charging. Let the battery
charge for 3-5 hours. The battery is fully
charged as soon as the indicator changes
to Green. Then unplug the charger.
Disconnect the Charger from the
screwdriver. The screwdriver is ready to
be used.
Important: When charging, the charger and screwdriver may become
warm to the touch; this is normal and does not indicate a problem.
SELECTING A BIT
Pull the Slide button back (1) completely. Manually rotate the Bit Cartridge
counterclockwise until the desired bit appears in the top window (2).
Push the Slide button forward (3) completely. (SEE Fig. 4 & 4A). The magnetic
chuck will hold the bit firmly in place.
(Fig. 3)
(Fig. 4A)
2
3
(Fig. 4)
1
NOTE: The Screwdriver will not operate if the Slide button is not fully pushed
into the forward position.
Summary of Contents for 172.417710
Page 8: ...14 NOTES PARTS LIST 13 ...


