background image

Summary of Contents for 2 IN ONE MULCHER/BAGGER 917.37248

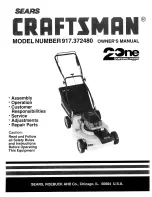
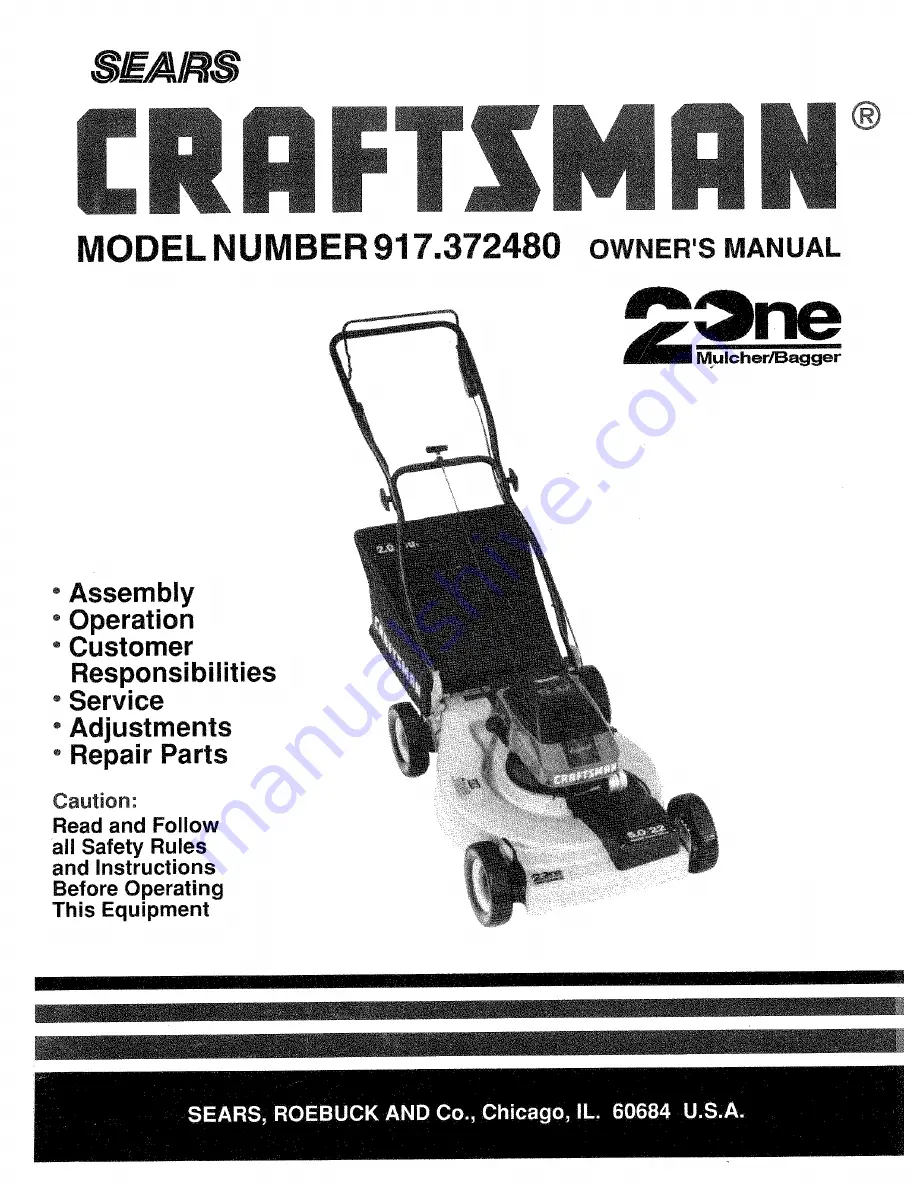
Page 1: ...DEL NUMBER 917 372480 OWNER S MANUAL oAssembly oOperation oCustomer Responsibilities oService Adjustments oRepair Parts Caution Read and Follow all Safety Rules and Instructions Before Operating This Equipment ...

Page 2: ...ds or feet near or under rotating parts Keep clear of the discharge opening at all times Always stop the engine whenever you leave or are not using your mower or before crossing driveways walks roads and any gravel covered areas Never direct discharge of material toward bystanders nor allow anyone near the mower while you are operating it Before cleaning inspecting or repairing your mower stop the...

Page 3: ...ur nearest Sears store for details CUSTOMER RESPONSIBILITIES Read and observe the safety rules Follow a regular schedule in maintaining caring for and using your lawn mower Follow the instructions under Customer Responsibilities and Storage sections of this OwneCs Manual LIMITED TWO YEAR WARRANTY ON CRAFTSMAN POWER MOWER For two years from date of purchase when this Craftsman Lawn Mower is maintai...

Page 4: ...Gear Case 13 Lubrication 12 Spark Plug 4 E Engine OH Change 14 Oil LeveJ 14 Oil Type 14 Starting 10 Storage 17 F Fuel Type 10 Storage 17 H Handle Adjustment 16 Assembly 6 L Lubrication Engine 12 Brake Spring Bracket 12 Rear Door Hinge 12 Handle Bracket Mounting Pin 12 Wheel Adjuster 12 M Maintenance Agreement 3 Maintenance Schedule 12 Mowing Tips 11 Mulching Mowing Tips 1 0 Oil Engine 10 Storage 1...

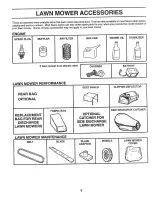
Page 5: ...your lawn mower Some of these accessories may not apply to your lawn mower ENGINE SPARK PLUG MUFFLER AIR FILTER if lawn mower is an electric start LAWN MOWER PERFORMANCE REAR BAG OPTIONAL FABRIC BAG LAWN MOWER MAINTENANCE REPLACEMENT BAG FOR REAR DISCHARGE LAWN MOWERS BELT BLADE _ GAS CAN ENGINE OiL STABiLiZER DUST SHIELD OPTIONAL CATCHER FOR SIDE DISCHARGE LAWN MOWER CLiPPiNG DEFLECTOR SiDE DISCH...

Page 6: ...r handle section locks into place in mowing position Raise upper handle section intoplace on lower handle remove protective padding and tighten both handle knobs Remove handle padding holding operator presence control bar to upper handle o Your lawn mower handle can be adjusted for your mowing comfort Refer to Adjust Handle in the Service and Adjustment section of this manual TO ASSEMBLE GRASS CAT...

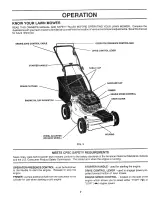
Page 7: ...MEETS CPSC SAFETY REQUIREMENTS Sears rotary walk behind power lawn mowers conform to the safety standards of the American National Standards Institute and the U S Consumer Product Safety Commission The blade turns when the engine is running OPERATOR PRESENCE CONTROL must be held down to the handle to start the engine Release to stop the engine PRIMER pumps additional fuel from the carburetor to th...

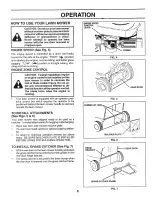
Page 8: ...ator centre The blade turns when the engine is running Your lawn mower is equipped with an operator pres ence control bar which requires the operator to be positioned behind the lawn mower handle to start and operate the lawn mower TO iNSTALL ATTACHIVlENTS See Figs 5 6 Your lawn mower was shipped ready to be used as a mulcher To installattachments for bagging or discharging Open rear door and remo...

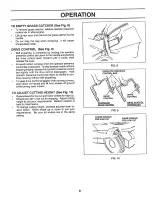
Page 9: ...e operator presence control bar slightly unti the drive control disengages Hold operator presence control bar down to handle to con tinue mowing without self propelling To keep drive control engaged when turning corners push down on handle and lift front wheels off ground while turning lawn mower TO ADJUST CUTTING HEIGHT See Fig 10 Raise wheels for low cut and lower wheels for high cut Wheels are ...

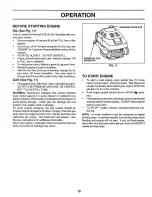
Page 10: ...rage Acidic gas can damage the fuel system of an engine while in storage To avoid engine problems the fuel system should be emptied before storage for30 days or longer Drain the gas tank start the engine and let it run until the fuel lines and carburetor are empty Use fresh fuel next season See Storage instructions for additional information Never use engine or carburetor cleaner products in the f...

Page 11: ...E CLEANING IN CUSTOMER RESPONSIBILITIES SECTION OF THIS MANUAL The special mulching blade will recut the grass clip pings many times and reduce them in size so that as they fall onto the lawn they will disperse into the grass and not be noticed Also the mulched grass will biodegrade quickly to provide nutrients for the lawn Always mulch with your highest engine blade speed as this will provide the...

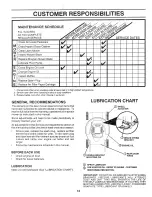
Page 12: ...ents will need to be made periodically to properly maintain your unit All adjustments in the Service and Adjustments section of this manual should be checked at least once each season Once a year replace the spark plug replace air filter element and check blade for wear A new spark plug and clean new air filter element assures proper air fuel mixture and helps your engine run better and last longe...

Page 13: ...sults NOTE We do not recommend sharpening blade but if you do be sure the blade is balanced TO SHARPEN BLADE The blade can be sharpened with afite or on a grinding wheel Do not attempt to sharpen while on the mower To check blade balance drive a nail into a beam orwa l Leave about one inch of the straight nail exposed Place center hole of blade over the head of the nail If blade is balanced it sho...

Page 14: ... dusty dirty condkions Do not wash air filter TO CHANGE AIR FILTER See Fig 15 Remove the aiHiker cover by turning counterclockwise to the stop and putt away from collar Remove filter from inside of cover Clean the inside of the cover and the collar to remove any dirt accumulation Insert new filter into cover Put air filter cover and filter into collar aligning the tab with the slot Push in on cove...

Page 15: ...lways use factory approved belt to assure fit and long life TO ADJUST DRRVE CONTROL CABLE See Fig 17 A drive control cable that needs adjustment will keep your lawn mower from self propelling properly and can also cause gear case components to wear out sooner Remove drive cover Loosen cable clamp screw A and nuts B and C Hold down operator presence control bar to handle and engage drive control o ...

Page 16: ...bar must pivot freely to permit blade brake engagement when contro_ bar is released Do not over t ghten the fasteners holding the controls to the upper handle To change from medium low to high position only the upper handle section will have to be turned over See Fig 19A _ To change from medium low to tow position only the lower handle section wil have to be turned over See Fig 19B ENGINE ENGINE S...

Page 17: ...NG ETHANOL OR METHANOL CAN ATTRACT MOISTURE WHICH LEADS TO SEPARATION AND FORMATION OF ACIDS DURING STORAGE ACIDIC GAS CAN DAMAGE THE FUEL SYSTEM OF AN ENGINE WHILE IN STORAGE Drain the fue tank Start the engine and let it run until the fuel lines and carburetor are empty Never use engine or carburetor cleaner products in the fuel tank or permanent damage may occur Use fresh fuel next season NOTE ...

Page 18: ...0RAFTSMAN 22 ROTARY LAWN MOWER MODEL NUMBER 917 372480 REPAIR PARTS 11 9 35 27 58 29 28 55 12 54 62 47 ...

Page 19: ...lip 60 85t201X004 26 52160 Washer 61 103672X 27 87748 Wheel Tire Assembly 62 134612 28 84921 Shoulder Bolt 3 8 16 64 132961 29 62335 Belleville Washer 134078 30 85021X004 Axle Arm Assembly 31 87877 Selector Knob 32 850855X004 Selector Spring 34 84920 Spacer 35 850923 Wheel Adjusting Bracket Left 36 850924 Wheel Adjusting Bracket Right DESCRIPTION Thread Cutting Screw 5 t6 18 x 3 4 Locknut 5 16 18 ...

Page 20: ... RAFTSMAN 22 ROTARY LAWN MOWER MODEL NUMBER 917 372480 REPAIR PARTS 54 5 I 18 2O 21 15 11 13 20 7 35 ...

Page 21: ...Dust Cover 37 83632 15 86273 Spacer Bearing 38 STD541425 16 86274 Belleville Washer 40 75192 t7 851019X004 Selector Spring Left 41 48 74 18 87877 Selector Knob 52 88614 19 88284X004 Axle Arm Assembly 54 751663 20 850922 Wheel Adjusting Bracket 55 86012 21 58922 Retaining Clip 56 851552 23 851021X004 Selector Spnng Right DESCRIPTION Drive Cover Decal Pan Head Tapping Screw 1 0 24 x 2 3 4 Hex Washer...

Page 22: ...ifter Seal Pin Grooved 1 8 x 1 2 Gear Case Halves Upper and Lower includes Key 4 5 and 7 Bearing Bracket Spring Drive Shaft Washer Hardened Yoke Clutch Bushing KEY PART NO NO DESCRIPTION 13 86447 Plug 14 133804 Gear Helical 15 750436 Jaw Clutch 16 750355 Grease 17 STD581050 E Ring 18 850848 Key Hi Pro 19 131481 Shaft Worm 20 65692 Key Woodruff 3 21 83680 Worm 22 STD522512 Screw Hex Head 1 4 20 x 1...

Page 23: ...CRAFTSMAN 4 CYCLE ENGINE MODEL NO 143 424tS2 L 23 ...

Page 24: ...Washer Flat 285 35000 Gear Assy Governor Incl 81 287 650884 Spool Governor 290 34357 Ring Retaining 292 26460 Screw Sems Hex 1 4 20 x 1 1 4 300 35586 Key Flywheel 301 35355 Flywheel 305 35819A Washer Betlevilie 306 34265 Nut Flywheel 307 35499 Solid State Assembly 309 650936 Cover Spark Plug Screw Sems Torx 15 Hex 310 35822 Washer Head 10_24 x 1 3t3 34080 Wire Ground 347 650898 Gasket Cylinder Hea...

Page 25: ...at O Ring Float Bowl to Body inlet Needle Seat C ip tncl 31 Spring Clip Primer Bulb Retainer Ring High Speed Bowl Nut Bowl Nut Washer Welch Plug Atmospheric Vent NOTE All component dimensions given in U S inches 1 inch 25 4 mm 10 REF PART NO NO DESCRiPTiON 590637 Starter Rewind 1 590599 Pin Spring includes Reference 4 2 590600 Washer 3 590615 Retainer 4 590601 Washer 5 590598 Spring Brake 6 590616...

Page 26: ...SERVICE NOTES 26 ...

Page 27: ...elt not driving 1 Cutting height too low 2 Lift on blade worn off 3 Catcher not venting air 4 Low engine speed 1 Grass is too high or wheel height is too low 2 Rear of lawn mower housing blade dragging in grass 3 Grass catcher too full 4 Handle height position not right for you 5 Connect wire to plug 8 Replace spark plug 7 Tighten blade bolt or replace blade adapter 8 Depress control bar to handle...

Page 28: ...rts listed here in may be ordered through Sears Roebuck and Co Service Centers and most Retail Stores WHEN ORDERING REPAIR PARTS ALWAYS GIVE THE FOLLOWING INFORMATION PRODUCT ROTARY LAWN MOWER MODEL NUMBER 917 372480 ENGINE CRAFTSMAN MODEL NO 143 424152 PART NUMBER PART DESCRIPTION Your Sears merchandise has added value when you consider that Sears has service units nationwide staffed with Sears t...

Reviews: