background image

Summary of Contents for 320.26314

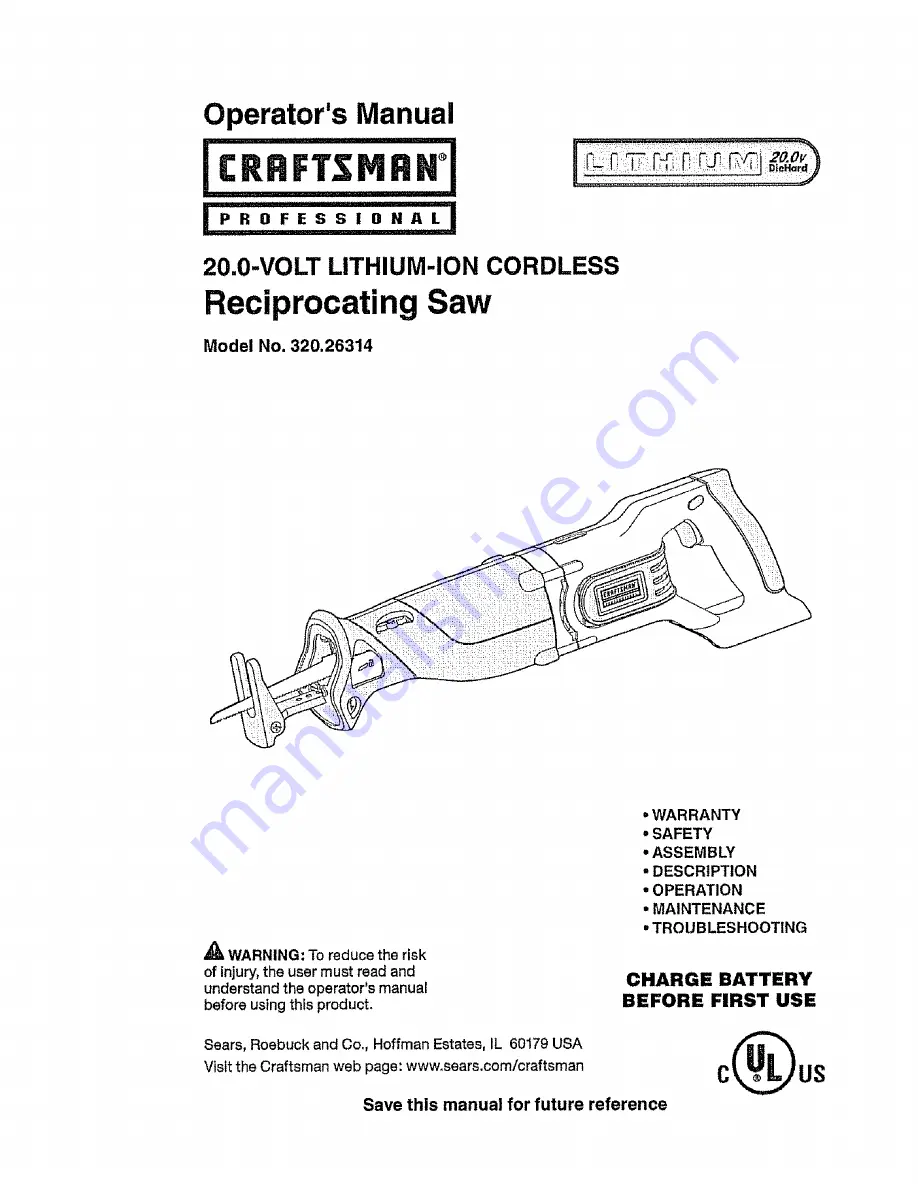
Page 1: ...njury the user must read and understand the operator s manual before using this product WARRANTY SAFETY ASSEMBLY DESCRIPTION OPERATION MAINTENANCE TROUBLESHOOTING CHARGE BATTERY BEFORE FIRST USE Sears Roebuck and Co Hoffman Estates IL 60179 USA Visit the Craftsman web page www sears com craftsman Save this manual for future reference ...

Page 2: ... Professional Tool fails due to a defect in material or workmanship return it to any Sears store Sears Service Center or other Craftsman outlet in the United States for free replacement during the first year from the date of purchase and for free repair during the second year from the date of purchase This warranty does not include expendable parts such as lamps batteries bits or blades This warra...

Page 3: ...in electric shock fire and or serious personal injury SYMBOL MEANINGS A_k DANGER Indicates an imminently hazardous situation which if not avoid ed will result in death or serious injury _k WARNING Indicates a potentially hazardous situation which if not avoided could result in death or serious injury _ik CAUTION Indicates a potentially hazardous situation which if not avoided may result in minor o...

Page 4: ... damp locations To reduce the risk of injury user must Read the Product Manual read and understand product manual before using this product Always wear safety goggles or safety Eye Protection glasses with side shields and a full face shield when operating this product Safety Alert Precautions that involve your safety Failure to keep your hands away from No Hands Symbol the blade will result in ser...

Page 5: ...refrigerators There is an increased risk of electric shock if your body is earthed grounded Do not expose power tools to rain or wet conditions Water entering a power tool will increase the risk of electric shock o Do not abuse the cord Never use the cord for carrying pulling or unplug ging the power tool Keep cord away from heat oil sharp edges or moving parts Damaged or entangled cords increase ...

Page 6: ...ndles dry clean and free from oil and grease Slippery hands can not safely control the power tool Always wear safety glasses with side shields Everyday glasses have only impact resistant ienses They are NOT safety glasses Following this rule will reduce the risk of eye injury Protect your lungs Wear a face or dust mask if the operation is dusty Fol lowing this rule will reduce the risk of serious ...

Page 7: ...equently and use them to instruct others who may use this tool If you loan someone this tool also loan them these instructions BATTERY TOOL USE AND CARE Ensure the switch is in the off position before inserting battery pack insert ing the battery pack into power tools that have the switch on invites accidents Recharge only with the charger specified by the manufacturer A char ger that is suitable ...

Page 8: ...or wet location Following this rule will reduce the risk of electric shock Under extreme usage or temperature conditions battery leakage may occur if liquid comes in contact with your skin wash immediately wit soap and water then neutralize with lemon juice or vinegar If liquid gets in your eyes flush them with clean water for at least 10 minutes then seek immediate medical attention Following thi...

Page 9: ...properly to minimize body expo sure blade binding or loss of control Hold the tool by insulated gripping surfaces when performing an opera tion where the cutting tool may come into contact with live wires Use suitable detectors to find hidden utility lines or call the local util ity company for assistance Contact with electric lines can lead to fire or electrical shock damage to a gas line can res...

Page 10: ...rd rather than the plug when disconnecting from re ceptacle Damage to the cord or charger could occur and create an electric shock hazard Replace damaged cords immediately Make sure cord is located so that it will not be stepped on tripped over come in contact with sharp edges or moving parts or otherwise subjected to damage or stress This will reduce the risk of accidental falls which could cause...

Page 11: ...ons Refer to them frequently and use them to instruct others who may use this tool If you loan someone this tool loan them these instructions also to prevent misuse of the product and possible injury If the power supply cord is damaged it must be replaced only by the manufacturer or by an authorized service center to avoid risk iMPORTANTSAFETY iNSTRUCTiONS SAVE THESE INSTRUCTIONS This manual conta...

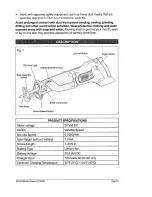
Page 12: ...th eyes or lay on the skin may promote absorption of harmful chemical Fig 1 Lock offButton Trigger Switch LED Work Ught Base Assembly Shoe Orbital Adjustment Knob Blade Clamp Lever Saw Blade Shoes Release Button PRODUCT SPECIFICATIONS Motor voltage 20 Volt DC Switch Variable Speed No load Speed 0 2500 min Saw Weight without battery 7 3 Ibs Stroke Length 1 3 16 In Battery Type Lithiumqon Battery Vo...

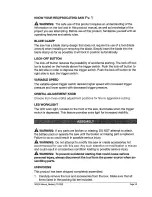
Page 13: ...ger pressure and lower speed with decreased trigger pressure ORBITAL ADJUSTMENT KNOB Choose from three orbital adjustment positions for fine to aggressive cutting LED WORKLIGHT The LED work light located on the front of the saw illuminates when the trigger switch is depressed This feature provides extra light for increased visibility WARNING If any parts are broken or missing DO NOT attempt to att...

Page 14: ...e O 60 79 Charge 4o s9 Charge 0 0 O o 39 Charge Is C O C _ _ Under 10 Charge discharged moved from tool Low capacity warning If one LED on the POWER BAR begins to flash the battery pack s charge is under 10 capacity and should be recharged Unlike other battery pack types Uthium lon battery packs deliver fade free power for their entire run time The tool will not experience a slow gradual loss of p...

Page 15: ...ormance in tempera tures between 32 F 0 3 and 104 F 40 C When the battery pack is very cold it may pulse for the first minute of use to warm itself up Put the battery pack on a tool and use the tool in a light application After about a minute the battery pack wilt have warmed itself up and will operate normally WHEN TO CHARGE THE BATTERY PACK The Lithium Ion battery can be charged at any time and ...

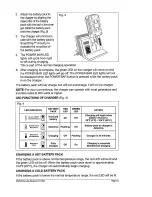
Page 16: ...arger NOTE For your convenience the charger can operate with most generators and inverters rated at 300 watts or higher LED FUNCTIONS OF CHARGER Fig 4 Fig 4 LED INDICATOR HI LO TEMP_ SEE MANUAL _ DNFNOTi VE _ BATTERY BATTERy CHARGING I BATTERY FULL BATTERY PACK Hot Cold battery Defective Charging RED GREEN LED LED On Off Fleshing Off Off Fleshing Fully Off On charged ACTION Charging will begin whe...

Page 17: ...isplayed when the POWER BAR button is pressed while the battery pack is on the charger BATTERY FULL if the battery pack is within normal temperature range the green LED will be lit and the red LED will be off The battery pack is fully charged and ready to use The battery pack will fully charge but will not overcharge if left on the charger The POWER BAR LED lights will not be displayed when the PO...

Page 18: ...ARNING Battery tools are always in operating condition Therefore the trigger switch should always be locked when not in use or when carrying the tool at your side TRIGGER SWITCH Fig 6 1 To turn the saw ON push the lock off button to left side then depress trigger switch 2 To turn it OFF release the trigger switch and push the lock off button to right side to lock the trigger switch NOTE The lock o...

Page 19: ...ork light located on the front of the saw wil come on when the trigger switch is depressed The LED work light will turn off when the trigger switch is released This pro vides additional lighting on the surface of the work piece for operation in lower light areas INSTALLING SAW BLADE Fig 8 I Remove the battery pack 2o Insert the saw blade into the blade clamp as far as possible it will lock in posi...

Page 20: ...Shoe In or Out Fig 10 The base assembly slides in or out to adjust the effective stroke length for maximum control and longer blade life 1 Remove the battery pack 2 Press the shoe s release button and slide shoe out to desired position The shoe can be locked in any of 4 positions 3 Release the shoes release button to lock the shoe in desired position To Pivot Shoe Fig 11 The shoe pivots to provide...

Page 21: ... in a vise or with clamps to a workbench or table 4 Clearly mark the line of cut 5o Push the lock off button to left side then depress trigger switch to start the cutting action 6 Place the base assembly shoe against the work then move the blade into the work 7 Do not force Use only enough pressure to keep the saw cutting Let the blade and saw do the work Use of excessive pressure that causes bend...

Page 22: ...plastic parts Chemicals can damage weaken or destroy plastic which may result in serious personal injury WARNING To avoid serious personal injury always remove the battery pack from the tool and unplug the charger when cleaning or performing any maintenance BATTERIES The battery pack is equipped with Lithium ion rechargeable batteries The dura tion of use from each charge will depend on the type o...

Page 23: ...dhesive tape Do not attempt to destroy or disassemble the battery pack or remove any of its components Lithium Ion batteries must be recycled or dis posed of properly Also never touch the terminals with metal objects and or body parts as a short circuit may result Keep away from children Failure to comply with these warnings could result in fire and or serious injury PROBLEM CAUSE The trigger cann...

Page 24: ...000 3123268000 5700048000 370O353000 5620039000 5650007000 3703833000 Left Gear Case Circlips For Hole Pin Dust Cover Ball Bearing Washer Screw 18 19 2O 3550728000 3550726000 282234400O 21 5700025000 22 5650189000 23 24 25 26 27 28 29 Spring Washer Bearing Clamping Plate 5610083000 Thread Forming Screw Shaft Gear Counterweight Assembly Needle Bearing Gasket 1 1 1 1 I 4 1 1 1 1 1 1 1 2 1 3 1 342051...

Page 25: ... Bearing Support 1 Seal Ring 1 Plunger 1 Pin 1 Sliding Block 1 Spring 1 3660263000 Torsion Spring 1 5670150000 Pin 1 3550740000 Bush 1 3660264000 Spring 1 3550738000 Shaft 1 40 3550730000 3703834000 3550786000 3402189000 3550784000 569O137000 3550737000 5670149000 3550739000 3660265000 5O 51 52 53 54 55 3520253000 Hoop 56 3520233000 Rotate Bush 57 58 59 6O 61 62 3123224000 3810008000 3402154000 36...

Page 26: ...2822264000 3123267000 4870303000 3400260000 5610097000 5610094000 Left indictor Cover Front Hand e SUpport Front Handle PCB Assembly Pivot Shoe Button Switch Contact Receptacle ASSY Thread Forming Screw Thread Forming Screw 1 1 1 1 1 1 1 1 3 4 26314 ManuaLRevtsed_07 0322 Page26 ...

Page 27: ... 0 6 66 19 20 25 24 64 48 6O 47 28 25 2 1 7I 58 ...

Page 28: ...Our Home For repair of carry in products like vacuums lawn equipment and electronics call or go on line for the nearest Sears Parts Repair Service Center 1 800 488 1222 US A 1 800 469 4663 Canada Call anytime day or night www sears com www sears ca To purchase a protection agreement on a product serviced by Sears 1 800 827 6655 usA 1 800 361 6665 Canada Para pedir servicio de reparaci6n a domiciti...

Reviews: