background image

Summary of Contents for 351.184090

Page 1: ...AD NAILER Model No 351 184090 CAUTION Read and follow all Safety Rules and Operating Instructions before First Use of this Product Sears Roebuck and Co Hoffman Estates IL 60179 U S A Safety Operation Maintenance Parts List Espa5ol 4348 01 Draft 11 02 99 ...

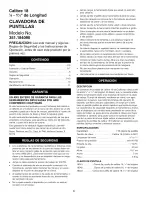
Page 2: ...nded fasteners only DESCRIPTION The Craftsman 18 Gauge Brad Nailer drives brads from 3 8 to 1_ 4 long Oilless design eliminates daily oiling and oil stains on workpiece Die cast aluminum body with textured grip mini mizes operator fatigue Large capacity side loading magazine with positive quick action latch makes loading easy Safety feature disables tool unless contact trip is pressed against work...

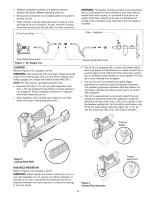
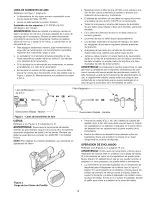
Page 3: ... magazine with heads toward top of tool Slide magazine cover forward over magazine until latch snaps into place locking magazine cover The air tool is equipped with a contact trip safety mecha nism see Figure 3 that disables tool unless contact trip is pushed against work Hold body firmly and press contact trip on workpiece where fastener is to be applied Pull trig ger to drive fastener into workp...

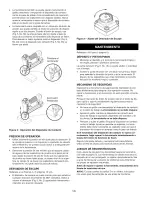
Page 4: ...e more consistent if the ram tip is kept clean and square SAFETY MECHANISM Inspect contact trip safety mechanism daily for proper opera tion Do not operate tool if mechanism is not operating properly With the red push button switch in the rapid fire mode per form the following procedures to test safety mechanism Leave trigger untouched while pushing contact trip into workpiece Tool must not fire P...

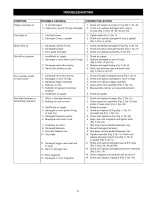
Page 5: ...g 6 Magazine nose bolts loose 7 Fasteners too short 8 Damaged fasteners 9 Incorrect fastener size 10 Cap leaks 11 Damaged trigger valve seal and O rings 12 Bent or damaged ram 13 Dirty magazine 14 Damaged or worn magazine 3 4 Check air supply Replace damaged or worn O rings Fig 5 Nos 13 and 15 Replace damaged spring Fig 5 No 9 Clean and lubricate cap and head valve Fig 5 Nos 5 and 12 1 Check and r...

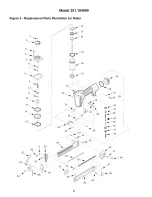
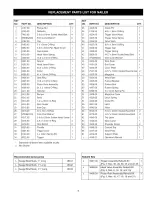
Page 6: ...Model 351 184090 Figure 5 Replacement Parts Illustration for Nailer _16 18 1 2 6 11 0 12 13 14 4 59 _ _ 20 23 49 47 58 56 55 6 ...

Page 7: ...A Gauge Brad Nails 1 Long 18342 A Gauge Brad Nails 1 4 Long 18343 KEY NO PART NO 35 4323 00 36 6136 00 37 4324 00 38 4325 00 39 4326 00 40 4327 00 41 4328 00 42 4329 00 43 5809 00 44 STD852004 45 4330 00 46 4331 00 47 4332 00 48 7537 00 49 4333 00 50 4334 00 51 4335 00 52 4336 00 53 4337 00 54 6396 00 55 4338 00 56 4339 00 57 4340 00 58 4341 00 59 4342 00 60 6045 00 61 6079 00 62 4343 00 63 4344 0...

Page 8: ...andose de usted y de los demas Jamas apunte la herramienta hacia usted u otras personas Jam_ s transporte la herramienta mientras presiona el gatillo Como suministro de aire para la herramienta no se deben utilizar oxigeno gases combustibles o gases comprimidos a alta presi6n Utilice siempre la herramienta a una distancia segura de las otras personas que se encuentren dentro de la zona de trabajo ...

Page 9: ...nistro neumatico Se debe conectar un acople macho de flujo libre a la Ifnea neumatica del lado de la herramienta ADVERTENClA El acoplamiento hembra proporciona un selIo que evita la perdida del aire comprimido del estanque del com presor cuando esta desconectado del acoplamiento macho Si esta conectado al lado de la herramienta del abastecimiento de aire el acoplamiento hembra puede sellar una car...

Page 10: ...ios y sin mugre pelusas o parficulas abrasivas La punta del pis6n Fig 5 No 18 se puede abollar o redondear con el tiempo Cuadre la punta del pis6n con una lima manual fina y limpia para extender la duraci6n del pis6n y de la herramienta El disparo de los sujetadores ser _ mas consistente si la punta del pis6n se mantiene limpia y cuadrada MECANISMO DE SEGURIDAD Inspeccione el mecanismo de segurida...

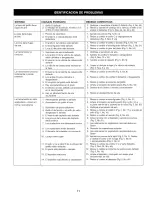
Page 11: ...Verifique y reemplace el anillo O da_ado Fig 5 No 40 2 Revise y cambie el vastago de la valvula el sello o los anillos O daffados Fig 5 Nos 29 36 39 y 40 1 Apriete los pernos Fig 5 No 3 2 Revise y cambie el anillo O o empaquetadura dahado a Fig 5 Nos 6 y 8 1 Revise y cambie el anillo O daffado Fig 5 No 19 2 Revise y cambie el amortiguador daffado Fig 5 No 21 3 Revise y cambie la guia del pis6n Fig...

Page 12: ...37 For the repair or replacement parts you need Call 6 a m 11 p m CST 7 days a week PartsDirect 1 800 366 PART 1 800 366 7278 www sears com partsdirect Para ordenar piezas con entrega a domicilio 1 800 659 7084 For the location of a Sears Service Center in your area Call 24 hours a day 7 days a week 1 800 488 1222 To purchase or inquire about a Sears Maintenance Agreement Call 7 a m 5 p m CST Mond...

Reviews: