background image

Summary of Contents for 351.226151

Page 1: ...or s Manual CRRFTSMRN 15 PLANER Model No 351 226151 CAUTION Read and follow all Safety Rules and Operating Instructions before First Use of this Product Sears Roebuck and Co Hoffman Estates IL 60179 U S A www _ar_ conVcraftsm an 17857 00 Draft 01 11 02 ...

Page 2: ...s invite accidents Do notuse powertools tn dangerousenvironments Do notuse powertools in damp or wet locations Do notexpose powertools to rain Work area shouldbe properlylighted Proper electricalreceptacle shouldbe availablefor tool Three prong plug shouldbe pluggeddirectly into properly grounded three prongreceptacle Extensioncords shouldhave a groundingprongand the three wires of the extensionco...

Page 3: ...rts Solvents may deterioratethese finishes Use soap and water on paint plasticor rubber components Aftercleaning cover all exposed surfaceswith a lightcoating of oil Paste wax Is recommended for tabletop WARNING Never usa highlyvolatilesolvents Non flammable solventsare recommendedto avoidpossible fire hazard WARNING Do not attempt assemblyif partsare missing Use this manual to orderreplacement pa...

Page 4: ...of bladeedges and to makeadjustmentsif necessary Slide knifegauge onto knifegauge rod Positionknifegauge on the rod so that there is a grooveon eithersideof gauge Press In E rings one ineach groove end secure knifegauge position Repeat above steps forthe other knifegauge on the otherend of the rod J_0 rod Figure2 KnifeGaugeAssembly POWER SOURCE Refer to Figure 3 page 5 WARNING Do not connectplaner...

Page 5: ...ords ever 50 ft long Is not recommended ELECTRICAL CONNECTIONS Referto Figure 4 WARNING All eleotricalconnections mustbe per formed by a qcallfled electrician Make sureunit is off and disconnectedfrom power sourcewhile motoris mounted connected reconnectedor anytimewiring is Inspected Planer hasan approved 230 volt three conduotor line curdwitha three prong grounding typeplug and a 230 volt magnet...

Page 6: ...parts are free from interfer enoe Always wear eye protection or face shield Make sure blades are aligned and properly attached to cutterhead Do notplug in planer unless switchis inOFF posi tion After turningswitch on allow planerto come to full speed before operating Keep hands clear of all moving parts Do notforce cut Slowingor stalling will overheat motor Allow automaticfeed to functionproperly ...

Page 7: ...cutterhead so that both the legs of the gauge rest firmly on the cutterhead Remove chip deflector plate Key No 7 if required The blade edge must just make contact with the tab on the knife gauge Adjust blade height by turning the jack screw Key No 15 Rgure 7 Checking Blade Height Repeat the previoustwo steps to adjustthe blade heightonthe other end of the blade Secure blade and glb bytighteninggib...

Page 8: ...eep cuts require morepower and cause greater wear on all machine parts Rgure9 CuttingDepth SNIPE Snipe Is a depressionat either end of the beard caused by an unevenforce on the cutterbeedwhen work is entering or leevingthe planer Snipe will occur when beards are not supported properly A slightsnipe may stnibe noticedwhen the board Is supported An unevenforce is createdwhen only one feed rolleris i...

Page 9: ... blades have been nicked SHARPENING BLADES The blades can be honed individually by whetting them with fine sharpening stone Make sure oilstone is flat and is not worn To sharpen blades Partially cover stone with paper to protect the table top Position infead table so stone will contact blade along its beveled surface Stroke the stone across blade from one side to other while stone is also moving s...

Page 10: ... Rough cut wood requiresthe rollersto be adjusteda littlehigher while smoothfinishwood requiresthe rollersto be a little lower For all workplacematerials and finishesthe table rollersshould be positionedslightlyabove the table Table roller heightIs adjusted by looseningset screws Key No 73 and rotatingeccentricadjusters Key No 57 Use a straight edge acrossthe table and table rollersto check miler ...

Page 11: ...shouldJustcontact adjustment block If chipbreaker is too highor too low loosen hex nut on set screw Figure 19 Key Nos 3 and 29 under chipbreaker Rotate set screwto position chlpbreakerproperly Secure positionby tightanlnghex nuton set screw Place adjustmentblockon other end of chlpbreaker and repeat steps 3 and 4 above Be surethat chip breaker is at the same height on bothends so that the chipbrea...

Page 12: ... corners need adjustment and removethe chain from the sprocketinthat corner Rotatethe sprocketby hand to adjust the table height be sure to leave other sprocketsuntouched NOTE Be careful not to rotate each sprocketmore than 1 or 2 teeth Rotate sprocket or sprockets untiltable Is parallelto rollercase Assemble chain tension sprocketcarefully and tensionchain properly 12 ...

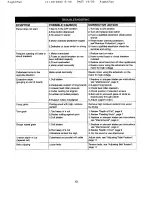
Page 13: ...age Excessive snipe 1 Dull blades gouging at end of board _Inadequate support of long boards 3 Uneven feed rollerpressure 4 Cutter castingnotaligned 5 Lumbernot buttedproperly 1 Replace or sharpen blades per instructions see Maintenance page 9 2 Support longboards 3 Check feed rolleroperation 4 Check positionof elevationscrews 5 Butt endto end each piece of stockas boardspassthroughplaner 6 Adjust...

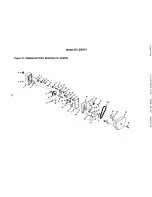
Page 14: ...Model351 226151 Figure 18 Replacement Parts Illustration for Gearbox cP 11 35 10 15 16 10 3O 29 18 27 9 39 22 8 26 32 23 24 _ _ t_ 0 0 rO 0 o M 01 O3 m i J 0q ...

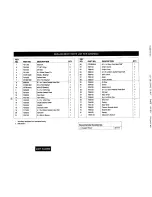
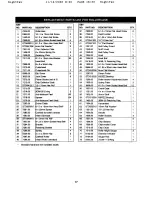
Page 15: ...2mm Spacer Standardhardwareitem av_lable IocaJly Not Shown OTY 1 2 1 2 2 1 1 3 1 5 1 1 1 1 1 1 1 1 6 1 1 KEY NO 22 23 24 25 26 27 28 29 30 31 32 33 34 35 36 37 38 39 40 41 A PART NO STD833016 7327 00 7326 00 726g 00 7330 00 7331 00 7332 00 7333 00 7334 00 8102 00 7317 00 7336 00 7337 00 7338 00 7339 00 7340 00 7341 00 398 00 7399 00 7400 00 17857 00 DESCRIPTION 6ol 0 x 16mmHex Head Bolt ChainGuard...

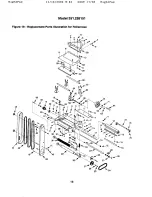
Page 16: ...RightFax 11 14 2002 9 40 PAGE 17 33 RightFax Model 351 226151 Figure 19 Replacement Parts Illustration for Rollercase 45 63 7 16 ...

Page 17: ...7286 00 Spring 4 134 0259 00 5 x 5 x 23mm Key 2 35 7287 00 Outfeed Roller 1 36 7288 00 Infeed Roller serrated 1 Standard hardware _em availablelocally KEY NO PART NO DESCRIPTION QTY 37 7289 00 6 1 0 x 10mrn Flat Head Screw 2 38 7290 00 Depth Limlter 1 39 0316 00 6 25 x 12ram Set Screw 1 40 STD541031 5 1s 1 8 Hex Nut 2 41 STD551031 5 _ FlatWasher 2 42 7291 00 Belt Pulley Guard 2 43 7292 00 M 60 V b...

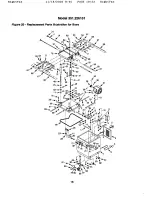
Page 18: ...RightF x 11 14 2002 9 40 PAGE 19 33 KightFmx Model 351 226151 Figure 20 Replacement Parts Illustration for Base 65 67 67 66 67 4O 37 18 ...

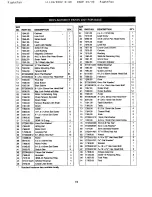
Page 19: ...crew Standard hardware item availablelocally QTY 1 1 1 1 1 2 1 2 3 6 2 1 1 24 8 2 1 1 2 1 1 1 1 1 1 1 8 3 1 4 7 4 1 2 13 1 1 1 2 3 4 4 4 4 1 KEY NO 47 48 49 50 51 52 53 54 55 56 57 58 59 60 61 62 63 64 65 66 67 68 69 7O 71 72 73 J74 75 76 77 78 79 80 81 82 83 84 85 86 87 88 89 9O 91 PART NO 1531 00 7373 00 5990 00 7375 00 7376 00 7377 00 7378 00 7379 00 7380 00 7381 00 7382 00 STD315485 738_ 00 38...

Page 20: ...cibn as polvorosa Est6 agertay pieose claramente Nunca opera las herm mientes mec_nicascuando est_ cansado intoKicado o cuando estd tomando medicamentosqua producen somnolencia PREPARE EL AREA DETRABAJO PARA LATAREA Mantenga el _rea de trabajo limpia Las _reas de trabajo desordenadas alraen sosidentes No use herramientes mec_nices en entornos p aligrosos No use herramientas mec_nicas en lugares ht...

Page 21: ...n rodillos la rueda de mane la manivela el canal de astinas le varilla de calibradoresde cuch ltas dos calibradoree de cuchiltas el boise de art culosde fermterla Ilaves de _trerno abierto de 8 10 rnrn y 12 16mm y Ilaveshexagonales de 3 4 5 y 6 rnm El boise de artfculcode ferreten aiosluye U Perne de cabeza hexagonalde 8 1 25 x 20 rnm 6 Perno de cabeza hueca de 6 1 0 x 12 mm 3 Perne de cabeza de a...

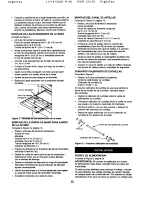
Page 22: ...o al eje de transmisibnhelicoidal Atornillela manivela a la rueda de mano MONTAJE DEL CANAL DE ASTILLAS Consulte la Figura 19 p_jina 16 Partes y artfculosde ferreter a necosarlos Canal de astillas Pemo de cabeza de arendela hexagonal de 6 1 0 x 12 mm 3 Tuerca I _agonal de 6 1 0 mm 3 Arandela plana de 6 rnm 6 Perno de cabeza hosca de 6 1 0 x 12 mm 3 Arandela de asgurided de 6 mm 3 Coloqueel canal d...

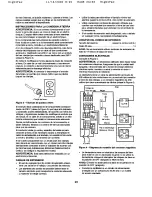
Page 23: ...ste deber_tser reemptazade con un zl_calopars tres da ijas debidemente conectado s tlerra instaladode ecuerdocon las Normas para Instaleciones Ek_otricas Nalienal Electric Code y los cc digos y regulasionas locales ADVERTENClA Esta tares deber tser realizadaper un electricist a protesional CABLES DE EXTENSION El use de cualquler ripe de cordbn de extensibnocasic nar_ una caida en el voRajey una p_...

Page 24: ...o de todas las herrernien tas mec nicaspuede hacer qos sean lanzados e los ejos cuerposextra6os Io cual pueds lesionatos gra emente Sier _oreuse galas de seguridadque cumptancon los requisi tes de la norrna estadeunidenseANSI Z87 1 se indica en el paquete antesde cornenzara usar la herramienta rnec_ mica PRECAUCION Tenga sismpre en cuenta las sigulentes precauct ooss Aprenda las reglas de segurida...

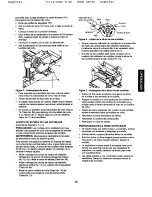
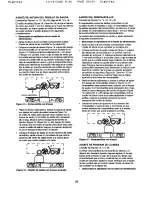
Page 25: ...aves No 10 y 5 y retire el canal de estilles Clave No 69 Afloje y e_traiga los pernos de cabeza de arandela h_agona_ Clave No 1O y la cubierta del rompeestilles Clave No 68 Aroje loscincotornillos de cure Clave No 14 del portacuchillapare aflojarla cure del pertacuchina Clave No 13 CaJlbradorde la a turade oJchlltas Pale Gate _ Cuchilla Pale Flgura 6 AJuste de la altura de lee cuchlllas Sit_s el c...

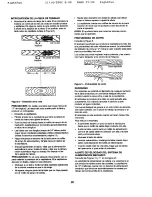
Page 26: ...enta con rodillos de retornoan la parfe superiorde rnodo que el ayudantepuede devolverlela parte al operador AVISO El ayudantetiene qua tornarlos rnisrnas precau cionesque el operador PROFUNDIDAD DE CORTE Consultela Figure 9 El acabade superficialqua produce la cepilladora as m _Ls liso si la profundidaddel corte utilizadeas manor La profundidad del limitadorde carte en _ indicael valor m_ximo est...

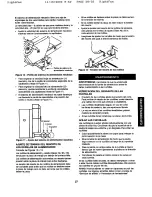
Page 27: ...de alimentaci6n accionades per resorteejercen presibnsobre la pieza de trabajo pare avitar deslizarse La tenaibn del resorte de los rodillosde alimentaci6n debe ser suficientepare av_ar qua los rodillosse deslisen sobre la pieza de trabajo pete no debeser tanta qua los rodillos de an la plaza Figure 12 Tensl _n del rosorte de los rodlllos ADVERTENClA Cercibrese de que la unidadeat6 desconectada de...

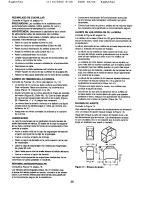
Page 28: ... 6 60 WanehasteClUe el nivelde scelte alcenceel orificio del tapdn Vuelva a col car el tapbn de Ilenado Lubriquefrecuentemente las superficiesdeslizantesde las colurenascon gmse grat_ada o industrial RErENES ANTICONTRAGOLPE Consults la Figura 19 p_gina 16 Los retenes anticontragolpe Clays No 21 impiden que la piezs de trabajo golpee en sentidocontrario el de elirnan tacibn Los retenes deben girar ...

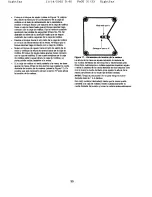
Page 29: ...las cuchilla s duranteel cepillado Luego el mmpeastillas dirige les astillasalrededor clelportacuchillay las saca per el canaJ de astillas El rompeastillasse debe sltuar 1 mm per debajo del portacuchillapare funcionar adecuadarnente La posici6n del romdeastillasse verificay ajusta aplicando el siguienteprocedimiento gesc_necte la epllladora de la tuente de allmentaclon Ajuste la altura de las cuch...

Page 30: ...apenas hacer contacto con la caja de rodillos Si leas cuatm esquinas de la caja de rodillosest_ na igual dtura la caja de rodillosy el portacuchilla est _m par delosala mesa Si Is caja de rodillosno est_ par delaala mesa se debe ajustar la mesa Afloje los dos pernos que sujetan la rueda dentada de tensi6n de la cadena v_ asela Figure 7 Es posibleque sea necesario extrasr el perno A pars diviar la ...

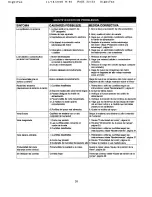
Page 31: ...siones al extreme la tabla 2 Soporte inadecuadopare tables largas 3 Presibndesigual del mdino de alimentaci6n 4 Pieze fundidede corte desalineada 5 La madera no eat_ topando correotarnent e 6 Rodillosde apoyo real alineados Cepillade de madera con un alto contenide de humeded 1 Corte muypesado 2 Las cuchillaseat_tncortandoen centre de le veta 3 Cuchillas desafiledes 1 Cuchillas desafilades 2 Carte...

Page 32: ... carry in items like vacuums lawn equipment and electronics call or go on line for the location of your nearest Sears Parts Repair Center 1 800 488 1222 Call anytime day or night U S A only www sears com To purchase a protection agreement on a product serviced by Sears 1 800 827 6655 U S A 1 800 361 6665 Canada Para pedir servicio de reparaci6n a domicilio y para ordenar piezas 1 888 S U HOGAR _ 1...

Reviews: