background image

Summary of Contents for 358.362181

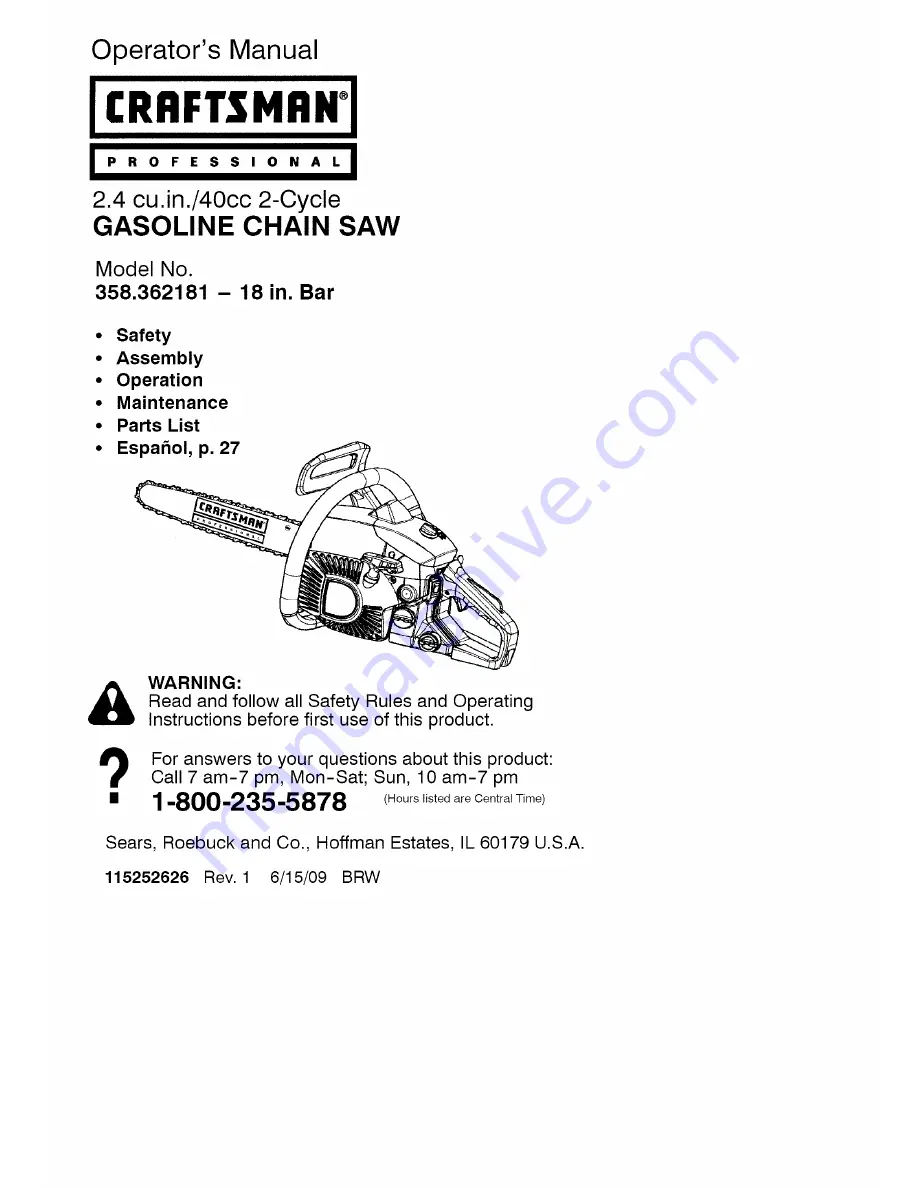
Page 1: ...intenance Parts List Espa_ol p 27 WARNING Read and follow all Safety Rules and Operating Instructions before first use of this product For answers to your questions about this product Call 7 am 7 pm Mon Sat Sun 10 am 7 pm 1 800 235 5878 Hours listed are Central Time Sears Roebuck and Co Hoffman Estates IL 60179 U S A 115252626 Rev 1 6 15 09 BRW ...

Page 2: ...anship Sears will NOT pay for Expendable items that can wear out from normal use within the warranty period such as bars chains filters or spark plugs Repairs necessary because of accident or failure to operate or maintain the product according to all supplied instructions Preventive maintenance or repairs necessary due to improper fuel mixture contaminated or stale fuel This warranty gives you sp...

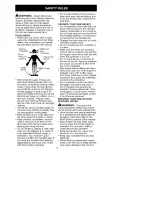
Page 3: ... start cutting until you have a clear work area secure footing and if you are felling trees a planned re treat path OPERATE YOUR SAW SAFELY Do not operate a chain saw with one hand Serious injury to the operator helpers bystanders or any combina tion of these persons may result from one handed operation A chain saw is intended for two handed use Operate the chain saw only in a well ventilated outd...

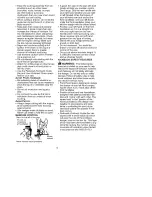
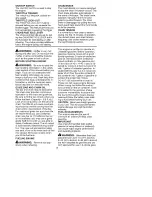
Page 4: ...t reach sparks oropen flames from water heaters electric motors or switches furnaces etc GUARD AGAINST KICKBACK Follow all safety rules to help avoid kickback and other forces which can result in serious injury X__ _ Kickback Path Avoid Obstructions Clear The Working Area _ LWARNING Avoid kickback which can result in serious injury Kickback is the backward upward or sudden forward motion of the gu...

Page 5: ...lp you maintain control Don t let go Grip the rear handle with your right hand whether you are right or left handed Wrap the fingers of your left hand over and around the front handlebar and your left thumb under the front handlebar Keep your left arm straight with the elbow locked Position your left hand on the front handlebar so it is in a straight line with your right hand on the rear handle wh...

Page 6: ...e guide bar may push the guide bar rapidly back toward the operator Either of these reactions may cause you to lose control of the saw which could result in serious injury Do not rely exclusively upon devices built into your saw This unit is not equipped with an anti vibration system and is intended for occasional use only SAFETY NOTICE Exposure to vibra tions through prolonged use of gasoline pow...

Page 7: ...l fuel residue onthe muffler when you unpack the unit ASSEMBLY Your saw isfully assembled no assembly isnecessary KNOW YOUR CHAIN SAW READ THIS OPERATOR S MANUAL AND SAFETY RULES BEFORE OPERATING YOUR CHAIN SAW Compare the illustrations with your unit to familiarize yourself with the location of the various controls and adjustments Save this manual for future ref erence Bar Sprocket 4 Hole Chain F...

Page 8: ... ruin the bar and chain Too little oil will cause overheat ing shown by smoke coming from the chain and or discoloration of the bar For maximum guide bar and chain life we recommend you use Craftsman chain saw bar oil If Craftsman bar oil is not available you may use a good grade SAE 30 oil until you are able to obtain Craftsman brand The oil output is automatically metered during opera tion Your ...

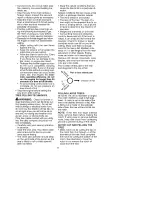
Page 9: ...ntacting any object Starter Rope Handle I Right Foot Through Rear Handle IMPORTANT POINTS TO REMEMBER When pulling the starter rope do not use the full extent of the rope as this can cause the rope to break Do not let starter rope snap back Hold the han dle and let the rope rewind slowly For cold weather starting start the unit at FULL CHOKE allow the engine to warm up before squeezing the throttl...

Page 10: ... be replaced if any part is worn to less than 0 020 0 5 mm thick Repairs on a chain brake should be made by your Sears Service Center Take your unit to the place of purchase or to the near est Sears Service Center This saw is equipped with a chain brake The brake is designed to stop the chain if kickback occurs The inertia activated chain brake is activated if the front hand guard is pushed forwar...

Page 11: ...d a clear area all around the tree so you can have secure footing The chain saw operator should keep on the uphill side of the terrain as the tree is likely to roll or slide downhill after it is felled Study the natural conditions that can cause the tree to fall in a particular di rection Natural conditions that can cause a tree to fall in a particular direction include The wind direction and spee...

Page 12: ... Any portion can roll causing loss of footing and control Do not stand downhill of the log being cut IMPORTANT POINTS Cut only one log at a time Cut shattered wood very carefully sharp pieces of wood could be flung toward operator Use a sawhorse to cut small logs Never allow another person to hold the log while cutting and never hold the log with your leg or foot Do not cut in an area where logs l...

Page 13: ...ot allow the moving chain to contact any other branches or objects at the nose of the guide bar when limbing or pruning Allowing such contact can result in serious injury _ WARNING Never climb into a tree to limb or prune Do not stand on ladders platforms a log or in any posi tion which can cause you to lose your balance or control of the saw IMPORTANT POINTS Work slowly keeping both hands firmly ...

Page 14: ...rs parts _ Check chain tension _ Check chain sharpness _ Check guide bar _ Check fuel mixture level _ Check guide bar and chain oil _ Inspect and clean unit decals Clean cooling system Check chain brake Clean guide bar groove Clean air filter Clean inspect muffler and spark arresting screen Replace spark plug and fuel filter GENERAL RECOMMENDATIONS The warranty on this unit does not cov er items t...

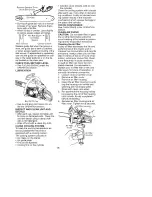
Page 15: ...groove 5 Lift up tip of guide bar to check for sag Release tip of guide bar then turn adjusting screw until sag does not exist 6 While lifting tip of guide bar tighten bar nuts securely with the bar tool 7 Use the screwdriver end of the bar tool to move chain around guide bar 8 If chain does not rotate it is too tight Slightly loosen bar nuts and loosen chain by turning the adjust ing screw 1 4 tu...

Page 16: ...irects cold air over the cylinder Clean the cooling system with a brush after each use more often in demand ing conditions A dirty or blocked cool ing system results in the machine overheating which causes damage to the piston and cylinder CHECK CHAIN BRAKE See CHAIN BRAKE in the OPERATION section CLEAN AIR FILTER CAUTION Do not clean filter in gaso line or other flammable solvent to avoid creatin...

Page 17: ... Pull off the spark plug boot 4 Remove spark plug from cylinder and discard 5 Replace with Champion RZ 7C spark plug and tighten securely with a 3 4 inch 19 mm socket wrench Spark plug gap should be 0 025 inch 0 6 mm 6 Reinstall the spark plug boot 7 Reinstall the cylinder cover and 3 screws Tighten securely oot Air Filter _ _ _ _ _ Cover REPLACE FUEL FILTER To replace fuel filter drain your unit ...

Page 18: ...r the chain you are using Improper hook angle will increase the chance of kickback which can result in serious injury 4 Check and lower depth gauges Depth Gauge Tool _ __ File _ __ Depth Gauge Place gauge tool on cutter If the depth gauge is higher than the deNh gauge tool file it level to the top of the depth gauge tool Maintain rounded front corner of depth gauge with a flat file NOTE The very t...

Page 19: ... Do not tighten any further at this point Proceed to CHAIN AD JUSTMENT CHAIN ADJUSTMENT See CHAIN TENSION in MAINTENANCE section CARBURETOR ADJUSTMENT _IWARNING The chain will be moving during most of this procedure Wear your protective equipment and observe all safety precautions The chain must not move at idle speed The carburetor has been carefully set at the factory Adjustments may be necessar...

Page 20: ...ons found on stabilizer containers Run engine at least 3 minutes after adding stabilizer Craftsman 40 1 2 cycle engine oil air cooled is blended with fuel stabilizer If you do not use this oil you can add a fuel stabilizer to your fuel tank ENGINE Remove spark plug and pour 1 tea spoon of 40 1 2 cycle engine oil air cooled through the spark plug open ing Slowly pull the starter rope 8 to 10 times ...

Page 21: ...uel mixture 3 Clean or replace air filter 4 Contact Sears Service see back cover 5 Contact Sears Service see back cover 1 See Fueling Engine in the Operation section 2 Replace with correct plug 3 Contact Sears Service see back cover 4 Contact Sears Service see back cover 5 Clean spark arresting screen 6 Clean starter housing area 7 Contact Sears Service see back cover Oil inadequate 1 Oil tank emp...

Page 22: ... related part on your engine as listed under Emissions Control Warranty Parts List is defective or a defect in the materials or workmanship of the engine causes the failure of such an emission related part the part will be repaired or re placed by Sears OWNER S WAR RANTY RESPONSIBILITIES As the small off road engine owner you are responsible for the performance of the required maintenance listed i...

Page 23: ...anted parts caused by the use of add on or modified parts HOW TO FILE A CLAIM If you have any ques tions regarding your warranty rights and responsibilities you should con tact your nearest authorized service center call Sears at 1 800 469 4663 or send e mail correspondence to emission warranty HCOP emission corn WHERE TO GET WARRANTY SERVICE Warranty services or re pairs shall be provided at all ...

Page 24: ...ro del periodo de la garantia tal como barras guia cadenas filtros o bujias Reparaciones necesarias debido a accidente o falta de funcionar o de mantener el producto segOn todas las instrucciones provistas Mantenimiento preventivo o reparaciones necesarias debido a mezcla de combus tible incorrecto combustible contaminado o combustible rancio Esta garantia le otorga derechos legales especificos y ...

Page 25: ...aciendo ar rancar el motor No levante ni opere las sierras de ca dena cuando est fatigado enfermo ansioso o si ha tomado alcohol dro gas o remedios Es inprescindible que ud est en buenas condiciones risk casy alerta mentalmente Si ud sufre de cualquier condici6n que pueda em peorar con el trabajo arduo ases6rese con su medico No ponga en marcha la sierra sin ten er un _ rea de trabajo despejada un...

Page 26: ...arada apro piadamente o deber ser reemplaza da por un Centro de Servicio Sears a no ser que se indique de otra for ma en este manual del usuario AI no encontrarse en uso las sierras de cadena deber n almacenarse en un lugar seco en un lugar alto o bajo Ilave fuera del alcance de los niSos AI almacenar la sierra use una fun da o un estuche de carga MANEJE EL COMBUSTIBLE CON EXTREMO CUIDADO No fume ...

Page 27: ... de sorpre sa que contribuye a los accidentes Nunca permita que la cadena en mo vimiento toque ningOn objeto en la punta de la barra guia Mantenga el rea de trabajo libre de obstrucciones como por ejemplo otros rboles ramas piedras cer cas tocones etc Elimine o evite toda obstrucci6nes comp por ejem plo otros rboles ramas piedras cercas tocones etc Elimine o evite toda obstrucci6n que la cadena pu...

Page 28: ...guri dad instrucciones y mantenimiento que se encuentran en este manual para ayudar a evitar las reculadas y otras fuerzas que pueden causar graves heridas Protector de Mano Delantera dise_a do para reducir la probabilidad que su mano izquierda entre en contacto con la cadena si la mano se desprende de la manija delantera La posici6n de las manijas delantera y trasera dise_adas con distancia entre...

Page 29: ... de anti vibraci6n y se disefia si es usado ocasionalmente AVISO SEGURIDAD El estar expuesto a las vibraciones traves del uso prolon gado de herramientas de fuerza a gaso lina puede causar dafios a los vasos sanguineos o a los nervios de los de dos las manos y las coyunturas en aquellas personas que tienen propensi dad a los trastornos de la circulaci6n o a las hinchazonees anormales El uso prolon...

Page 30: ...acar el aparato MONTAJE El aparato viene completamente arma do y no hay necesidad de montaje CONOZCA EL APARATO LEA ESTE MANUAL DEL USUARIO Y I_ASREGLAS DE SEGURIDAD ANTES DE USAR LA SIERRA DE CADENA Compare las ilustraciones con su aparato para familiari zarse con la ubicaci6n de los varios controles y ajutes Guarde este manual para uso futuro Protector de Mano Delantera Cadena Bar Sprocket Hole ...

Page 31: ...an no est dis pondible puede usarse un aceite SAE provee combustible adicional al motor al arrancar frio FRENO DE CADENA El FRENO DE CADENA est diseSado para detener la cadena en caso de re culada El freno de cadena se activa autom ticamente en caso de recula das El freno de cadena se activa manualmente si empujan al protector de mano delantero adelante Para de sactivar el freno de cadena tire Io ...

Page 32: ...esactivar el freno de cadena pars cortar con la sierra _ ADVERTENClA La cadena no debe moverse cuando el motor se en cuentre en marcha inactiva Si la cade na se mueve en marcha inactiva vea la secci6n de AJUSTE AL CARBURADOR en este manual Evite contacto con el silen ciador Un silenciador caliente podria causar quemaduras muy graves PARA PARAR EL MOTOR Suelte el gatillo acelerador Mueva el interru...

Page 33: ...AVlSO Normalmente el procedimiento para arrancar con el motor caliente puede ser utilizado dentro 5 10 minutos despues que el motor se para Si el aparato esta sin funcionar por m s de 10 minutos ser necesario arrancar el aparato siguiendo los pasos abajo PARA ARRANCAR CON MOTOR FRIO o des pues trate los pasos de las instruc ci6nes de como arrancar el aparato ARRANQUE DIFICIL o arranque de motor ah...

Page 34: ...a punta de la bar ra golpee el tocon el freno debe acti varse SUGERENClAS PARA EL USO CORRECTO DEL APARATO Verifique la tensi6n de la cadena antes del primer uso y despues de un minuto de funcionamiento Vea TEN SION DE LA CADENA en la secci6n de MANTENIMIENTO Corte madera t3nicamente No corte metal pl stico ladrillos cemento otros materiales de construcci6n que no sean de madera etc Pare la sierra...

Page 35: ...o para la caida del rbol Manten ga una distancia equivalente a dos veces y medio del larbo del rbol que est cortando entre el rbol y la perso na m s cercana u otros objetos El rui do del motor puede impedir que se es cuchen las advertencias gritadas Retire la tierra las piedras la corteza suelta los clavos las grampas y el alambre que pueda haber en el rbol en el lugar del corte Planifique una rut...

Page 36: ...Corte con sumo cuidado la madera astillada La sierra puede arrojar peda zos punteagudos y filosos hacia el usuario Use un caballete pars cortar troncos pequeSos Nunca permits a otra per sona que sostenga el tronco mientras ud corta ni sostenga el tronco con la pierna o el pie No corte en lugares donde hays tron cos ramas y raices entrelazadas como puede acontecer despues de un vendaval Arrastre lo...

Page 37: ...cortar ramas y podar nunca permi ta que a cadena en movimiento toque ningSn objeto en a punta de a barra guia Permitir ta contacto puede cau sar graves heridas _ ADVERTENClA Nunce trepe a los rbo es para cortar ramas e para podar No se pare sobre esca eras p ataformas troncos ni en ninguna po sici6n que podria causarle que pierda el equilibrio o e control de a sierra PUNTOS IMPORTANTES Trabaje ent...

Page 38: ...es cendiente dejando un toco de 2 5 a 5 cm 1 a 2 pulgada sobresaliendo del tronco del rbol I A_ r Seg dooo t y Teroer oorte I_ _ 7 RESPONSABILIDADES DEL USUARIO _ ADVERTENClA Desconecte la bujia antes de hacer cualquier mantenimiento con la excepci6n de los ajustes al carburador Anote las fechas al completar el servicio de rutina Verifiique que no haya piezas dahadas gastadas Verifique que no hay ...

Page 39: ...e Tornillos de las Manijas Fijadores Anti Vibraci6n Caja del Arranque Protector de Mano Delantera VERIFIQUE LA TENSION DE LA CADENA _ADVERTENClA Use guantes protectores al manejar la cadena La cadena tiene filo y podria causarle graves cortaduras aun cuando esta no se encuentre en movimiento La tensi6n de la cadena es muy impor tante Estiramientos de la cadena du rante uso Esto es especialmente ve...

Page 40: ... la barra y del orificio del engranaje Para mantener la barra guia Coloque el interruptor ON STOP en po sici6n STOR Afloje y retire las tuercas del freno de cadena y el freno de cadena Retire la barra y la cadena del aparato Limpie los orificios del aceite y el ranu ra de la barra despues de cada 5 ho ras de la operaci6n Retire el Aserrin de la _ Ranura de It2a__ _ _ 1_ i 0rificios deI aceite _ Lo...

Page 41: ... nuevo despues du cada 50 horas de uso o anualmente Io que acontezca primero Para limpiar el filtro 1 Afloje la perilla en la cubierta del filtro de aire 2 Remueva la cubierta del filtro de aire 3 Remueva la caja del filtro de aire 4 Limpie la caja del filtro de aire divi diendo la caja en mitades y lavado con agua caliente y jab6n Enjua gue bien con agua clara y fria 5 Vuelva a montar las mitades...

Page 42: ...plazo _ LADVERTENClA Desconecte la bujia antes de realizar mantenimiento servicio o ajustes excepto de ajustes del carburador AFILACION DE LA CADENA _ LADVERTENClA Las tecnicas de afilado de la cadena y o el manten imiento del marcador de profundidad incorrectos aumentan las probabili dades de reculadas que pueden pro ducir lesiones graves _ LADVERTENClA Use guantes protectores al manejar la caden...

Page 43: ...bre la euehilla Si el marcador de prolundidad es mils alto que la herramienta mar eadora de profundidad limelo para nivelarlo con la parte superi or de la herramienta marcadora Mantenga redondeada la esquina delantera del marcador de pro Iundidad con una lima plana AVISO El extremo superior del mareador de profundidad debe ser parejo con la mitad delantera redondeada con una lima plana Si neeesita...

Page 44: ... detr s del embrague poner las esla bones de funcionamiento en el cilin dro del embrague 9 Coloque los eslabones de propul si6n entre los dientes de la engra naje en la punta de la barra 10 Coloque los eslabones de propul si6n en la ranura de la barra 11 Tire la barra hacia adelante hasta que la cadena quede tirante en la ranura de la barra Asegure todas las eslabones de propulsi6n est n en el ran...

Page 45: ...una pequeha cantidad de aceite alas superficies externas met licas y a la barra guia Lubrique la cadena y envuelvala en papel grueso o en tela SlSTEMA DE COMBUSTIBLE Vacie el sistema de combustible antes de almacenar el aparato por 30 dias o m s Vacie el tanque de combustible ponga el motor en marcha y dejelo en marcha hasta que las lineas de com bustible y el carburador esten vacios Use combustib...

Page 46: ...e ajuste 5 El carter esta perdiendo SOLUClON 1 Coloque el interruptoren ON 2 Vea Arranque Dificil en la secci6n Uso 3 Llene el tanque con la mezcla correcta de combustible 4 Instale una bujia nueva 5 Verifique si el filtro de combustible est sucio limpielo Verifique si hay dobleces en la linea de combustible o siesta partida rep_trla o c mbiela 6 Entre en contacto con el Servicio Sears vea parte t...

Page 47: ...barra est tapado La marcha lenta requiere ajuste El embrague reauiere reparaciones La cadena est demasiado tensionada El carburador requiere ajuste Los rieles de la barra guia est n apretados El deslizarse de embrague La freno de cadena es activado La Cadena est incorrectamente tensionada Las cuchillas est n daSadas La cadena est gastada Las cuchillas est n desafiladas o mal afiladas o los medidor...

Page 48: ...so fuera de carretera no haya sufrido ningt3n tipo de abuso negligencia o mantenimiento inapropiado Su sistema de control de emisi6n incluye piezas tales como el carburador el sistema de ignici6n y el tanque de combustible Donde exista una condici6n que re quiera reparaci6n bajo garantia Sears reparar gratis su motor pequeSo para uso fuera de carretera Los gatos cu biertos bajo la garantia incluye...

Page 49: ...e diagn6stico la cual determine que una pieza garantiza da se encuentra defectuosa si el trabajo de diagn6stico ha sido desempefiado por un Centro de Servicio Sears DANOS POR CONSECUEClA Sears podr ser responsable de dafios ocurri dos a otras piezas del motor causados por la falla de una pieza garantizada que se encuentre bajo el periodo de ga rantia QUE NO CUBRE LA GARAN TIA Todas las fallas caus...

Page 50: ...isface las regulaciones de emision para mo tores peque_os operados fuera de la carretera Familia De Serie Horas de la durabilidad del motor Vea el manual de instrucciones para especificaciones de mantenimiento y ajustes 61 I sl I Se certifica este motor para satisfacer los requisitos de emisi6n para los uso siguientes Moderado 50 horas Intermedio 125 horas Extendido 300 horas 53 ...

Page 51: ...54 ...

Page 52: ...55 ...

Reviews: