background image

Summary of Contents for 390.2532

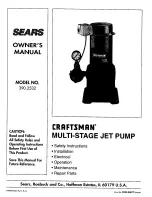
Page 1: ...ating Instructions BeforeFirstUse of ThisProduct Save ThisManual For FutureReference I RRFTIMRN MULTI STAGE JET PUMP Safety Instructions Installation Electrical Operation Maintenance Repair Parts Sears Roebuck and Co Hoffman Estates IL 60179 U S A PRINTED IN U S A Form No F642 040T7 8 6 04 ...

Page 2: ... to hazards 1 To avoid risk of serious bodily injury and property damage read safety instructions carefully before in stalling pump 2 Follow local and or national plumbing and electri cal codes when installing pump 3 Keep well covered while installing pump to prevent leaves and other debris from falling into well con taminating well and possibly damaging pump 4 Protect pump and piping system from ...

Page 3: ... the tank drops to 40 pounds per square inch PSI and stops the pump when the tank pressure reaches 60 PSI Adapter Flange The VMS pump is equipped with an adapter flange This adapter facilitates installation and removal of the pump without disturbing piping See Pages 6 and 7 for more information Pressure Relief Valve Under certain conditions VMS pumps can generate very high pressure The pressure re...

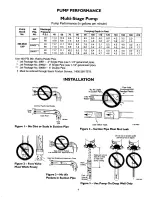
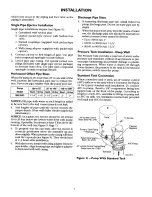
Page 4: ... 9 5 8 6 7 8 6 6 5 4 4 7 4 6 4 2 3 4 2 6 1 7 Use 160 PSI Min Rating Plastic Pipe Jet Package No 2967 2 Single Pipe use 1 1 4 galvanized pipe Jet Package No 29902 3 Single Pipe use 1 1 4 galvanized pipe Jet Package No 29660 4 Double Pipe t Must be ordered through Sears Product Service 1 800 366 7278 INSTALLATION Use New Pipe for Best Results Clean FJow 1096 0697 From Well Figure I No Dirt or Scale ...

Page 5: ...wells or double pipe 4 and larger wells In a dou ble pipe installation the larger pipe is the suction pipe and the smaller pipe is the drive pipe very deep wells may use suction and drive pipes of the same diameter Plastic pipe is ideal for double pipe instaUations Due to its light weight it is easy to handle and does not usually require a block and tackle for instaUation and removal Double Pipe I...

Page 6: ...ounted on Casing 12 Remove paper backing from adhesive gasket Apply gasket to adapter flange making sure that holes line up 13 Align locating lugs on pump base with locating lugs on adapter flange attach pump to flange with cap screws provided 14 See Discharge Pipe Sizes for information regard hag correct discharge pipe size Steel Piping The special adapter nipple is not used with steel piping To ...

Page 7: ...and down slightly Water pressure in the casing will then soak the cup seals see Figure 9 They should seal in 2 3 hours after installation 5 With ejector set install well casing adapter Remove pipe holder Align locating lugs and tighten adapter to form seal with well casing Discharge Pipe Sizes 1 If increasing discharge pipe size install reducer in pump discharge port Do not increase pipe size by s...

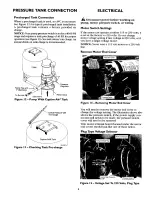
Page 8: ...motor voltage setting if line voltage is 230 volts or if you have a single voltage motor NOTICE Never wire a 115 volt motor to a 230 volt line Remove Motor End Cover Pressure Regulator Piping Tee and 1 Discharge To Service 2358b0697nc Relief Valve Figure 12 Pump With Captive Air Tank Check Pressure with Tire Gauge Figure 14 Removing Motor End Cover You will need to remove the motor end cover to ch...

Page 9: ...in the dial window 3 Reinstall the Motor end cover 4 Go to Wiring Connections below _ WARNING Hazardous voltage Can shock burn or kill Connect ground wire before connecting power supply wires Use the wire size including the ground wire specified in the wiring chart If possible connect the pump to a separate branch cir cuit with no other appliances on it IAwARNING Explosion hazard Do not ground to ...

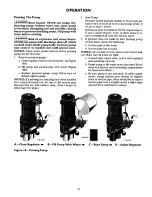
Page 10: ... 2 Start Pinup Pressure should increase rapidly to 50 pounds per square inch or more as ejector and pump prime If so go to step 4 below lf pressure does not build to 50PSI repeat steps a b and c under Step No 1 two or three times to re move entrapped air from the suction pipes 3 If pressure does not build up after priming pump several times check the following a Suction pipe in the water b Suction...

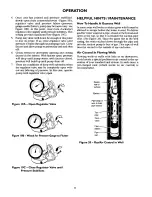
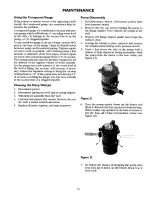
Page 11: ...any faltering of pressure In this case operate pump with regulator valve open Figure 19A Open Regulator Valve Figure 19B Watch for Pressure Gauge to Flutter HELPFUL HINTS MAINTENANCE How To Handle A Gaseous Well In some areas well water contains gases which must be allowed to escape before the water is used To deliver gas free water suspend a pipe closed at the bottom and open at the top so that i...

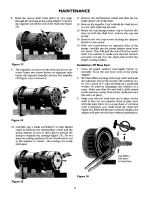
Page 12: ...ccording the gauge you may have air leaks in the suction line or a clogged impeller Cleaning the Deep Well Jet 1 Disconnect power 2 Disconnect piping and well seal or casing adapter 3 Vc_tthdraw jet assembly from the well 4 Unscrew and remove the venturi Remove the noz zle with a socket wrench and clean 5 Replace all parts reprime and turn on power Pump Diassembly 1 Pull disconnect switch Disconne...

Page 13: ...e shaft s sealing surface Installation Of New Seal 1 Clean all gasket surfaces thoroughly before re assembly Clean the seal bore cavity in the pump adapter 2 Wet the rubber seat ring with soapy water and push the stationary part of the seal into the seal bore cav ity Use a piece of 1 pipe pressing on a cardboard washer to prevent damaging seal surface as a press Make sure that the seal half is ful...

Page 14: ...s and install and tighten the impeller locknut Tightening the lock nut automatically spaces the im peller correctly Do not overtighten 11 Install the base volute gasket Make sure thegasket is rl_ht side up so that the waterpassage holes line up with the water passages in the volutes Install the base volute using the alignment marks made before disassembly Make sure that the pump dis charge will co...

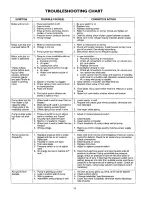
Page 15: ...ed and has no air cushion 2 Pipes leak 3 Faucets or valves are open 4 Foot valve leaks 5 Pressure switch is out of adjust ment 6 Air charge too low in Captive Air _ tank 1 Pump is picking up prime 2 Leak in suction side of pump 3 Well is gaseous 4 Intermittent overpumping of well 2 3 4 5 6 In new installation a Re prime according to instructions b Check all connections on suction line air volume c...

Page 16: ...Switch Tube 14 1 2 Pressure Regulator Assembly Adapter Capscrew 3 8 16x1 1 4 Lg 2 Req Shaft Key 2 Req Seal Shaft Spring Holder Impeller 2 Req Spacer Impeller Intermediate Volute w Wear Rings Gasket 2 Req Wear Ring 2 Req Wear Ring Impeller Nut Base Volute w Wear Ring Pipe Plug 1 4 NPT Capscrew 3 8 16x4 1 4 Lg 4 Req Standardhardware item may be purchasedlocally Notmailable specify freightorexpress F...

Page 17: ...sure Regulator Body w Seat Barbed Fitting Elbow Valve Seat Diaphragm Assembly Regulator Guide Stem Diaphragm Spring Follower Lock Washer Nut 1 4 20 Reducer Bushing 1 2xl 8 NPT Pressure Gauge 0 100_f Spring Spring Guide Bonnet Capscrew 5 16 18x3 4 Lg 4 Req Adjusting Screw 5 16 18x2 Locknut 5 16 18 Standard hardware item may be purchased locally For repair or serviceto motors always givethe Motor Mo...

Page 18: ... 2 13 x1 1 4 Long Capscrew 2 Req Standard Hardware Item may be purchasedlocally Repair Parts List Casing Adapters J216 13 J216 14 2 3 Key No 1 2 3 4 5 6 7 8 9 U30 282ZP J16 19ZZP J21 19 J21 18 J51 1ZZP U30 277ZP J21 17 J16 2077p U36 38ZP U30 282ZP J16 23ZZ J21 19 J21 18 J51 3ZZ U30 277ZP J21 21 J 16 24ZZP U36 38ZP Part Description 3 8 16x5 Long Machine Bolt 2 Req Upper Flange Seal Ring Drive Pipe ...

Page 19: ...ts J32P 24 J32P 18 J34P 42 J40 25 J57 3 J43 16 J43 20C J161 3 J66 14 J37 4 J216 14 U37 116GP 29660 4 Double Pipe Jets J32P 24 J32P 18 J34P 42 N40 92 N212 12P L8 1P U11 104P Part Description Venturi Venturi Nozzle Jet Body Packer Leathers 2 Req Spacer Washer Check Valve Valve Seat Turned Coupling 11 included 1 NPT Offset Nipple Strainer Plastic Pipe Adapter Casing Adapter 1 x 6 T O E Nipple Pump Mo...

Page 20: ...partsyouneed Call 7 am 7 pm 7 daysa week 1 800 366 PART 1 800 360 7278 Forin homemajorbrandrepairservice Call24 hoursa day 7 daysa week 1 800 4 REPAIR 1 800 473 7247 Forthe location of a SearsRepairServiceCenterin yourarea Call24 hours a day 7 daysa week 1 800 488 1222 ForInformation onpurchasing u Sears MaintenanceAgreement or to inquire aboutan existingAgreement call 9 am 5 pm Monday Saturday 1 ...

Reviews: