background image

Summary of Contents for 580.329130

Page 1: ... m to 5 p m CT CAUTION Before using this product read this manual and follow all its Safety Rules and Operating Instructions Sears Roebuck and Co Hoffman Estates IL 60179 Visit our Craftsman website www sears com craftsman Part No 187144 Draft 0 9 6 2000 Safety Assembly Operation Maintenance Parts Espahol ...

Page 2: ...by him This warranty does not cover normal maintenance and service and does not apply to a generator set alternator or engine or parts which have been subjected to improper or unauthorized installation or alteration misuse negligence accident overloading overspeeding improper maintenance repair or storage so as in SEARS s judgment to adversely affect its performance and reliability NORMAL WEAR As ...

Page 3: ...lt Read Cold Weather Operation on page 7 Gasoline is highly FLAMMABLE and its vapors are EXPLOSIVE Do Not permit smoking open flames sparks or heat in the vicinity while handling gasoline Avoid spilling gasoline on a hot engine Comply with all laws regulating storage and handling of gasoline Do Not overfill the fuel tank Always allow room for fuel expansion If tank is overfilled fuel can overflow ...

Page 4: ...mp Locking Receptacle May be used to supply electrical power for the operation of 120 Volt AC at 30 Amp single phase 60 Hz electrical lighting appliance tool and motor loads 120 240 Volt AC 20 Amp Receptacle May be used to supply electrical power for the operation of 120 and or 240 Volt AC 20 Amp single phase 60 Hz electrical lighting appliance tool and motor loads Air Cleaner Filters air as it is...

Page 5: ...number of 120 Volt loads powered through these receptacles should not exceed 20 Amps 120 240 Volt AC 20 Amp Receptacle This is a full capacity receptacle which means you can take the generator s full rated wattage from this single receptacle The outlet is protected by a 20 Amp push to reset circuit breaker 4 Wire Cord Set 240V qF 120V _ 120V _ Neutral i Y P_ot _ X Hot NEMA L14 20 I 7 _rr Uenn_ As ...

Page 6: ...etc improve starting in cold weather these multi viscosity oils will result in increased oil consumption when used above 32 F Check your engine oil level more frequently to avoid possible damage from running low on oil Place generator on a level surface Clean area around yellow oil fill cap Remove the oil fill cap Slowly fill engine with oil through the oil fill opening until the oil level is to t...

Page 7: ... clearance between open side of box and nearest object Cut appropriate slots to access receptacles and clear handles Start unit then place box over it 4 Grasp the recoil handle and pull slowly until slight resistance is felt Then pull rapidly one time only to start engine If engine starts proceed to step 6 If engine fails to start proceed to step 5 5 Move the choke lever to Half choke position and...

Page 8: ... and have not corrected the low oil pressure the engine runs for about 10 seconds as described above and then stops If the appliance tool or motor does not give wattage multiply volts times ampere rating to determine watts volts x amps watts Some electric motors such as induction types require about three times more watts of power for starting than for running This surge of power lasts only a few ...

Page 9: ...egligence To receive full value from the warranty operator must maintain Generator as instructed inthis manual Some adjustmentswill need to be made periodically to properlymaintain your generator All adjustmentsin the Service and Adjustments section of this manual should be made at least once each season Followthe requirements inthe Maintenance Schedule chart above NOTE Once a year you should clea...

Page 10: ... first This will help your engine to start easier and run better Replace with recommended spark plug as follows Clean area around spark plug then remove and inspect it Replace spark plug if electrodes are pitted burned or porcelain is cracked Check new spark plug electrode gap with wire feeler gauge and set gap to 0 030 inch 0 76mm Retorque Head Bolts After 50 hours of operation retorque the head ...

Page 11: ...e valve stem with a feeler gauge Correct clearance is 0 002 0 004 inch 0 05 0 1mm NOTE You must hold the rocker arm jam nut in place as you turn the pivot ball stud Feeler Allen Wrench Gauge Loosen Jam Nut MUFFLER HEAT SHIELD Remove four screws that attach the spark arrester screen Inspect screen and replace if torn perforated or otherwise damaged Do Not use a defective screen If screen is not dam...

Page 12: ... away from open flame Be sure engine is cool Do Not smoke Protect Fuel System Remove all gasoline from the fuel tank to prevent gum deposits from forming on these parts and causing possible malfunction of engine Run engine until engine stops from lack of fuel Engine Change Oil While engine is still warm drain oil from crankcase Refill with recommended grade Oil Cylinder Bore _ CAUTION Avoid spray ...

Page 13: ...Out of gasoline 2 Low oil level 1 Load is too high 2 Dirty air filter 1 Choke is opened too soon Carburetor is running too rich or too lean Correction 1 Reset circuit breaker 2 Contact Sears service facility 3 Check and repair 4 Connect another device that is in good condition 1 Disconnect shorted electrical load 2 Contact Sears service facility 3 See Don t Overload the Generator page 8 4 Contact ...

Page 14: ... 580 329130 BRIDGE F___ TIFIER BLUE 2 _X__ RED 6 I EXCITATION FIELD 4 SLUE POWER RED POWER GRAY I I 4 4 o _ h I _ _o _ 3oA _ _ W2oA _u__LI_ _J_ 11A _ llL 120 _ 22 GRAY L I g1 _ RAY J20A 22 _ I T _LLE LUE GR _ 120F F N _ 120 240 V _ 14 ...

Page 15: ... _BLUE GRAY_ GRAY IIA 44A 44 BLUE illS REDI I _RED I 22 GF GRAY 22 I z L BLUE llB B_W OST GREE BE BROKEN OFF BLUE O liB RE BLUE RED 88 CB 3OA BLU_ BLUE IIA if I IIA I RED 2 4 12OV 30A BLUE IIA BLUE ll GRAY 44 NOTE POSITIVE BRUSH 13 CLOBEST TO BEARING BLU E 15 ...

Page 16: ...CRAFTSMAN 3800 Watt AC Generator 580 329130 Main Unit Exploded View I 52 49 58 54 6 DETAIL X 900 SEE DETAIL Y 22 32 39 3O 35 38 33 29 57 28 36 27 21 5 8 18 34 17 6 59 16 6O 12 DETAIL Y 16 ...

Page 17: ...5 x 20 53 85000 1 GASKET Exhaust 54 14353621 1 SCREEN Spark Arrester 55 23762 1 DECAL Fuel Shut Off 56 26850 1 DECAL Control Panel 57 187162 1 PIN M4 x 10 Roll 58 92982 3 PPHMS M8 1 25 x 35 59 AB3061 1 CARRIER Rear Bearing 60 187144 2 MOUNT Vibration 900 NSP 9 NUT M8 Flanged Serrated 1 DECAL 1 800 4 MyHome 1 DECAL Ground 4 TAPTITE M5 0 8 x 10 4 SCREW 12 Self Drilling 4 BOLT M6 1 0 x 115 Stator 1 G...

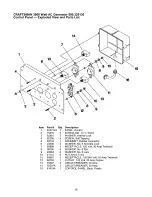
Page 18: ...715 68867 68759 75207 75207A 81919A Qty 1 6 3 4 1 6 1 6 6 6 1 1 2 1 1 Description PANEL Control SCREW M4 0 7 x 10mm WASHER Internal Lock SCREW Self Tapping GROMMET Rubber Connector WASHER No 8 Serrated Lock RECEPTACLE 120 Volt 30 Amp Twistlock WASHER No 8 Flat WASHER No 8 Lock NUT M4 0 7 Hex RECEPTACLE 120 240 Volt 20 Amp Twistlock OUTLET 120 Volt 20 Amp Duplex CIRCUIT BREAKER 20 Amp CIRCUIT BREAK...

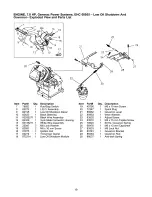
Page 19: ...bly Low Oil Shutdown Decal Black Sleeving Black Wire Assembly 3 pin Male Connector Housing White Wire Assembly M6 Lock Washer M6 x 30 mm Screw Ignition Coil Tinnerman Clamp Low Oil Shutdown Module Item Part Qty Description 19 45756 1 M6 x 10 mm Screw 20 72347 1 Spark Plug 21 86962 1 Governor Lever 22 85953 1 Wear Washer 23 83502 1 Adjust Screw 24 83512 1 M8 x 15 mm Taptite Screw 25 78604 1 60 Hz G...

Page 20: ...78 82774 1 Woodruff Key 79 77182E 1 Flywheel 80 83312 1 Conical Washer 81 81810 1 M16 Hex Nut 82 92984 1 Top Wrapper 83 45756 4 M6 x 10 mm Screw 84 78609 2 Cover Bolt 85 78608A 1 Air Box Cover 86 90695A 1 Blower Housing 87 89739 1 Lower Wrapper 88 66476 9 M6 x 12 mm Capscrew 89 A2799 1 Recoil Assembly 90 A2842 1 Recoil Cup 91 78651C 1 Backplate 20 ...

Page 21: ...1 Oil Filter Gasket 1 Oil Filter Adapter 2 M6 x 20 mm Screw 1 Oil Pressure Switch 1 Oil Filter 1 Breather Hose 1 Manifold Head Gasket 2 M6 x 30 mm Screw 1 Intake Manifold 1 Air Box Gasket 1 Canal Cover Item 42 43 44 45 46 47 48 49 50 51 Part Qty Description 78631 1 Manifold Gasket 97747 1 Carburetor 78607 1 Air Cleaner Base 66476 1 M6 x 12 mm Capscrew 59635 1 8 x 3 8 Plastite Screw 78601 1 Air Fil...

Page 22: ...nor Spool 1 8 NPT Pipe Plug Camshaft Assembly Crankcase Gasket Valve Stem Seal Cylinder Head Gasket Oil Pressure Relief Cover Oil Pressure Spring 5 16 Ball M5 Form Screw 24 Item PaN Qty 26 78606 4 27 76361 1 28 89230 6 29 99922 1 30 A1720 2 31 88401 2 32 84186 2 33 83192 1 34 86254 1 36 21705B 1 37 90082 1 38 90081 1 39 88396A 2 40 83235 2 41 80336 1 42 96362 1 43 77161 2 44 77160 2 45 76307 2 46 ...

Page 23: ... is scheduled only for regular inspection to the effect of repair or replace as necessary shall be warranted for 2 years Any warranted part which is scheduled for replacement as required maintenance shall be warranted for the period of time up to the first scheduled replacement point for that part Diagnosis The owner shall not be charged for diagnostic labor which leads to the determination that t...

Page 24: ...o sujetas a instalaci6n a alteraci6n inadecuadads o desautorizadas abuso negligencia accidentes sobrecarga velocidad excesiva mantenimiento reparciones o almacenamiento inadecuados de modo que en la opini6n de SEARS afecten adversamente su rendimiento y confiabilidad Degaste Normal Como con todos los aparatos el6ctricos los motores necesitan servicio y reemplazo peri6dico para que den buen rendimi...

Page 25: ...biertas chispas o calor a su alrededor cuando manipule gasolina Evite regar gasolina sobre un motor caliente Cumpla con todas las regulaciones que requieran almacenamiento y manejo de gasolina No Ilene el tanque de combustible excesivamente Siempre permita que exista espacio para la expansi6n del combustible Si el tanque est demasiado Ileno el combustible podria rebosarse y caer sobre el motor cal...

Page 26: ... de Marcha Parado Deber estar en la posici6n Run Marcha para darle arranque al motor Col6quelo en la posici6n Stop Parado para detener un motor en funcionamiento Palanca del Cebador Usada cuando se est dando arranque a un motor frfo Silenciador Apagachispas El silenciador disminuye el ruido del motor y est equipado con una pantalla apagachispas Tanque de Combustible Capacidad en los 4 galones U S ...

Page 27: ...ispositivos para las recomendaciones del fabricante Mantenga los cordones de extensi6n Io m s corto posible preferiblemente menos de 15 pies de largo para evitar la caida de voltaje y posible recalentamiento de los alambres Tomacorriente de 120 240 Voltios AC 20 Amperios Este tomacorriente es del tipo NEMA L14 20 y est_ protegido por cortacircuito con dispositivo de reposici6n _ 240V _ 120V _ 120V...

Page 28: ...ra de funcionamiento que espera tener No use 10W 40 Por encima de 40 F use SAE 10W 30 o SAE 30 Por debajo de 40 F use sint6tico 5W 20 o 5W 30 mm m b _lriH _jill iI ilkvAl ll _ I l i_vAlBtflj F 20 0 20 32 40 60 80 100 c 0 2 o Jo O 1 o 2 0 4 o Temperaturas de Uso Esperadas A pesar de que los aceites de m61tiple viscosidad 5W30 10W30 etc mejoran el arranque en clima frio estos pueden producir un aume...

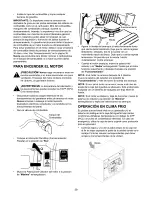
Page 29: ...el Combustible Coloque el interruptor Run Stop Funcionamiento Parada en la posici6n de Run M xima Funcionamiento Media Agarre la manija del arranque y halela lentamente hasta que sienta cierta resistencia Deje que la cuerda regrese lentamente Despu6s tire de la cuerda con un movimiento r pido del brazo Deje que la cuerda regrese lentamente No permita que la cuerda rebote violentamente contra arran...

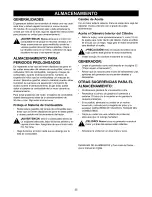
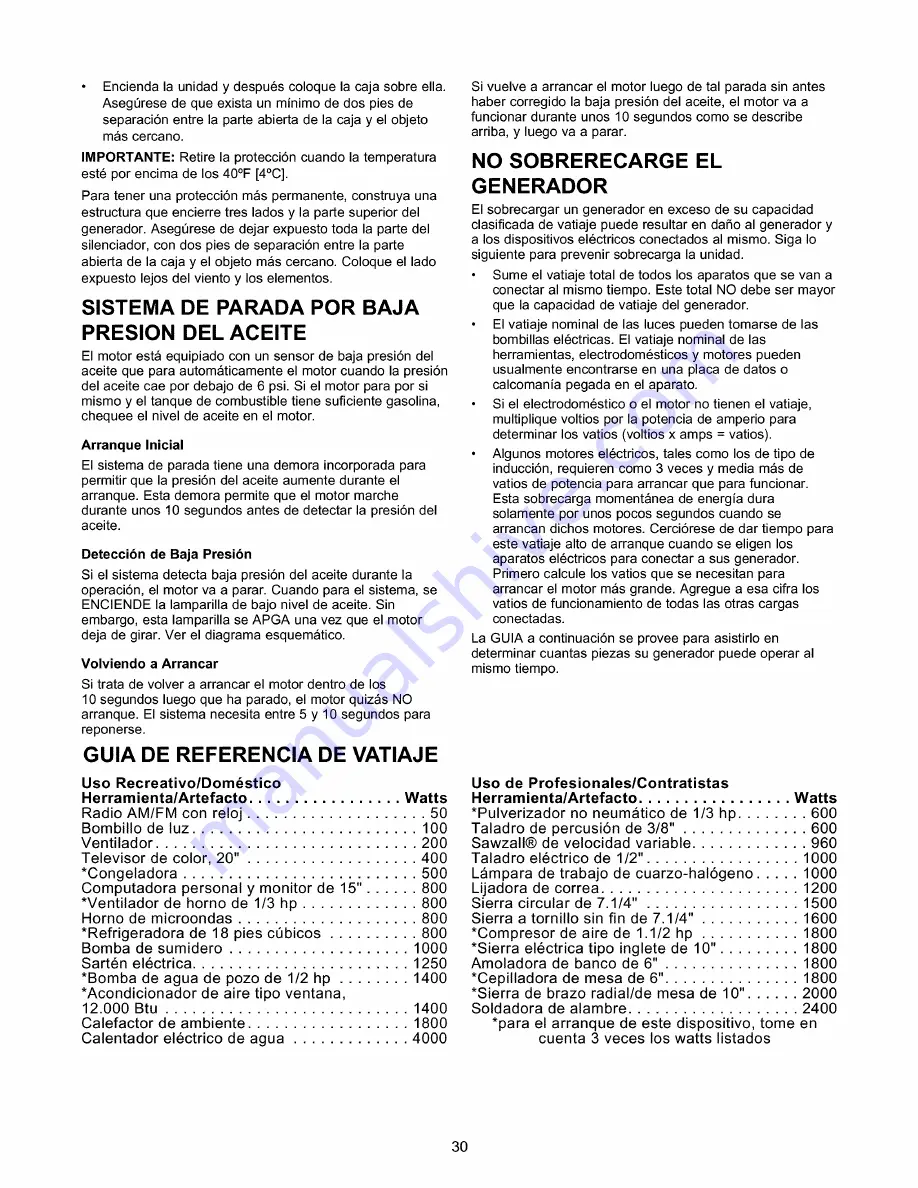
Page 30: ...Calentador el_ctrico de agua 4000 Si vuelve a arrancar el motor luego de tal parada sin antes haber corregido la baja presi6n del aceite el motor va a funcionar durante unos 10 segundos como se describe arriba y luego va a parar NO SOBRERECARGE EL GENERADOR El sobrecargar un generador en exceso de su capacidad clasificada de vatiaje puede resultar en daSo al generador y a los dispositivos el6ctric...

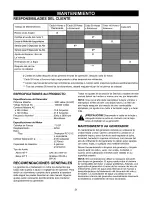
Page 31: ...to de la garantfa el operador debe seguir las pautas descritas en este manual Algunos ajustes ser n necesarios peri6dicamente para mantener apropiadamente su generador Todos los ajustes de la secci6n de Servicio y Ajustes de este manual deben ser hechos al menos una vez por temporada NOTA Una vez al aSo debe reemplazar la bujfa y limpiar o reemplazar el filtro de aire Una bujfa nueva y un filtro d...

Page 32: ...por debajo del filtro de aceite y retire el filtro gir ndolo en sentido contrario a las manecillas del reloj Desc rtelo cumpliendo con las leyes locales Cubra con aceite de motor el empaque del filtro nuevo Gire el filtro en sentido de las manecillas del reloj hasta que el empaque se ponga en estrecho contacto con el adaptador del filtro Despu6s apriete 3 4 de vuelta m s Llene con el aceite recome...

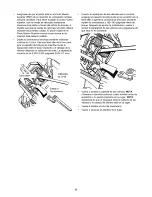
Page 33: ...agachispas El silenciador del escape del motor posee una pantalla apagachispas Inspeccione y limpie la pantalla cada 100 horas de operaci6n o una vez al aSo Io que suceda primero NOTA El generador tendr que tener un apagachispas si Io usa en terrenos no tratados cubiertos de monte maleza o pasto El apagachispas deber ser mantenido en buenas condiciones por parte del propietario operador Limpie e i...

Page 34: ... lvula utilizando un calibrador de cinta La separaci6n correcta es de 0 002 0 004 pulgadas 0 05 0 1 mm Calibrador Llave Allen de Cinta _ Suelte la Contratuerca Cuando la separaci6n de las v lvulas sea la correcta sostenga el pasador de bola pivote en su posici6n con la Ilave allen y apriete la contratuerca del brazo oscilante Apriete la contratuerca a 165 183 pulgadas libras de torque Despu6s de a...

Page 35: ...onamiento del motor _ iADVERTENCIA Drene el combustible dentro de un recipiente adecuado lejos de llamas abiertas yen lugares al aire libre AsegQrese de que el motor est6 frfo No fume Haga funcionar el motor hasta que se detenga por la falta de combustible Cambio de Aceite Con el motor todavfa caliente drene el aceite de la caja del cigQeSal Vuelva a Ilenarlo con el grado de aceite recomendado Ace...

Page 36: ...36 ...

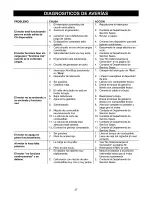
Page 37: ...e gasolina II_nelo con combustible fresco 5 Conecte el cable a la bujia El motor no se enciende o se enciende y funciona mal 7 8 9 10 11 malas la bujia Bujia defectuosa Agua en la gasolina Sobrecebado Mezcla de combustible excesivamente rica La v_lvula de corte de combustible La v_lvula de entrada est atascada est cerrada 6 Reemplace la bujia 7 Drene el tanque de gasolina 116nelocon combustible fr...

Page 38: ...38 ...

Page 39: ...ales y mane de obra que puedan causar falla de la parte garantizada per un perfodo de dos aSos QUE ESTA CUBIERTO Reparacibn o Remplazo de Partes La reparaci6n o el remplazo de cualquier parte garantizada se realizara sin ningSn costo para el propietario en un centro de servicio aprobado Sears Si tiene preguntas acerca de sus responsabilidades y derechos de garantfa debera ponerse en contacto con s...

Page 40: ...pieces For the repair or replacement parts you need Call 7 am 7 pm 7 days a week 1 800 366 PART 1 800 366 7278 Para ordenar piezas con entrega a domicilio 1 800 659 7084 For the location of a Sears Parts and Repair Center in your area Call 24 hours a day 7 days a week 1 800 488 1222 For information on purchasing a Sears maintenance Agreement or to inquire about an existing Agreement Call 9 am 5 pm...

Reviews: