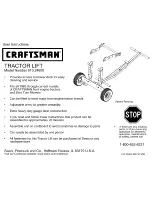
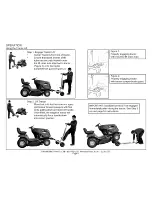
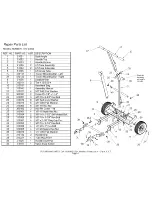
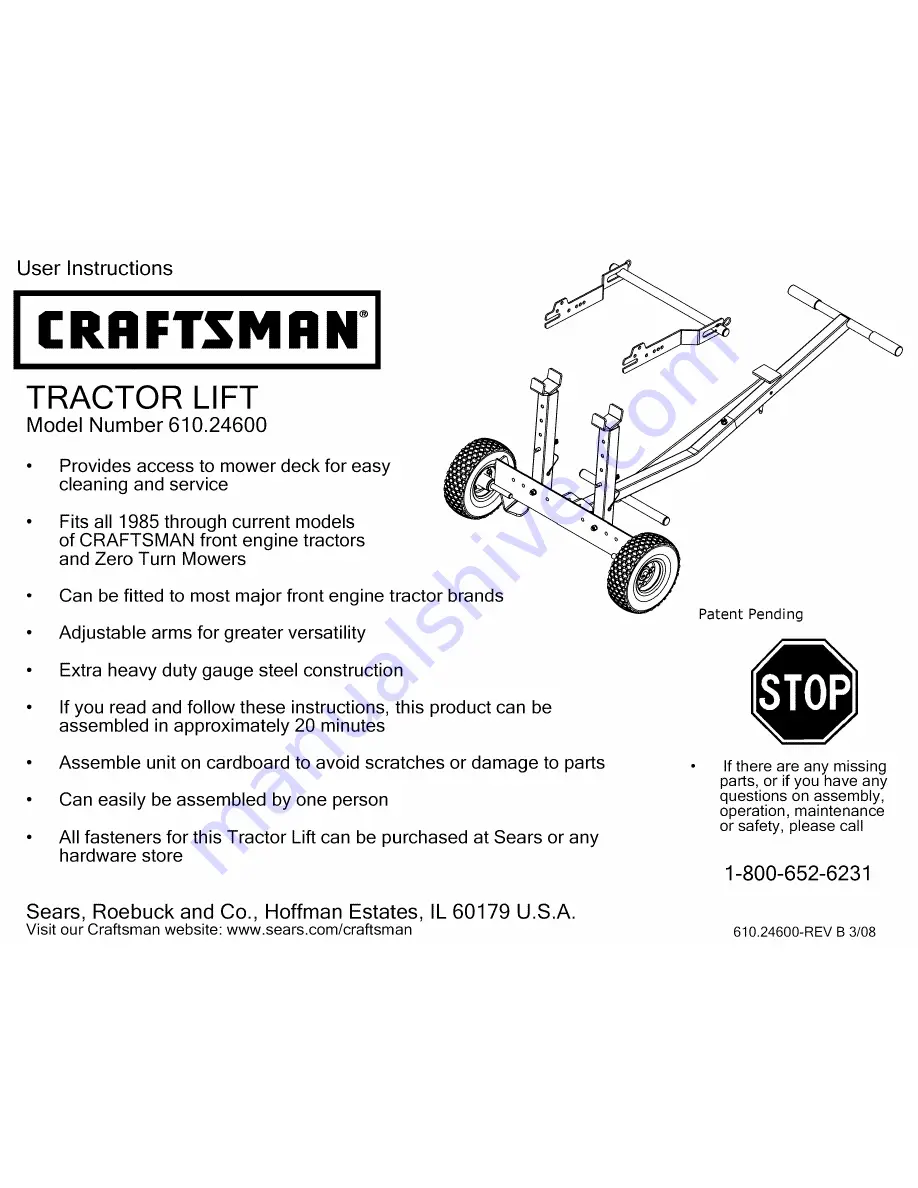
background image

Summary of Contents for 610.24600

Page 1: ...you read and follow these instructions this product can be assembled in approximately 20 minutes Assemble unit on cardboard to avoid scratches or damage to parts Can easily be assembled by one person All fasteners for this Tractor Lift can be purchased at Sears or any hardware store Patent Pending If there are any missing parts or if you have any questions on assembly operation maintenance or safe...

Page 2: ... damage and or serious bodily injury SAFETY INSTRUCTIONS Be sure to read and follow all safety instructions and warnings Failure to follow these instructions may result in damage to the product and or serious personal injury Danger of serious personal injury exists Serious personal injury can occur when using a lifting device Never attempt to ride any vehicle up or down the tractor lift Do not cli...

Page 3: ...11 1 310041 Assembly Manual OPERATION Tractor Lift can be used out of the box on all Craftsman tractors with bumpers or brush guards Tractor Lift mounting hardware is provided if your tractor does not have a bumper or brush guard TOOLS REQUIRED FOR ASSEMBLY 9 16 Wrench and or Socket Adjustable wrench MAINTENANCE Store unit in a clean dry place Recommended tire pressure 30 PSI Before each use Alway...

Page 4: ...Washer 3 8 USS Flat Washer 3 8 16 H ex Nut Hair Pin Cotter 148 D ia 3 8 16 l _ylok Hex Nut 3 8 16 x 1 1 2 Self thread Bolt REF NO QTY 29 6 33 1 34 4 35 4 36 4 37 2 38 4 39 1 PARTNUMBER 310055 310053 310052 310065 310075 310182 310221 31026 D ESCR I PTION 3 8 16 x 1 1 4 Hex Bolt 318 16 x 2 1 4 Hex Bolt 1 4 20 x 1 Hex Bolt 1 4 20 l Iok Hex Nut 1 4 USS Flat Washer Vinyl Handle Grip Tube Plug RT8 1 Sc...

Page 5: ...es of the tractor Insert hex head bolt 29 through inside front hole of frame through tractor mounting bar and secure with nylock nut 27 Add flat washer 24 under head of bolt removed in earlier step and reinsert through tractor mounting bar and tighten For LT1000 LT2000 series tractors use self thread bolts 28 in place of bolt 29 and nut 27 Step 2 Push tube plugs 38 into each end of lift tube 6 Sli...

Page 6: ...eiver bolts 22 could cause damage to lift tubes 4 29 Determining the width between lift tubes Front of Craftsman Tractors Front of Craftsman Zero Turn 25 Brush guard bumper can also be used for front of Craftsman tractor Push mower 4 5 Note The higher the lift tube extensions 5 are positioned the harder the tractor will be to lift 25 O o o o o o DCB A A BCD Settings A Push Mower B C D Brush guard ...

Page 7: ...0 as shown Insert handle top 2 into handle bottom 3 Secure with hex bolt 33 flat washer 24 split lock washer 23 and hex nut 25 Place handle grips 37 onto handle top tube 2 A little soapy water will help grip slide onto tube easily IF HANDLE CANNOT BE EASILY INSERTED FLIP HANDLE OVER AND REINSERT j37 3 Handle Top Tube j Foot Bar Tube FOR MISSING PARTS Call 1 800 652 2321 Monday Friday 8 a m 5 p m E...

Page 8: ...zer bar 8 onto foot bar tube as shown Step 2 Press snap button and slide stabilizer bar against handle Step 3 Insert ring grip pin 30 through stabilizer bar and handle top Foot bar Snap 3O FOR MISSING PARTS Call 1 800 652 2321 Monday Friday 8 a m 5 p m E S T Page 8 ...

Page 9: ...ift cross tube Figure 2 Properly engaging tractor with tractor bumper brush guard Step 2 Lift Tractor Place foot onto foot bar tube and apply continuous forward pressure with foot while pulling down on tractor lift handle Once lifted the weight of tractor will automatically force handle down into correct position IMPORTANT Stabilizer bar MUST be engaged immediately after raising the tractor See St...

Page 10: ...ng grip pin 30 from tube handle Press snap button and slide stabilizer bar 8 from foot bar tube Turn stabilizer bar 180 degrees as shown at bottom of Figure 1 Position stabilizer bar under base of unit between wheels Slide stabilizer bar back onto foot bar tube making sure the bar is positioned back over snap button Tube Handle Snap Figure 1 30 Figure 2 Snap Button FOR MISSING PARTS Call 1 800 652...

Page 11: ... x 2 3 4 Hex Bolt 23 310072 6 3 8 Split Lock Washer 24 310073 8 3 8 USS Flat Washer 25 310062 6 3 8 16 Hex Nut 26 300082 2 Hair Pin Cotter 148 27 310061 4 3 8 16 N_4ok Hex Nut 28 310054 2 3 8 16 x 1 1 2 Self thread Bolt 29 310055 6 3 8 16 x 1 1 4 Hex Bolt 30 310081 4 3 8 x2 1 8 Ring Grip Pin 33 310053 1 3 8 16 x 2 1 4 Hex Bolt 34 310052 4 1 4 20 x 1 Hex Bolt 35 310065 4 1 4 20 Nylock Hex Nut 36 31...

Page 12: ...ts and you may also have other rights which may vary from state to state Sears Roebuck and Co Hoffman Estates IL 60179 PRODUCTRECORD In the space below record the model number and purchase date of your cart The model number can be found on the front cover of the user guide Model Number Purchase Date Keep this booklet and your Sears receipt in a safe place for future reference ORDERING INFORMATION ...

Page 13: ...ome For repair of carry in items like vacuums lawn equipment and electronics call anytime for the location of your nearest Sears Parts Repair Service Center 1 800 488 1222 U S A 1 800 469 4663 Canada www sears com www sears ca To purchase a protection agreement on a product serviced by Sears 1 800 827 6655 U S A 1 800 361 6665 Canada Para pedir servicio de reparaci6n a domicilio y para ordenar pie...

Reviews: