background image

Summary of Contents for 917.249790

Page 1: ...17 249790 CAUTION Read and follow all Safety Rules and Instructions before operating this equipment Safety Assembly Operation Customer Responsibilities Repair Parts Sears Roebuck and Co Hoffman Estates II 60179 Visit our Craftsman website www sears com craftsman ...

Page 2: ...ates that operators age 60 years and above are invoIved in a targe percentage of riding mower related injuries These operators should evaluate their ability to operate the riding mower safely enough to protect themselves and others from serious injury Keep machine free of grass leaves or other debris build up which can touch hot exhaust engine parts and burn Do not allow the mower deck to plow lea...

Page 3: ...n neutral you may lose control of the tractor CAUTION Tow onlythe attachments thatare recommended byand comply with specifications of the manufactu rer of your tractor Use common sensewhen towing Operate only at the lowest possible speed when on a slope Too heavy of a load while on a slope is dangerous Tires can lose traction with the ground and cause you to lose control of your tractor CAUTION In...

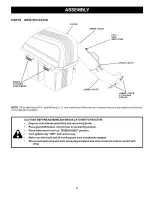
Page 4: ...ER Compare the illustrations with the carton contents to familiarize yourself with the parts before starting the assembly Study the operating instructions and safety precautions thoroughly to insure proper functioning of your Grass Catcher and to 3revent injury to yourself and others Save this manual for future reference The operation of any tractor can result in foreign objects thrown into the ey...

Page 5: ...actor in the operator s position CAUTION BEFORE ASSEMBLING GRASS CATCHER TO TRACTOR Depress clutch brake pedal fully and set parking brake Place gearshift motion control lever in neutral N position Place attachment clutch in DISENGAGED position Turn ignition key OFF and remove key Make sure the blade and all moving parts have completely stopped Disconnect spark plug wire from spark plug and place ...

Page 6: ...d holes in the drawbar instali the four shoulder bolts as shown and tighten securely 2 Hang the mounting bracket lanced tabs towards bottom on the bolts TAPPING UPPER SHOULDER CORNER BOLTS RIBS LANCED TABS TOWARD BOTTOM _ FIG 1B BOLTS AND LOCKNUTS See Fig 1C 1 Assemble the mounting bracket lanced tabs towards bottom using the four smaller inside holes on the drawbar 2 Install the four bolts and Io...

Page 7: ...HER TO FORM SEAL WHILE LIFTING TOP HALF LOCKING TAB ASSEMBLY CHECK Squeeze sides of lower half of con tainer and check that there is no gap between upper and lower halves If a gap appears unlock tabs to separate container halves and repeat instructions above FIG 3 CONTAINER MOUNTING See Fig 4 No hardware required Install one container to left side first with warning to outside of unit Install othe...

Page 8: ...k NOTE While hooking the latches the deflector shield may try to push the chute away from the mower deck opening It is important to hold the chute in position while hooking the latches to the mower deck If your tractor is equipped with gage wheels on the deck then it wilt be necessary to hook the rear latch into the hole in the R H gage wheel bracket I CAUTION Do not remove discharge guard from mo...

Page 9: ...upper chute until it is in line with Iower chute 4 Align the bosses on lower chute with alignment slots on upper chute and slide together 5 Secure with rubber latch by hooking hole in latch over latch pin FULL BAG HANDLE COVER FIG 6A LOWER UPPER CHUTE ALIGNMENT SLOT LATCH PIN RUBBER LATCH BOSSES FIG 6B LEVEL MOWER DECK No hardware required Be sure deck is properly leveled for best mower perfor man...

Page 10: ...laps left container at center supports h Close cover and secure latches over center support tubes Avoid cutting wet grass or in the morning while the dew is still heavy Grass clippings collected under these conditions tend to be sticky and adhere to the walls of the flow path causing clogging Your bagger is equipped with a full bagger indicator As the bags become full_ movement of the wheel will s...

Page 11: ... all moving parts have completely stopped Disconnect spark plug wire s from spark plug s and place wire where it cannot come in contact with plug STORAGE When grass catcher is to be stored for a period of time clean it thoroughly remove all dirt grass leaves etc Store in a clean dry place CAUTION Do not leave grass in bagger containers Empty containers after each use and before storing Failure to ...

Page 12: ...12 ...

Page 13: ...13 ...

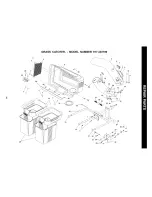
Page 14: ...GRASS CATCHER MODEL NUMBER 917 249790 2 4 _ 20 12 38 9 13 39 2 2 2O 14 18 15 24 16 5 6 16 7 8 9 10 15 31 31 1 31 26 27 _ _ 27 ...

Page 15: ...orn 10 24 Washer lock Latch Chute Nut Weld Latch Hook Rubber Latch Chute Lower Screw 10 24 x 518 Spring Cover LH black Spacer Cover KEY PART NO NO DESCRIPTION 23 132983 24 126813X 25 73680500 26 4939M 27 74760512 28 170053 29 170165 30 131137 31 134496 32 126919X 33 128600 34 127534 35 129584 36 129586 38 130895 39 155042X431 104419X 170470 Spring Cover R H gray Post Support Locknut 5 16 x 18 Spri...

Page 16: ... about a Sears Service Agreement or Sears Maintenance Agreement 1 800 827 6655 U S A 1 800 361 6665 Canada 7 a m 5 p m CST Mon Sat 9 a m 8 p m EST M F 4 p m Sat Parapedirserviciode reparackSn a Au Canadapour serviceen frang_is domic io y paraordanarpiezas 1 800 LE FOYERMC 1 888 SU HOGARs_ 1 800 533 6937 1 888 784 6427 www sears ca Sears Roebuckand Co Registered Trademark TMTrademark SMService Mark...

Reviews: