background image

Summary of Contents for 917.271660

Page 1: ...viously built engines Before you start the I engine read and understand this Owner s Manual CAUTION Read and follow all Safety Rules and Instructions before operating this equipment For answers to your questions about this product Call 1 800 659 5917 Sears Craftsman Help Line 5 am 5 pm Mon Sat Sears Roebuck and Co Hoffman Estates II 60179 U S A Visit our Craftsman website www sears com craftsman ...

Page 2: ...operator negligence including but not limited to electrical and mechanical damage caused by improper storage failure to use the proper grade and amount of engine oil failure to keep the deck clear of flammable debris or the failure to maintain the equipment according to the instructions con tained in the owner s manual Engine fuel system cleaning or repairs caused by fuel determined to be contami ...

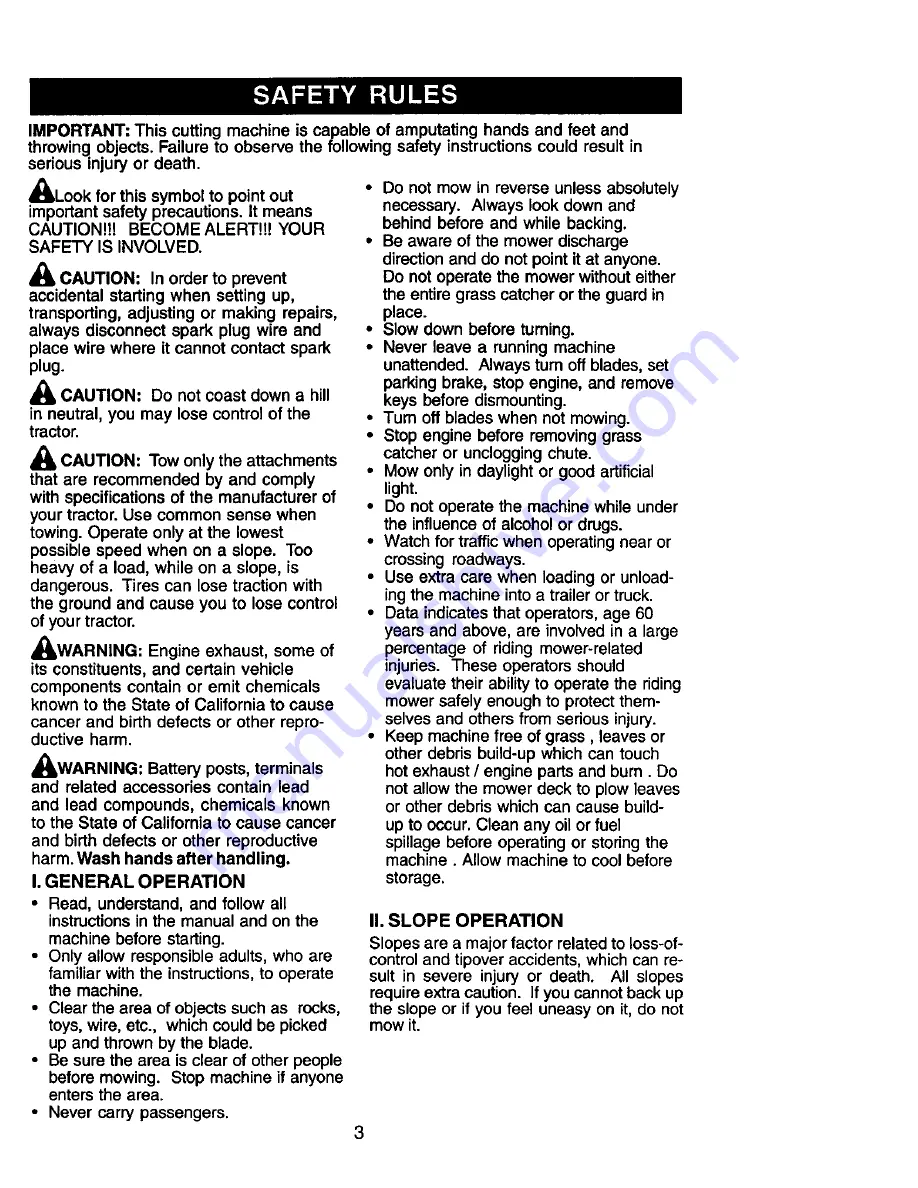
Page 3: ...onsible adults who are familiar with the instructions to operate the machine Clear the area of objects such as rocks toys wire etc which could be picked up and thrown by the blade Be sure the area is clear of other people before mowing Stop machine if anyone enters the area Never carry passengers Be aware of the mower discharge direction and do not point it at anyone Do not operate the mower witho...

Page 4: ...nsible adult Be alert and turn machine off if children enter the area Before and when backing look behind and down for small children Never carry children They may fall off and be seriously injured or interfere with safe machine operation Never allow children to operate the machine Use extra care when approaching blind comers shrubs trees or other objects that may obscure vision IV SERVICE Use ext...

Page 5: ...if children enter the area Before and when backing look behind and down for small children Mow up and down slopes 15 Max not across Remove obstacles such as rocks tree limbs etc Watch for holes ruts or bumps Uneven terrain could overturn the machine Tall grass can hide obstacles Use slow speed Choose a low gear so that you will not have to stop or shift while on the slope Avoid starting or stoppin...

Page 6: ... tractor properly Always observe the SAFETY RULES REPAIR AGREEMENT A Repair Agreement is available on this product Contact your nearest Sears store for details CUSTOMER RESPONSIBILITIES Read and observe the safety rules Follow a regular schedule in maintain ing caring for and using your tractor Follow the instructions under Mainte nance and Storage sections of this owner s manual _ILWARNING This t...

Page 7: ...ering Boot Steering Wheel 1 Lock washer 3 8 1 Locknut 5 16 18 J _ Steering Wheel Adapter 1 Large Flat Washer 1 Hex Bolt 5 16 18 x 1 1 4 t Steering n Shaft Seat _Washer 17 32 x 1 3 16 x 12 Gauge _ 1 Knob Slope Sheet For Future Use Keys Video Cassette 7 ...

Page 8: ...lower steering shaft Align mounting holes in extension and lower shafts and install 5 16 hex bolt and Iocknut Tighten securely IMPORTANT Tighten bolt and nut securely to 18 22 ft Ibs torque 2 Place tabs of steering boot over tab slots in dash and push down to secure INSTALL STEERING WHEEL 3 Position front wheels of the tractor so they are pointing straight forward 4 Remove steering wheel adapter f...

Page 9: ... by depressing clutch brake pedal 3 Place freewheel control in transmis sion disengaged position See q O TRANSPORT in the Operation section of this manual 4 Roll tractor forward off skid 5 Remove banding holding deflector shield up against tractor TO DRIVETRACTOR OFF SKID See Operation section for location and function of controls _IWARNING Before starting read understand and follow all instructio...

Page 10: ... tractor check to see that the brake is properly adjusted See TO ADJUST BRAKE in the Service and Adjustments section of this manual CHECKLIST Before you operate your new tractor we wish to assure that you receive the best performance and satisfaction from this qualify product Please review the following checklist All assembly instructions have been completed No remaining loose parts in carton Batt...

Page 11: ...ST SLOW WARNING NG NEO ENG OFF O LP ESSUR L GHT ON OVI_MP m FUEL CHOKE MOWER HEIGHT PARKING BRAKE UNLOCKED MOWER LIFT LOCKED R N H L ATTACHMENT REVERSE NEUTRAL HIGH LOW PARKING BRAKE CLUTCH ENGAGED KEEP AREA CLEAR SLOPE HAZARDS ATTACHMENT IGNITION CLUTCH DISENGAGED SEE SAFETY RULES SECTION DANGER KEEP HANDS AND FEET AWAY 11 FREE WHEEL Automatic Models only ...

Page 12: ...ng or discharging of battery ATTACHMENT CLUTCH LEVER Used to engage the mower blades or other attachments mounted to your tractor ATTACHMENT LIFT LEVER Used to raise lower and adjust the mower deck or other attachments mounted to your tractor CLUTCH BRAKE PEDAL Used for declutching and braking the tractor and starting the engine MOTION CONTROL LEVER Selects the speed and direction of tractor IGNIT...

Page 13: ...ition NOTE Failure to move throttle control to slow position and allowing engine to idle before stopping may cause engine to backfire Turn ignition key to STOP position and remove key Always remove key when leaving tractor to prevent unauthorized use Never use choke to stop engine IMPORTANT Leaving the ignition switch in any position other than STOP will cause the battery to discharge and go dead ...

Page 14: ...ntrol in freewheeling position Freewheel control is located at the rear drawbar of tractor 1 Raise attachment lift to highest position with attachment lift control 2 Pull freewheel control out and down into the slot and release so it is held in the disengaged position Do not push or tow tractor at more than two 2 MPH To re engage transmission reverse above procedure Transmission Engaged Position D...

Page 15: ... run until the fuel lines and carburetor are empty Use fresh fuel next season See Storage Instruc tions for additional information Never use engine or carburetor cleaner products in the fuel tank or permanent damage may occur TO START ENGINE When starting the engine for the first time or if the engine has run out of fuel it will take extra cranking time to move fuel from the tank to the engine 1 B...

Page 16: ...surface with engine off and parking brake set 2 Disengage transmission by placing freewheel control in _transmission disengaged position See TO TRANSPORT in this section of manual 3 Sitting in the tractor seat start engine After the engine is running move throttle control to slow position With motion control lever in neutral N position slowly disengage clutch brake pedal 4 Move motion control leve...

Page 17: ... speed that will suit the terrain and give best performance of the attachment being used MULCHING MOWINGTIPS IMPORTANT For best performance keep mower housing free of built up grass and trash Clean after each use The special mulching blade will recut the grass clippings many times and reduce them in size so that as they fall onto the lawn they will disperse into the grass and not be noticed Also t...

Page 18: ... items that have been subjected to operator abuse or negligence To receive full value from the warranty operator must maintain tractor as instructed in this manual Some adjustments wHI need to be made periodically to properly maintain your tractor All adjustments in the Service and Adjustments section of this manual should be checked at least once each season Once a year you should replace the spa...

Page 19: ... to allow access to blades 2 Remove hex bolt lock washer and flat washer securing blade 3 Install new or resharpened blade with trailing edge up towards deck as shown IMPORTANT To ensure proper assembly center hole in blade must align with star on mandrel assembly 4 Reassemble hex bolt lock washer and flat washer in exact order as shown 5 Tighten bolt securely 27 35 Ft Lbs torque IMPORTANT Blade b...

Page 20: ... V BELTS Check V belts for deterioration and wear after 100 hours of operation and replace if necessary The belts are not adjustable Replace belts if they begin to slip from wear ENGINE LUBRICATION Only use high quality detergent oil rated with API service classification SF SJ Select the oil s SAE viscosity grade according to your expected operating temperature NOTE Although multi viscosity oils 5...

Page 21: ...ion of the cartridge Do not oil cartridge Do not use pressurized air to clean or dry cartridge _ Cover _ _ Knob Cover__ Cadridga Nut _ _ Paper t oam t re _ S Cartridge Cleaner _ _ _ Base 4 21 CLEAN AIR SCREEN Air screen must be kept free of dirt and chaff to prevent engine damage from overheating Clean with a wire brush or compressed air to remove dirt and stubborn dried gum fibers ENGINE COOLING ...

Page 22: ...nd lift clutch spring off pulley bolt 5 Remove large retainer spring slide collar off and push housing guide out of bracket 6 Disconnect anti sway bar from chassis bracket by removing retainer spring 7 Disconnect suspension arms from rear deck brackets by removing retainer springs 8 Disconnect front links from deck by removing retainer springs 9 Raise lift lever to raise suspension arms Slide mowe...

Page 23: ...side to side If the following front to back adjustment is necessary be sure to adjust both front links equally so mower will stay level side to side To obtain the best cutting results the mower housing should be adjusted so that the front is approximately 1 8 to 1 2 lower than the rear when the mower is in its highest position Check adjustment on right side of tractor Measure distance D directly i...

Page 24: ... stopping distance is still greater than six 6 feet in highest gear further maintenance is neces sary Contact a Sears or other qualified service center With Parking Brake Engaged Jam Nut Nut A Do Not touch this nut If further brake adjustment is necessary contact a Sears or other qualified service center TO REPLACE MOTION DRIVE BELT Park the tractor on level surface Engage parking brake For assist...

Page 25: ...reeps repeat above steps until satisfied Adjustment Bolt TRANSMISSION REMOVAL REPLACE MENT Should your transmission require removal for service or replacement it should be purged after reinstallation and before operating the tractor See PURGE TRANSMISSION in the Operation section of this manual TO ADJUST STEERING WHEEL ALIGN MENT If steering wheel crossbars are not horizontal left to right when wh...

Page 26: ...tery terminals by allowing a wrench or any other object to contact both terminals at the same time Before connecting battery remove metal bracelets wristwatch bands rings etc Positive terminal must be connected first to prevent sparking from accidental grounding 1 Lift seat pan to raised position 2 Disconnect BLACK battery cable first then RED battery cable and carefully remove battery from tracto...

Page 27: ...RETOR NOTE The carburetor on this engine is low emission It is equipped with an idle fuel adjusting needle with a limiter cap which allows some adjustment within the limits allowed by the cap Do not attempt to remove the limiter cap The limiter cap cannot be removed without breaking the adjusting needle The carburetor has been preset at the factory and adjustment should not be necessary However mi...

Page 28: ...lve out counterclockwise 118 turn Repeat test and continue to adjust if neces sary until engine accelerates smoothly High speed stop is factory adjusted Do not adjust or damage may result IMPORTANT Never tamper with the engine governor which is factory set for proper engine speed Overspeeding the engine above the factory high speed setting can be dangerous If you think the engine governed high spe...

Page 29: ...om forming in essential fuel system parts such as carburetor fuel hose or tank during storage Also alcohol blended fuels called gasohol or using ethanol or methanol can attract moisture which leads to separation and formation of acids during storage Acidic gas can damage the fuel system of an engine while in storage 1 Drain the fuel tank 2 Start the engine and let it run until the fuel lines and c...

Page 30: ...rminals 3 Loose or damaged wiring 3 Check all wiring 4 Faulty solenoid or starter 4 Check replace solenoid or starter Loss of power 1 Cutting too much grass too 1 Set in Higher Cut position fast reduce speed 2 Throttle in CHOKE position 2 Adjust throttle control 3O Enginewill not turn over 1 Fill fuel tank 2 See TO START ENGINE in Operation section Wait several minutes before attempting to start R...

Page 31: ...rass leaves and trash around mandrels CORRECTION 3 Clean underside of mower housing 4 Clean replace air filter 5 Check oil level change oil 6 Clean and regap or change spark plug 7 Replace fuel filter 8 Drain fuel tank and refill with fresh gasoline 9 Drain fuel tank and carburetor refill tank with fresh gasoline and replace fuel filter 10 Connect and tighten spark plug wire 11 Clean engine air sc...

Page 32: ...r Freewheel control in disengaged position Motion drive belt worn damaged or broken Air trapped in transmission during shipment or servicing Engine throttle control not set at SLOW position for 30 seconds before stopping engine CORRECTION 2 Replace mower drive belt 3 Replace idler pulley 4 Contact aSears or other qualified service center 1 Place throttle control in FAST position 2 Shift to slower ...

Page 33: ...UTPUT I T R o_ SAMPACO_p DIODE IAL E NATOR NOTE YOUR TRACTOR IS u_ow _b_t_cK EQUIPPED WITH A SPECIAL ALTERNATOR SYSTEM THE LIGHTS ARE NOT CONNECTED TO THE BATTERY BUT HAVE THEIR OWN ELECTRICAL SOURCE HEADLIGHTS BECAUSE OF THIS THE BRIGHTNESS OF THE LIGHTS WILL CHANGE WITH ENGINE SPEED AT IDLE THE LIGHTS WILL DIM AS THE ENGINE IS SPEEDED UP THE LIGHTS WILL BECOME THEIR BRIGHTEST NON REMOVABLE CONNE...

Page 34: ...ELECTRICAL TRACTOR MODEL NUMBER 917 271660 22 28 25 I r 16 I I 34 ...

Page 35: ...6147 Cable Battery 6 Ga w 16 wire red 26 175158 Fuse20 AMP 27 73510400 Nut Keps Hex 1 4 20 Uno 28 4207J Cable Ground 6 Ga 12 black 29 121305X Switch Plunger Nc Gray 30 175566 Switch Ign 33 140403 Key Ign 40 179720 Harness Ign 41 71110408 Bolt BIk Fin Hex 1 4 20 Uno x 1 2 42 131563 Cover TerminalRed 43 178861 Solenoid 45 121433X Ammeter Rectangular 6 Amp 52 141940 ProtectionWire Loop 89 180449 Cove...

Page 36: ...TRACTOR MODEL NUMBER 917 271660 CHASSIS AND ENCLOSURES 28 12 31 5 208 60 74 3 3 14 38 2O8 36 ...

Page 37: ...t 37 17490508 Screw Thdrol 5 16 18 x 1 2 38 175710 Pivot Bracket Assembly Rear 51 73800400 Nut Lock w Insert 1 4 20 UNC 52 19091416 Washer 9 32 x 7 8 x 16 Ga 53 145201 Bracket Grille Pickofl LH 54 161464 Screw Hex Wshd 6 18 x 7 8 55 145202 Bracket Grille Pickoff RH 57 STD522507 Bolt Fin Hex 1 4 20 UNC x 75 60 72140606 Bolt Rdhd Sqnk 3 8 16 UNC x 3 4 64 154798 Dash Lower STLT 74 STDr J 1437 NutCrow...

Page 38: ...TRACTOR MODEL NUMBER 917 271660 GROUND DRIVE 53 3B ...

Page 39: ...51 STD541437 Nut 166 166880 52 STD541431 NutCrownlock 5 16 18 168 165492 53 105710X Link Clutch 169 165580 55 105709X Spring Return Clutch 197 169613 56 17060620 Screw 3 8 16x 1 1 4 198 169593 57 140294 V Belt Drive 199 169612 59 169691 Keeper Belt Center 200 72140508 61 17120614 Screw 3 8 16 x 875 62 8883R Cover Pedal 202 72110614 63 175410 Pulley Engine 205 19171616 64 71170764 Bolt Hex 7 16 x 4...

Page 40: ...TRACTOR MODEL NUMBER 917 271660 STEERING ASSEMBLY 7 88 I 29 46 47 M 67 67 17 3O j _47 4 1 40 ...

Page 41: ... 25 32 x 1 5 8 x 16 Gauge Washer 27 32 x 1 1 4 x 16 Gauge Ring Klip Beadng SteeringColumn Draglink Washer Lock Spacer Bearing Axle Front Nut Hex Flange Lock Shaft Assembly Steering Bushing Link Drag Washer 13 32 x 7 8 x 16 Gauge Screw 3 8 16 x 3 4 Pin Cotter Red Tie Bushing Steering Screw Insert Steering Wheel Washer 13 32 x 2 3 8 x 12 Gauge Nut Lock Center 3 8 24 Unf Adaptor SteeringWheel Boot St...

Page 42: ...TRACTOR MODEL NUMBER 917 271660 ENGINE 78 38 _ _37 31 40 33 29 OPTIONAL EQUIPMENT Spark Arrester 14 23 3 81 4 78 42 ...

Page 43: ...ne See Breakdown BriggsModel 310707 0137 E1 Muffler Exhaust B S Lt Gasket 1 313 Id Tin Plated Tube Drain oil easy Washer Lock Ext Tooth 3 8 Shield Browning DebrisGuard Arrestor Spark Tank Fuel 1 25 Fr Cap Asm Fuel Sears Vented Clamp Hose BIk Line Fuel 20 Plug drain oil easy Bushing Snap Nyl BIk Fuel Line Screw Hexwsh Thdrol 1 4 20x3 4 Screw 3 8 16 x 3 4 Washer 9 32 X 718X 16ga Washer Look Hvy Hlcl...

Page 44: ... Cprsn 2 250 BIk Zi Screw 3 8 16 X 1 Washer t3 32 X 1 X 14 Ga Pan Pnt Seat b k Knob Seat Adj Wingnut Bracket Pnl MountingSwitch KEY PART NO NO DESCRIPTION 13 121248X 14 72050412 15 1343O0 16 121250X 17 123976 21 171852 22 STD541431 24 19171912 25 127018X Bushing Snap BIk Nyl 50 Id Bolt Rdhd Sht Nk 1 4 20x1 1 2 Spacer Split 28 X 96 Zinc Spring Cprsn 1 27 BIk Pnt Nut Lock I 4 Lge Fig Gr 5 Zinc Bolt ...

Page 45: ...R Drive Schematic Decal Dash Panel Decal V Belt Schematic Decal Engine Decal Mower Heavy Duty 12 Ga Decal Battery Dngr Psn Eng Decal Bypass Decal Lift Handle Pad Footrest LH STLT Pad Footrest RH STLT Owner s Manual English Owner s Manual Spanish WHEELS TIRES 4 10 11 KEY PART NO NO DESCRIPTION 1 59192 2 65139 3 106222X 4 59904 5 106732 427 6 278H 7 9040H 8 106108x427 9 106268x 10 7152J 11 104757X42...

Page 46: ...TRACTOR MODEL NUMBER 917 271660 LIFT ASSEMBLY 7 13 5 2 8 i I I I I 6 5 19 13 13 _ 31_ 32 19 13 20 15 20 46 ...

Page 47: ...gNylong 7 125631X GripHandle Fluted 8 122365X Button Plunger Read 11 139865 Link Asm Lift L H 12 139866 Link Asm Lift R H 13 STD6 4008 Retainer Spdng 15 173288 Link Front 16 73350800 Nut Jam Hex 1 2 13 Unc 17 175689 Trunnion 18 73800800 Nut Lock w NVsh1 2 13 Unc 19 139868 Arm SuspensionMower 20 163552 RetainerSpring 31 169865 Bearing Pvt Lift 32 73540600 Nut Crownlock3 8 24 NOTE Allcomponentdimens...

Page 48: ...TRACTOR MODEL NUMBER 917 271660 MOWER DECK 16 1 18 21 22 _ _3 24 28 29 18 27 48 ...

Page 49: ... 152 169676 31 129963 Washer Spacer 153 169674 154 169675 32 153535 Pulley Mandrel 155 169671 33 178342 Nut Toplock Flanged 34 STO533717 Bolt 156 169672 36 131494 Pulley Idler Flat 157 169669 37 STD551037 Washer 13 32 x 13 16 x 16 158 17720408 Gauge 159 72140614 40 STD541437 NutCrownlock3 8 16UNC 130794 44 140088 Guard Mandrel LH 45 STD624 X 3 Retainer 46 137729 Screw Thd Roll 1 4 20 x 5 8 181268 ...

Page 50: ...TRACTOR MODEL NUMBER 917 271660 HYDROTRANSAXLE MODEL NUMBER 322 0510 121 16 73 83 19 93 7 66 5O ...

Page 51: ...aft 111 170435 42 170_q5 Magnet Rling 113 170437 43 170396 Spdng Bypass 44 150797 Hydro mtg Screw 3 8 24 X 2 5 116 170438 Long 119 173161 45 170397 Flilter 120 170440 46 170398 Base Filter 122 173162 47 170399 Actuator Bypass 48 170400 Rod Bypass Actuator 123 173163 49 170401 Arm Bypass 124 170444 50 170402 Retaining Ring 250 External 51 170403 Seal Lip 741 X 250 X 250 TC 125 170445 52 170404 Flat...

Page 52: ...TRACTOR MODEL NUMBER 917 271660 BRIGGS STRATFON ENGINE MODEL NUMBER 310707 TYPE NUMBER 0137 E1 REQUIRES SPECIALTOOLS 53_ TO INSTALL SEE REPAIR INSTRUCTION MANUAL o23_I 38_ 11 71 307_ 10_ 757 _ 2 52 ...

Page 53: ...L NUMBER 917 271660 BRIGGS STRA I FONENGINE MODEL NUMBER 310707 TYPE NUMBER 0137 E1 467_ 971_t _i 445 8751 711_ 1019 LABEL KIT _t_ 1059 OWNER S MANUAL F _ 202 108A _ v J_ 634A_ 232 127 0 276 1127_ I 240_ 227 562 53 ...

Page 54: ...TRACTOR MODEL NUMBER 917 271660 BRIGGS STRAI FON ENGINE MODEL NUMBER 310707 TYPE NUMBER 0137 E1 I 1036 LABEL EMISSIONS 287_ 524_ 54 ...

Page 55: ... GASKET SET 48 NIKKI 125AI 141B _ 130A__11 231A a U 2 A01_ 5__1L05A_ 369 121 CARBURETOR OVERHAUL KIT 104_1270 27s_ _987 9s_ 137_ _ 51 _ 358 ENGINE GASKET SET s24 842 691_ 176_ 121A CARBURETOR OVERHAUL KIT 95A _ 276A 51 _ 0 I04A_ 127A 105A_ 987A_ 137A O 231A_ I 977A CARBURETOR GASKET SET 1 51 137AQ 276A_ 55 ...

Page 56: ...amshaft 231 691636 48 692706 Short Block 311707 0028 E1 231A 690718 Replacement Engine 232 691842 59 690193 Manifold Intake 238 691843 51 692137 O 1 Gasket Intake 240 394358 53 690227 Stud Carburetor 265 691024 54 691148 Screw Intake Manifold 267 695134 73 690492 Screen Rotating 74 691674 Screw Rotating Screen 75 690582 Washer Flywheel 78 690661 Screw Flywheel Guard 93 690602 Bushing Throttle Shaf...

Page 57: ...ipstick 987 691328 Seal Throttle Shaft 524 281370 Seal Dipstick Tube 987A 690998 Seal Throttle Shaft 525 691398 Tube Dipstick 996 690678 Carburetor Shield 544 692034 Armature Starter 1005 695056 Fan Flywheel 552 491986 Bushing Governor Lever 1006 890452 Retainer Fan 562 691119 Bolt Governor Control Lever 1019 690180 Kit Label 579 691029 Nut Starter Cable 1022 272475 Gasket Rocker Cover 601 95162 C...

Page 58: ...SERVICE NOTE 58 ...

Page 59: ... along dotted line indicated above 2 Hold page before you so that its left edge is vertically parallel to a tree trunk or other upright structure 3 Sight across the fold in the direction of hill slope you want to measure 4 Compare the angle of the fold with the slope of the hill ...

Page 60: ..._7278 U SA only www sears com par tsdirect m To purchase or inquireabout a Sears Service Agreement or Sears Maintenance Agreement 1 800 827 6655 U S A 1 800 361 6665 Canada 7 a m 5 p m CST Mo_ Sat 9 a m 8 p m EST M F 4 p m Sat Para pedirserviciode re_ a domidlio y para ordenar pieza s 1 888 SU HOGARsM 1 888784 6427 Au Canadapourserviceenfran_ 1 800 LE FOYERMc 1 _0 533 6937 WWN seals ca Sea_ Rcot x...

Reviews: