background image

Summary of Contents for 917.275012

Page 1: ...sly built engines Before you start the engine read and understand this Owner s Manual CAUTION Read and follow all Safety Rules and Instructions before operating this equipment For answers to your questions about this product Call 1 800 659 5917 Sears Craftsman Help Line 5 am 5 pm Mon Sat SEARS ROEBUCK AND CO HOFFMAN ESTATES IL 60179 U S A visit our Craftsman website www sears corn craftsman ...

Page 2: ...ecause of operator abuse including but not limited to damage caused by towing objects beyond the capability of the riding equipment impacting objects that bend the frame or crankshaft or over speeding the engine Repairs necessary because of operator negligence including but not limited to electrical and mechanical damage caused by improper storage failure to use the proper grade and amount of engi...

Page 3: ... mower without either the entire grass catcher or the guard in place Slow down before turning Never leave a running machine unattended Always turn off blades set parking brake stop engine and remove keys before dismounting Turn off blades when not mowing Stop engine before removing grass catcher or unclogging chute Mow only in daylight or good artificial light Do not operate the machine while unde...

Page 4: ...nsible adult Be alert and turn machine off if children enter the area Before and when backing look behind and down for small children Never carry children They may fall off and be seriously injured or interfere with safe machine operation Never allow children to operate the machine Use extra care when approaching blind corners shrubs trees or other objects that may obscure vision IV SERVICE Use ex...

Page 5: ...if children enter the area Before and when backing look behind and down for small children Mow up and down slopes 15 Max not across Remove obstacles such as rocks tree limbs etc Watch for holes ruts or bumps Uneven terrain could overturn the machine Tall grass can hide obstacles Use slow speed Choose a low gear so that you will not have to stop or shift while on the slope Avoid starting or stoppin...

Page 6: ...emble and maintain your tractor properly Always observe the SAFETY RULES REPAIR AGREEMENT A Repair Agreement is available on this product Contact your nearest Sears store for details CUSTOMER RESPONSIBILITIES Read and observe the safety rules Follow a regular schedule in maintain ing caring for and using your tractor Follow the instructions under Mainte nance and Storage sections of this owner s m...

Page 7: ..._Drain_ Video Cassette Video Cassette For Future Use Slope Sheet Keys 2 Keys Slope Sheet 7 ...

Page 8: ...y down 4 Get off seat without moving its adjusted position 5 Raise seat and tighten adjustment knob securely Knob NOTE You may now rollor drive your tractor off the skid Follow the appropriate instruction below to remove the tractor from the skid TO ROLLTRACTOR OFF SKID See Operation section for location and function of controls 1 Press lift lever plunger and raise attachment lift lever to its hig...

Page 9: ... brake is properly adjusted See TO ADJUST BRAKE in the Service and Adjustments section of this manual CHECKLIST Before you operate and enjoy your new tractor we wish to assure that you receive the best performance and satisfaction from this quality product Please review the following checklist All assembly instructions have been completed No remaining loose parts in carton Battery is properly prep...

Page 10: ...ENGINE ON ENGINE OFF OIL PRESSURE LIGHTS ON FUEL CHOKE MOWER HEIGHT PARKING BRAKE LOCKED FAST SLOW OI k OV _M UNLOCKED MOWER LIFT R N H L A33ACHMENT REVERSE NEUTRAL HIGH LOW PARKING BRAKE CLUTCH ENGAGED KEEP AREA CLEAR SLOPE HAZARDS ATTACHMENT IGNITION CLUTCH DISENGAGED SEE SAFETY RULES SECTION DANGER KEEP HANDS AND FEET AWAY 10 FREE WHEEL Automatic Models only ...

Page 11: ...mounted to your tractor LIGHTSWlTCH POSITION Turnsthe headlights on and off THRO n LE CONTROL Used to control engine speed CLUTCH BRAKE PEDAL Used for declutching and braking the tractor and starting the engine CHOKE CONTROL Used when starting a cold engine HEIGHT ADJUSTMENT KNOB Used to adjust the mower cutting height GEARSHIFT LEVER Selects the speed and direction of the tractor RANGESHIFT LEVER...

Page 12: ...ng may cause engine to backfire Turn ignition key to STOP position and remove key Always remove key when leaving tractor to prevent unauthorized use Never use choke to stop engine IMPORTANT Leaving the ignition switch in any position other than STOP will cause the battery to discharge and go dead NOTE Under certain conditions when tractor is standing idle with the engine running hot engine exhaust...

Page 13: ...eight of the mower deck Retainer f clevis Pin TO OPERATE MOWER Your tractor is equipped with an operator presence sensing switch Any attempt by the operator to leave the seat with the engine running and the attachment clutch engaged will shut off the engine 1 Select desired height of cut 2 Lower mower with attachment lift control 3 Start mower blades by engaging attachment clutch control TO STOP M...

Page 14: ... blended fuels called gasohol or using ethanol or methanol can attract moisture which leads to separation and formation of acids during storage Acidic gas can damage the fuel system of an engine while in storage To avoid engine problems the fuel system should be emptied before storage of 30 days or longer Drain the gas tank start the engine and let it run until the fuel lines and carburetor are em...

Page 15: ...LEVEL MOWER HOUSING in the Service and Adjustments section of this manual The left hand side of mower should be used for trimming Drive so that clippings are discharged onto the area that has been cut Have the cut area to the right of the tractor This will result in a more even distribu tion of clippings and more uniform cutting When mowing large areas start by turning to the right so that clippin...

Page 16: ...riodically to properly maintain your tractor All adjustments in the Service and Adjustments section of this manual should be checked at least once each season Once a year you should replace the spark plug clean or replace air filter and check blades and belts for wear A new spark plug and clean air filter assure proper air fuel mixture and help your engine run better and last longer BEFORE EACH US...

Page 17: ...perator is in the seat BLADE CARE For best results mower blades must be kept sharp Replace bent or damaged blades BLADE REMOVAL 1 Raise mower to highest position to allow access to blades NOTE Protect your hands with gloves and or wrap blade with heavy cloth 2 Remove blade bolt by turning counter clockwise 3 Install new or resharpened blade with stamped THIS SIDE UP facing deck and mandrel assembl...

Page 18: ...l to hub Transaxle Plug Filler V BELTS Check V belts for deterioration and wear after 100 hours of operation and replace if necessary The belts are not adjustable Replace belts if they begin to slip from wear ENGINE LUBRICATION Only use high quality detergent oil rated with API service classification SF SJ Select the oil s SAE viscosity grade according to your expected operating temperature Change...

Page 19: ...will damage the cartridge 1 Remove nut and cartridge plate 2 Reinstall the pre cleaner cleaned and oiled over the paper cartridge 3 Check rubber seal for damage and proper position around stud Replace if necessary 4 Reassemble air cleaner cartridge plate and nut 5 Reinstall air cleaner cover and secure by tightening knob Knob Foam Cartddge Plate Rubber Seal go CLEAN AIR SCREEN Air screen must be k...

Page 20: ... there are no fuel line leaks and clamps are properly positioned 4 immediately wipe up any spilled gasoline Clamp_mp Fuel Filter_ CLEANING Clean engine battery seat finish etc of all foreign matter Keep finished surfaces and wheels free of all gasoline oil etc Protect painted surfaces with automo tive type wax We do not recommend using a garden hose to clean your tractor unless the electrical syst...

Page 21: ...ent lift to its highest position 8 Slide mower forward and remove belt from electric clutch pulley 9 Slide mower out from under right side of tractor Chassis Bracket Retainer Spring Anti Sway Bar TO INSTALL MOWER Be sure tractor is on level surface and mower suspension arms are raised with attachment lift control Engage parking brake 1 Swing anti sway bar to left side of mower deck 2 Slide mower u...

Page 22: ...f mower loosen lift link adjustment nut on that side NOTE Each full turn of adjustment nut will change mower height about 3 16 Recheck measurements after adjust ing Bottom Edge of Bottom Edge of Mower to Ground Mower to Ground _e Ar_SUspensi n I I _ Lift Link _ _ __ _ Adj ustment _Nut FRONT TO BACK ADJUSTMENT IMPORTANT Deck must be level side to side If the following front to back adjustment is ne...

Page 23: ...ket with retainer spring 16 Reassemble R H mandrel cover Arm R H Suspension Arm Idler Arm TO REPLACE MOWER BLADE SEC ONDARY DRIVE BELT Park the tractor on level surface Engage parking brake 1 Remove mower See TO REMOVE MOWER in this section of manual 2 Remove screws from R H and L H mandrel covers and remove covers REMOVE MOWER DRIVE BELT Refer to TO REMOVE MOWER DRIVE BELT illustration in this se...

Page 24: ...e in OFF position 2 Adjust the three nylon Iocknuts until space between clutch plate and rotor measures 012 at all three slot locations cut in the side of brake plate NOTE After installing a new electric clutch run tractor at full throttle and engage and disengage electric clutch 10 cycles to wear in clutch plate Rotor Clutch Plate 012 Nylol Locknut TO ADJUST BRAKE Your tractor is equipped with an...

Page 25: ...wer section of belt through loop in midspan belt keeper 6 Check to be sure belt is on proper side of all belt keepers 7 Reinstall mower drive belt onto electric clutch pulley IMPORTANT Check Brake Adjustment Clutching Rat Idler Engine Belt Keeper Belt Transaxle Pulley Twists Belt Keeper As Viewed from Bottom TO ADJUST STEERING WHEEL ALIGN MENT If steering wheel crossbars are not horizontal left to...

Page 26: ...too weak to start the engine it should be recharged See BA I rERY in the MAINTENANCE section of this manual If jumper cables are used for emergency starting follow this procedure IMPORTANT Your tractor is equipped with a 12 volt system The other vehicle must also be a 12 volt system Do not use your tractor battery to start other vehicles TO ATTACH JUMPER CABLES 1 Connect one end of the RED cable t...

Page 27: ...automotive type plug in fuse The fuse holder is located behind the dash TO REMOVE HOOD AND GRILL AS SEMBLY 1 Raise hood 2 Unsnap headlight wire connector 3 Stand in front of tractor Grasp hood at sides tilt toward engine and lift off of tractor 4 When replacing hood be sure to reconnect the headlight wire connec tor Hood Headlight Wire 3ector ENGINE Maintenance repair or replacement of the emissio...

Page 28: ...ST THROTTLE CONTROL CABLE in the Service and Adjustments section of this manual 2 With engine off turn idle fuel adjusting needle In clockwise closing it finger tight and then turn out counterclock wise 1 turn FINAL SETTING 1 Start engine and allow to warm for five minutes Make final adjustments with engine running and shift motion control lever in neutral N position NOTE The high idle is set at t...

Page 29: ...m forming in essential fuel system parts such as carburetor fuel hose or tank during storage Also alcohol blended fuels called gasohol or using ethanol or methanol can attract moisture which leads to separation and formation of acids during storage Acidic gas can damage the fuel system of an engine while in storage 1 Drain the fuel tank 2 Start the engine and let it run until the fuel lines and ca...

Page 30: ...eration section 3 Wait several minutes before attempting to start Replace spark plug Clean replace air filter Replace fuel filter Drain fuel tank and carburetor refill tank with fresh gasoline and replace fuel filter 8 Check all wiring 9 See To Adjust Carburetor in Service and Adjustments section 10 Contact a Sears or other qualified service center 1 Weak or dead battery 2 Corroded battery termina...

Page 31: ...de mandrel Clogged mower deck vent holes from buildup of grass leaves and trash around mandrels CORRECTION 1 Set in Higher Cut position reduce speed 2 Adjust throttle control Clean underside of mower housing Clean replace air filter Check oil level change oil Clean and regap or change spark plug Replace fuel filter Drain fuel tank and refill with fresh gasoline Drain fuel tank and carbure tor refi...

Page 32: ...d wiring Blown fuse Bad battery cell s Poor cable connections Faulty regulator if so equipped Faulty alternator Engine throttle control not set at SLOW position for 30 seconds before stopping engine CORRECTION 1 Remove obstruction 2 Replace mower drive belt 3 Replace idler pulley 4 Contact a Sears or other qualified service center 1 Place throttle control in FAST position 2 Shift to slower speed 3...

Page 33: ...POSI_ON CIRCU_ OFF C G B H ON C F B E A D GFC REMOVABLE NON REMOVABLE CONNECTIONS CONNECTIONS H B DA IGNITION SWITCH POSmON CIRCUIT MAKE OFF M G A1 NONE _N LK_ B AI L A2 ON B A1 NONE START B S A1 NONE WIRING INSULATED CLIPS NOTE IF WIRING INSULATED CLIPS WERE REMOVED FOR SERVICING OF UNIT THEY SHOULD BE REPLACED TO PROPERLY SECURE YOUR WIRING 33 ...

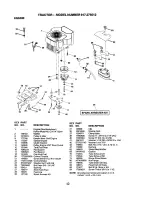
Page 34: ...TRACTOR MODEL NUMBER 917 275012 ELECTRICAL 22 26 29 P 33 _30 r ...

Page 35: ...k Push in 21 175688 Harness Socket LightW 4152J 22 4152J Bulb Light 25 150755 Cable Battery 25 108824X Fuse 27 73510400 Nut Keps Hex 1 4 20 Unc 28 170697 Cable Ground 29 160784 Switch Plunger 30 175566 Switch Ign 33 140403 Key Ignition 40 170238 Harness Ign 42 154336 Cover Terminal 45 122822X Ammeter 50 174652 Switch PTO 52 141940 HourmeterAdaptor 79 175242 BulbholderAsm IncandescentSV 81 109748X ...

Page 36: ...TRACTOR MODEL NUM BER 917 275012 CHASSIS AND ENCLOSURES 157 138 37 21 17 i I 47 17 19 0 17 17 44 17 1 39 36 ...

Page 37: ...6x16Ga 148 164655 36 17060512 Screw 5 16 18 x 3 4 150 161237 37 167286X558 Fender 152 177956 39 175278 Bracket Axle Front 153 179761 42 72140608 Bolt Carriage 3 8 16 x 1 156 17060512 43 136939 Bracket Spnsn Front Lh 157 161840 44 136940 Bracket Spnsn Front Rh 45 176018 Bracket Chassis 47 17670608 Screw Thdml 3 8 16 x 1 2 50 175476 Bracket Chassis Front 56 176016 Bracket Asm Susp Chassis Lh DESCRIP...

Page 38: ...TRACTOR MODEL NUMBER 917 275012 GROUND DRIVE 28 9 7 15 47 69 62 4 38 ...

Page 39: ...5 136923 Puck Brake Top 65 179613 26 137552 Spring Return 66 140296 27 17490528 Screw Hex Wsh Thd 67 19131312 5 16 18 x 1 3 4 68 5142H 28 73350600 Nut Hex Jam 3 8 16 69 136327 29 137213 Brake Rod 117 73900600 30 19131616 Washer 13 32 x 1 x 16 Ga 150 9858M1 34 71673 Cap Plunger 35 137648 Rod Parking Brake 36 149412 Spdng DriveGround 37 121749X Washer 25 32 x1 1 4 x 16 Ga Nyliner Screw Fin 10 24 x 1...

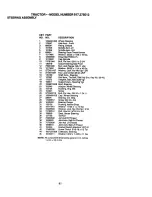
Page 40: ...TRACTOR MODEL NUMBER 917 275012 STEERING ASSEMBLY 21 20 23 34 32 6 28 19 2 6 16 40 _ 14 1313 7 8 4O ...

Page 41: ...a Ring Klip T5304 75 Cap Spindle Bolt Fin Hex 5 6 11 x 2 3 4 Spacer Bearing Axle Front Nut Lock FlaP ge 5 6 11 Uric Washer 25 32 x 1 1 4 x 16 Ga Washer Lock Hvy Hlcl Spr 3 8 Nut LockCenter 3 8 24 UNF Shaft Asm Steering Rod Asm Tie Bali J Ball Vgt inc Key No 36 40 Dragiink Bali Joint SolidVgt SupportAsm SteeringVgt Boot Steering Adapter Wheel Steering Bushing Strg BIk Screw Bolt Fin Hex 3 8 16 x 1 ...

Page 42: ...w hwhdHi Lo 13 16x3 4 Control Choke Washer Ext Tooth 3 8 Nut Keps 3 8 24 UNF Bushing Stem Tank Fuel FuelLine Spark Arrester Kit KEY NO 31 35 37 39 4O 41 42 43 47 62 69 70 71 74 8O 81 82 83 84 PART NO DESCRIPTION 145006 Clip 10010500 Washer Split 123487X ClampHose 17490636 Screw TI 3 8 16 x 2 1 4 UNC 17490664 Screw TT3 8 16 x 4 UNC 126197X Washer 1 1 20D xt5 32 ID x 250 STD551143 Washer Lock 7 16 1...

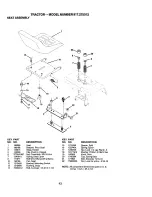
Page 43: ...8 16 Ucc Spring Seat Cpran Bolt 5 16 18Uncx3 4 w Seres Pan Seat Bracket Mounting Switch Bushing Snap Bolt Carriage 1 4 20 X 1 1 2 KEY PART NO NO DESCRIPTION 15 121249X Spacer Split 16 123740X Spring Cprsn 17 123976X Nut Lock 1 4 Lge Fig Gr 5 18 19171912 Washer 17 32x1 3 16x12 Ga 19 166369 Knob Seat 20 124238X Cap Spring Seat 21 171852 Bolt Shoulder 5 16 18 22 73800500 Nat Lock Hx w Ins 5 16 18 NOT...

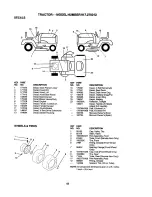
Page 44: ...33 182734 DESCRIPTION Decal V Belt Schematic Decal Repl Parts Decal Dash Atom Eng Decal Battery Dnge Poi Decal Insert Strg Decal Battery Reflector Taillight Decal Handle Lft Height Adjust Uft Handle Pad Footrest LH Pad FootrestRH Manual Owner s Eng Manual Owner s Span WHEELS TIRES 3 4 10 KEY PART NO NO 1 59192 2 65139 3 106228X427 4 6134H 5 106230X 6 278H 7 9040H 8 104757X428 9 105588X 10 7154J 11...

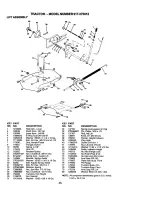
Page 45: ...inerSpring 70 145212 Nut Crewnlock 3 8 16 Unc 72 110452X Spring Asm Assist Lift 73 73350600 Bracket Spring Assist 74 175802 Washer 13 32 x 13 16 x 16 Ga 75 175805 Bolt Adjust Spring Assist 76 175560 Bolt Fin Hex 3 8 16 x 1 77 176205 Retainer Spring 78 175689 Nut Jam Hex 1 2 13 Unc 79 175378 Nut Crownlock 1 2 13 Unc 80 126684X Trunnion InfinHeight Nut Special Washer 13 32 x 5 8 x 16 Ga DESCRIPTION ...

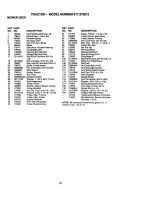
Page 46: ...TRACTOR MODEL NUMBER 917 275012 MOWER DECK 46 I 130 49 I 46 i I ii 116 11 19 1 17 26 46 ...

Page 47: ...eHead 119 19121414 30 173984 Screw Thdrol 121 174371 31 129963 Washer Specer Mower Vented 126 174372 32 177865 Pulley Mandrel 130 17060616 33 178342 Nut Fig Top LockCntr 9 16 131 19131606 36 19131316 Washer 13 32 x 13 16 x 16 Ga 184 173979 37 177968 Pulley Idler Primary 181704 39 174375 Pulley Idler Driven 174357 42 165723 Spacer Retainer 43 174373 Arm IdlerSecondary 45 174343 Cover Mandrel Deck K...

Page 48: ...TRACTOR o MODEL NUMBER 917 275012 TRANSAXLE 48 ...

Page 49: ...70H Pressure Relief Valve 82 136984 Gearcase Reverse IdlerShaft 84 5384J 85 2978J and Bearings R H Includes 86 633A85 Key No s 17 18 25 33 50 63 87 8739H1 77 and 82 Dowel Pin 88 4924H Needle Bearing 89 19151516 ThrustBearing Race 90 110542X 4th Reduction Gear Shaft 91 19181511 4th Reduction Gear Spacer 92 75J ThrustBearing Race Gate Lower Shift 93 6274H Gearease and Bearings L H 94 76020412 Includ...

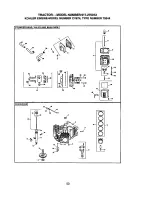
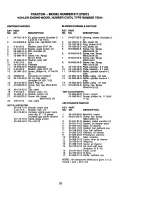
Page 50: ...TRACTOR MODEL NUMBER 917 275012 KOHLER ENGINE MODEL NUMBER CV674 TYPE NUMBER 75544 CYLINDER HEAD VALVE AND BREATHER I jg CRANKCASEJ _ 11 1_11t 3_1 28 17 3 v I XI 7 v i v i 0 8 ...

Page 51: ...26 19 S 23 24 032 05 S Seal valve stem 2 17 12 123 04 S 24 235011 S Retainer spring 4 t8 M 545016 S 25 24 089 02 S Spring valve 4 26 12 173 01 S Cap valve spring 4 19 12 153 02 S 27 12 755 03 S Kit retainer 4 20 24 038 04 S 28 24 31B 67 S Head assembly 1 cylinder 29 24 755o76 S Kit valve cover breather 21 24 755 46 S Inc1 18 19 30 22 12 153 03 S 24 015 09 S 30 25 313 02 S Grommet rubber 23 31 24 7...

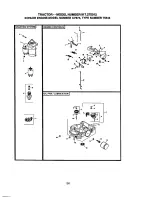
Page 52: ...TRACTO R MODEL N UM BER 917 275012 KOHLER ENGINE MODEL NUMBER CV674 TYPE NUMBER 75544 IGNITION ELECTRICAL I _ _ _ 17 _ AIR INTAKE J BLOWER HOUSING AND BAFFLESJ _p S tl 10 44 t I r 8 1o 11 II ...

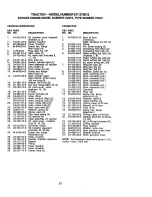
Page 53: ...using blower Includes 2 4 Nut plastic 3 Plug button 9 16 Nut plastic 2 Screw hex flange M5x0 8x20 4 Screw hex flange M5x0 8x16 3 Screw hex flange M5x0 8x16 Screw hex flange M6x1 0x16 6 Plate backing 2 side Plate backing 1 side Baffle cylinder barrel 2 side Baffle valley 2 side Baffle cylinder barrel 1 side Baffle valley 1 side Screw hex flange M5x0 8xlO 2 NOT ILLUSTRATED 24 096 66 S Cover control ...

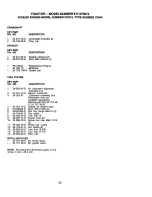
Page 54: ...TRACTOR MODEL N UMBER 917 275012 KOHLER ENGINE MODEL NUMBER CV674 TYPE NUMBER 75544 STARTING SYSTEM I 3 _6 ENGINE CONTROLS I _ _ OIL PAN J LUBRICATION J 54 ...

Page 55: ...lange M5x0 8x16 Nut hex lock M5x0 8 Spdng choke return Bracket control Screw hex flange M6x1 0x16 4 Clamp cable 2 Screw hex flange M5x0 Sx16 2 Lever throttle actuator Washer lock 1 4 Nut hex flange M5x0 8 Washer plain 5 5 mm 3 Spring governor Nut hex M4x0 7 Lever throttle control Screw hex flange M5x0 8x20 Spring throttle limiter Lever choke Washer spring 1 4 Screw hex cap M4x0 7x25 Linkage choke ...

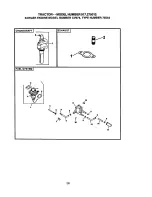
Page 56: ...TRACTOR MODEL NUM BER 917 275012 KOHLER ENGINE MODEL NUMBER CV674 TYPE NUMBER 75544 RANKSHAFT I FUELSYSTEMJ 2 1 rl EXHAUST J t 16 56 ...

Page 57: ... 6 M 64106O S 7 47 154 01 S 8 52 353 22 S 9 25 237 14 S 10 24 086 t 2 S 11 24 393 16 S 12 24 1g0 01 S 13 24 353 03 S 14 15 353 04 S 15 24 050 02 S Kit carburetor w gaskets Includes 2 4 Gasket carburetor Carburetor assembly For information only not available separately Service with Kits 24 757 36 S 24 757 38 S Gasket air cleaner base Stud M6x1 0x95 2 Nut hex flange M6xl 0 2 Clip cable Line fuel 12 ...

Page 58: ...58 ...
Page 59: ...e turns gradually to prevent tipping or loss of control Exercise extreme caution when changing direction on slopes 1 Fold this page along dotted line indicated above 2 Hold page before you so that its left edge is vertically parallel to a tree trunk or other upright structure 3 Sight across the fold in the direction of hill slope you want to measure 4 Compare the angle of the fold with the slope o...

Page 60: ...66 7278 U SA only _ se_ s q_n parlsdirect To purchase or inquire about a Sears Service Agreement or Sears Maintenance Agreement 1 800 827 6655 u sA 1 800 361 6665 Canada 7 a m 5 p m CST Mort Sat 9 a re 8 p m EST M F 4 p m S_ Parape_r serviciode _ parac_a domic_io y para ordenarpiezas 1 888 SU HOGARsM 1 888 784 6427 Au Canada pourse_ice enIran ais 1 800 LE FOYER c 1 80o 533 6937 WWW Seafs ca Seats ...

Reviews: