background image

Summary of Contents for 917.276140

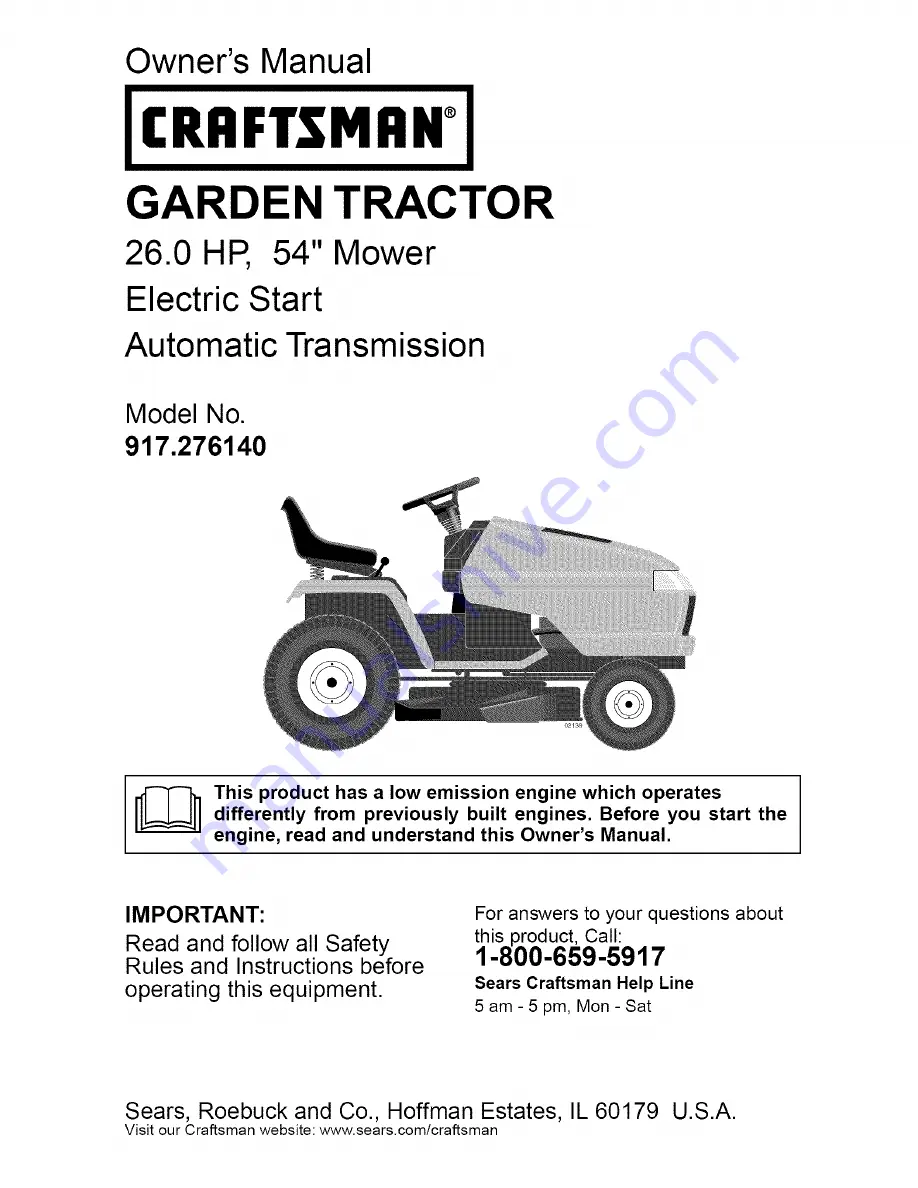
Page 1: ...usly built engines Before you start the engine read and understand this Owner s Manual IMPORTANT Read and follow all Safety Rules and Instructions before operating this equipment For answers to your questions about th_ product Call 1 800 659 5917 Sears Craftsman Help Line 5 am 5 pm Mon Sat Sears Roebuck and Co Hoffman Estates IL 60179 U S A Visit our Craftsman website www sears com craftsman ...

Page 2: ...cause of operator abuse including but not limited to damage caused by towing objects beyond the capability of the riding equipment impacting objects that bend the frame or crankshaft or over speeding the engine Repairs necessary because of operator negligence including but not limited to elec trical and mechanical damage caused by improper storage failure to use the proper grade and amount of engi...

Page 3: ...ades Be sure the area is clear of bystand ers before operating Stop machine if anyone enters the area Never carry passengers Do not mow in reverse unless abso lutely necessary Always look down and behind before and while backing Never direct discharged material toward anyone Avoid discharging material against a wall or obstruction Material may ricochet back toward the operator Stop the blades when...

Page 4: ...d in the watchful care of a respon sible adult other than the operator Be alert and turn machine off if a child enters the area Before and while backing look behind and down for small children Never carry children even with the blades shut off They may fall off and be seriously injured or interfere with safe machine operation Children who have been given rides in the past may suddenly appear in th...

Page 5: ...and use extra caution when servicing them Check brake operation frequently Ad just and service as required Maintain or replace safety and instruc tion labels as necessary Be sure the area is clear of bystand ers before operating Stop machine if anyone enters the area Never carry passengers Do not mow in reverse unless abso lutely necessary Always look down and behind before and while backing Never...

Page 6: ...states may have similar laws Federal laws apply on federal lands A spark arrester for the muffler is available through your nearest Sears service center See REPAIR PARTS section of this manual REPAIR PROTECTION AGREEMENTS Congratulations on making a smart pur chase Your new Craftsman product is designed and manufactured for years of dependable operation But like all prod ucts it may require repair...

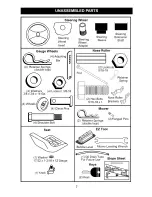
Page 7: ...gs double loop f O O 0 O O Nose Roller 2 Locknu 4 Washers 3 8 x 3 4 x 14 Ga 4 Wheels 4 Locknut 3 8 16 O 4 Clevis Pins _ 2 Hex Bolts N__r_ 5 16 18 x 1 Mower 4 Shoulder Bolt Seat 1 Washer 17 32 x 1 3 16 x 12 Gauge 1 Knob I_ 2 Retainer Springs double loop EZ Tool 2 Flanged Pins Bubble Level Mower Leveling Wrench 1 Oil Drain Tube For Future Use Slope Sheet Keys 7 ...

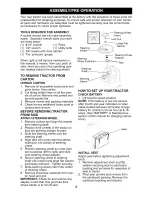
Page 8: ...ght forward 3 Slide the steering sleeve over the steering shaft 4 Align tabs and press steering sleeve extension into bottom of steering wheel 5 Position steering wheel so cross bars are horizontal left to right and slide onto steering wheel adapter 6 Secure steering wheel to steering shaft with Iocknut and large flat washer previously removed Tighten securely 7 Snap steering wheel insert into cen...

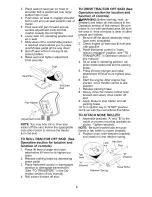
Page 9: ...n and function of controls _WARNING Before starting read un derstand and follow all instructions in the Operation section of this manual Be sure tractor is in a well ventilated area Be sure the area in front of tractor is clear of other people and objects 1 Be sure all the above assembly steps have been completed 2 Check engine oil level and fill fuel tank with gasoline 3 Place freewheel control i...

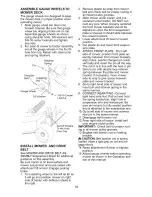
Page 10: ...ts should be aligned so when the front suspension plate is lowered it should slide between the mower brackets 4 Lower attachment lift lever to lowest position 5 Cut plastic tie and lower front suspen sion plate 6 ATTACH FRONT PLATE From left side of mower position front plate as sembly between front mower brackets align holes position flanged pin notch vertically and insert the pin all the way The...

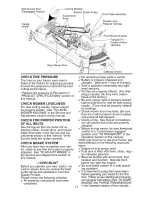
Page 11: ...w the following checklist All assembly instructions have been completed Deflector Shield No remaining loose parts in carton Battery is properly prepared and charged Minimum 1 hour at 6 amps Seat is adjusted comfortably and tight ened securely All tires are properly inflated For ship ping purposes the tires were overin flated at the factory Be sure mower deck is properly leveled side to side front ...

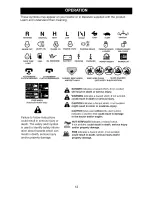
Page 12: ...RWARD SLOW IGNITION PARKING BRAKE PARKING BRAKE LOCKED UNLOCKED MOWER HEIGHT MOWER LIFT DANGER KEEP HANDS AND FEET AWAY KEEP AREA CLEAR SLOPE HAZARDS SEE SAFETY RULES SECTION _l_l lll ll DANGER indicatesa hazard which if not avoided will result in death or serious injury WARNING indicates a hazard which if not avoided could result in death or serious injury CAUTION indicatesa hazard which if not a...

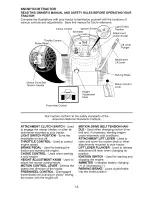
Page 13: ...adlights on and off THROTTLE CONTROL Used to control engine speed BRAKE PEDAL Used for braking the tractor and starting the engine CHOKE CONTROL Used when starting a cold engine HEIGHT ADJUSTMENT KNOB Used to adjust the mower cutting height MOTION CONTROL LEVER Selects the speed and direction of the tractor FREEWHEEL CONTROL Disengages transmission for pushing or slowly towing the tractor with the...

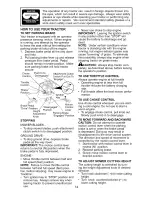
Page 14: ...ull speed fast posi tion before stopping may cause engine to backfire Turn ignition key to STOP position and remove key Always remove key when leaving tractor to prevent unauthorized use Never use choke to stop engine IMPORTANT Leaving the ignition switch in any position other than STOP will cause the battery to discharge and go dead NOTE Under certain conditions when tractor is standing idle with...

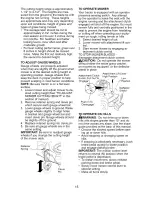
Page 15: ...ls if you change the cutting height of the mower deck Retainer Spring Clevis Pin TO OPERATE MOWER Your tractor is equipped with an operator presence sensing switch Any attempt by the operator to leave the seat with the engine running and the attachment clutch engaged will shut off the engine You must remain fully and centrally positioned in the seat to prevent the engine from hesitating or cutting...

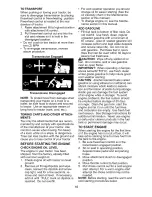
Page 16: ...Mainte nance section in this manual ADD GASOLINE Fill fuel tank to bottom of filler neck Do not overfill Use fresh clean regular unleaded gasoline with a minimum of 87 octane Use of leaded gasoline will increase carbon and lead oxide deposits and reduce valve life Do not mix oil with gasoline Purchase fuel in quan tities that can be used within 30 days to assure fuel freshness _ _CAUTION Wipe off ...

Page 17: ...e warmed up as follows 1 Be sure the tractor is on level ground 2 Place the motion control lever in neutral Release the parking brake and let the brake slowly return to operating position 3 Allow one minute for transmission to warm up This can be done during the engine warm up period The attachments can be used during the engine warm up period after the transmission has been warmed up and may requ...

Page 18: ...hat has already been cut Have the cut area to the right of the tractor This will result in a more even distribution of clippings and more uniform cutting When mowing large areas start by turning to the right so that clippings will discharge away from shrubs fences driveways etc After one or two rounds mow in the opposite direction making left hand turns until finished f J 00272 If grass is extreme...

Page 19: ...on this tractor does not cover items that have been subjected to operator abuse or negligence To receive full value from the warranty operator must maintain tractor as instructed in this manual Some adjustments will need to be made periodically to properly maintain your tractor At least once a season check to see if you should make any of the adjustments described in the Service and Adjustments se...

Page 20: ... clockwise 3 Install new or resharpened blade with stamped THIS SIDE UP facing deck and mandrel assembly IMPORTANT To ensure proper assembly center hole in blade must align with star on mandrel assembly 4 Install and tighten blade bolt securely 45 55 Ft Lbs torque IMPORTANT Special blade bolt is heat treated Blade _ AMsanedmr ebl Iy Blade Bolt __ Center Hole L J TO SHARPEN BLADE NOTE We do not rec...

Page 21: ...temperature SAE VISCOSITY GRADES o 1 vJsccha_tl e NOTE Although multi viscosity oils 5W30 10W30 etc improve starting in cold weather they will result in increased oil consumption when used above 32 E Check your engine oil level more frequent ly to avoid possible engine damage from running low on oil Change the oil after every 50 hours of op eration or at least once a year if the tractor is not use...

Page 22: ...e are kept clean at all times Every 100 hours of operation more often under extremely dusty dirty conditions remove the blower housing and other cool ing shrouds Clean the cooling fins and external surfaces as necessary Make sure the cooling shrouds are reinstalled NOTE Operating the engine with a blocked grass screen dirty or plugged cooling fins and or cooling shrouds removed will cause engine d...

Page 23: ...from spark plug and place wire where it cannot come in contact with plug TRACTOR TO REMOVE MOWER 1 Place attachment clutch in DISEN GAGED position 2 Lower attachment lift lever to its lowest position 3 Disengage belt tension rod from lock bracket _i CAUTION Belt tension rod is spring loaded Have a tight grip on rod and re lease slowly 4 Remove mower belt from electric clutch pulley 5 DISCONNECT RE...

Page 24: ...of mower Distance A on both sides of mower should be the same 24 If adjustment is necessary make adjust ment on one side of mower only To raise one side of mower tighten lift link adjustment nut on that side To lower one side of mower loosen lift link adjustment nut on that side NOTE Each full turn of adjustment nut will change mower height about 3 16 Recheck measurements after adjusting Bottom Ed...

Page 25: ...move screws from R H and L H mandrel covers and remove covers 5 Remove any dirt or grass clippings which may have accumulated around mandrels and entire upper deck surface 6 Remove belt from electric clutch pulley both mandrel pulleys and all idler pulleys MOWER DRIVE BELT INSTALLATION 1 Install belt around both mandrel pulleys and around idler pulleys as shown 2 Install belt onto electric clutch ...

Page 26: ...you try to manually push the tractor forward If the rear wheels rotate the brake needs to be adjusted or the pads need to be replaced TO ADJUST BRAKE Contact a Sears or other qualified service center TO REPLACE MOTION DRIVE BELT Park the tractor on level surface Engage parking brake For ease of service there is a belt installation guide decal on bottom of left footrest 1 Remove mower See TO REMOVE...

Page 27: ...ect one end of the RED cable to the POSITIVE terminal of each battery A B taking care not to short against tractor chassis 2 Connect one end of the BLACK cable to the NEGATIVE terminal C of fully charged battery 3 Connect the other end of the BLACK cable D to good chassis ground away from fuel tank and battery TO REMOVE CABLES REVERSE ORDER 1 BLACK cable first from chassis and then from the fully ...

Page 28: ...n cable clamp screw and pull cable back until swivel is against stop Tighten cable clamp screw securely TO ADJUST CHOKE CONTROL The choke control has been preset at the factory and adjustment should not be nec essary Check adjustment as described below before loosening cable If adjust ment is necessary proceed as follows 1 With engine not running move choke control located on dash panel to full ch...

Page 29: ...ng in essential fuel system parts such as carburetor fuel hose or tank during storage Also alcohol blended fuels called gasohol or using ethanol or methanol can attract moisture which leads to separation and formation of acids during storage Acidic gas can dam age the fuel system of an engine while in storage Empty the fuel tank by starting the en gine and letting it run until the fuel lines and c...

Page 30: ... much grass too fast 2 Throttle in CHOKE position 1 Fill fuel tank 2 See TO START ENGINE in Operation section 3 Wait several minutes before attempting to start 4 Replace spark plug 5 Clean replace air filter 6 Replace fuel filter 7 Empty fuel tank and carbure tor refill tank with fresh gas oline and replace fuel filter 8 Check all wiring 9 See To Adjust Carburetor in Service and Adjustments sectio...

Page 31: ... clutch mechanism 2 Worn damaged mower drive belt 3 Frozen idler pulley 4 Frozen blade mandrel 3 Clean underside of mower housing 4 Clean replace air filter 5 Check oil level change oil 6 Clean and regap or change spark plug 7 Replace fuel filter 8 Empty fuel tank and refill tank with fresh clean gasoline 9 Empty fuel tank and carbure tor refill tank with fresh gas oline and replace fuel filter 10...

Page 32: ...r 1 Freewheel control in disengaged position 2 Motion drive belt worn damaged or broken 3 Air trapped in transmission during shipment or servicing Engine throttle control not set between half and full speed fast position before stopping engine 1 Place throttle control in FAST position 2 Shift to slower speed 3 Allow grass to dry before mowing 4 Level mower deck 5 Check tires for proper air pressur...

Page 33: ...N SWITCH POSITION CIRCUIT MAKE OFF M G A1 NONE ON LIGHTS B A1 L A2 ON B A1 NONE START 9 S A1 NONE WIRING INSULATED CLIPS NOTE IF WIRING INSULATED CLIPS WERE REMOVED FOR SERVICING OF UNIT THEY SHOULD BE REPLACED TO PROPERLY SECURE YOUR WIRING 02743 HEADLIGHTS PTO SWITCH POSITION CIRCUIT OFF C G B H ON F B E A D REMOVABLE NON REMOVABLE CONNECTIONS CONNECTIONS GFC DA PTO SWITCH CONNECTOR 33 ...

Page 34: ...ELECTRICAL TRACTOR MODEL NUMBER 917 276140 22 24_ 43 42 27 33 34 ...

Page 35: ...ht W 4152J 22 4152J Bulb Light 24 185464 Cable Battery 25 146149 Cable Battery 26 108824X Fuse 27 73510400 Nut Keps Hex 1 4 20 unc 28 170697 Cable Ground 29 121305X Switch Plunger N Gray 30 175566 Switch Ign 33 140403 Key Ignition 40 188032 Harness Ign 41 17720408 ScrewThd Cut 1 4 20 x 1 2 42 131563 Cover Terminal 43 178861 Solenoid 45 122822X Ammeter 50 174652 Switch PTO 52 141940 Hourmeter Adapt...

Page 36: ...TRACTOR MODEL NUMBER 917 276140 CHASSIS AND ENCLOSURES 21 2 58 161 158 37 J 17 28 17 16 _ 36 47 169 j 17 Y 19 86 I 99 14 153 150 _ 122 167 _ 8 13o 130 17 156 _156 45 17 17 _ 24 chassis stealth II 2 36 ...

Page 37: ...nt 43 136939 Bracket Spnsn Front Lh 44 136940 Bracket Spnsn Front Rh 45 187270 Bracket Asm Susp Chas 47 17490608 ScrewThdrol 3 8 16 x 1 2 50 175476 Bracket Chassis Front 58 183569 Bracket Asm Fender 68 17490508 ScrewThdrol 5t16 18 x 1t2 84 188164 Upstop 54 Deck 86 74780616 Bolt Fin Hex 7 16 14 unc x 1 91 180374 Rail Frame Lh 99 177143 Rod By Pass 122 161464 Screw Hex Wshd 8 18 x 7 8 130 191611 Scr...

Page 38: ...TRACTOR MODEL NUMBER 917 276140 GROUND DRIVE 33 drive 6 vgt 127 120 153_ 122 69 65 55 58 133 77 111 143 124 38 ...

Page 39: ...69 58 74760724 Bolt Fin Hex 7 16 14 x 1 1 2 143 17000512 61 143995 Pulley Transaxle 145 163168 64 176601 Shaft Clutch Brake Pedal 146 140462 65 179613 Bolt Shoulder 147 141322 68 STD571812 Pin Roll 151 74760514 69 123800X Washer 152 178705 70 179121X428 Console AutomaticYT GT 153 4997H 73 74490548 Bolt Hex Flghd 5 16 18 x 3 Gr 5 74 142432 Screw Hex Wsh Hi Lo 1 4 1 2 77 74780716 Bolt Hex 7 16 14 x ...

Page 40: ...STEERING TRACTOR MODEL NUMBER 917 276140 34 33 32 6 42 16 23 22 13 31 29 36 28 47 49 13 13 I i I I I I I II I J 18 4O ...

Page 41: ...x 16 Ga Ring Klip T5304 75 Cap Spindle Bolt Fin Hex 5 8 11 x 2 3 4 Spacer Bearing Axle Front Nut Lock Flange 5 8 11 Unc Washer 25 32 x 1 1 4 x 16 Ga Washer Lock Hvy HIcl Spr 3 8 Nut Lock Center 3 8 24 UNF Shaft Asm Steering Draglink Vgt Support Asm Steering Vgt Boot Steering Adapter Wheel Steering Bushing Strg BIk Screw Cap Wheel Steering Bearing Col Strg Screw 3 8 16 x 3 4 Bearing Flange Bushing ...

Page 42: ...lutch 69 165391 Tank Fuel Rear 5 0 Yt Gt 96 70 176069 Cap Asm Fuel W Gauge 71 176070 Control Throttle 79 183906 Screw 10 x 3 4 Single Lead Hex 81 188800 Control Choke 82 188799 Bushing 83 171877 Stem Tank Fuel 84 17060624 Fuel Line 85 179953 Spark Arrester Kit Clip Push In Hinged Clamp Hose DESCRIPTION 17490636 ScrewTT 3 8 16 x 2 1 4 unc 17490664 Screw TT 3 8 16 x 4 unc 126197X Washer 1 1 20D x15 ...

Page 43: ...16 123740X Bolt Shoulder 5 16 18 x 62 17 123976X Clip Push In Hinged 18 19171912 Nut 3 8 16 Unc 19 166369 Spring Seat Cprsn 20 124238X Bolt 5 16 18Unc x 3 4 w Sems 21 171852 Pan Seat 37 73800500 Bracket Mounting Switch Bushing Snap DESCRIPTION Bolt Carriage 1 4 20 x 1 1 2 Spacer Split Spring Cprsn Nut Lock 1 4 Lge Fig Gr 5 Washer 17 32 x 1 3 16 x 12 Ga Knob Seat Cap Spring Seat Bolt Shoulder 5 16 ...

Page 44: ...IPTION 18 164065 Decal Insert Strg 19 138047 Decal Battery 20 181470 Decal Deck Level 22 189248 Decal Engine Logo 23 106202X Reflector Taillight 179768X428 Pad Footrest LH 166960 Decal Drawbar CNTRL 179769X428 Pad Footrest RH 192508 Owner s Manual English 192509 Owner s Manual Spanish KEY PART NO NO DESCRIPTION 1 59192 Cap Valve Tire 2 65139 Stem Valve 3 106228X624 Rim Asm Front 4 8134H Tube Front...

Page 45: ...2410 Grip Handle Fluted 43 123934X Plunger Button 70 145212 Spring 72 110452X Link Lift 73 73350600 Retainer Spring 74 187277 Retainer Spring 75 175805 Nut Jam Hex 112 13 unc 76 175560 Nut Crownlock 1 2 13 unc 77 176205 Trunnion Infin Height 78 175689 Nut Special 79 187276 Washer 13132 x 5t8 x 16 Ga 85 189013 Spring Compression Inf Hgt 86 188528 Pin Cotter 3 32 x 1 2 Rod Adj Lift Knob Inf 3 8 16 u...

Page 46: ...MOWER DECK TRACTOR MODEL NUMBER 917 276140 9O 182 46 46 57 5 1 33 116 117 56 3g 5 35 113 5g 17 17 2g 25 26 27 mower_deck 54 1 46 ...

Page 47: ... 33 178342 Nut Fig Top Lock Cntr 9116 180 73800500 34 73680600 Nut 182 179127 35 188635 Pin Suspension Rear 183 163552 36 19131316 Washer 13 32 x 13 16 x 16 Ga 187292 38 188657 Spring Compression 39 187284 Pulley Idler Stationary 188271 42 165723 Spacer Retainer 43 187278 Arm Idler 46 137729 Screw Thdroll 1 4 20 x 5t8 47 191273 V Belt Mower 49 73900600 Nut Lock Fig 3 8 16 unc 50 72110616 Bolt Carr...

Page 48: ...TRACTOR MODEL NUMBER 917 276140 TRANSAXLE MODEL NUMBER 331 3000 II1 101 157 _J 5 _144 _56 157 65 68 85 62 65 A22 121_ 79 SEALANt 97 20W50 OE 205 KIT SEAL 60 71 6 48 ...

Page 49: ...78336 43 142965 Pin I53 170434 44 150797 Bolt 3 8 24 x 2 1 2 I55 178337 46 184702 Spring neutral 310 3000 48 178320 Puck adjusting 310 3000 50 178343 Screw hex head washer cap screw IZT 1 4 20 x 3 4 5t 169530 Lower cover I57 169548 52 169531 Geroter assembly I69 184701 53 144581 O ring 203 178338 54 161139 Charge pump housing 55 178321 Kit filter Gasket 10 X 16 X 4 24 Filter 56 169533 Charge manif...

Page 50: ...67 _ 84_ 5231 _ 842 525 287 524 25J 27 O_ 2_32 _ I 26CO O 447 _5 _46 _ 447A 4_ 615 220 1035 t017 750 252 i 250 1330 REPAIR MANUAL 1329 REPLACEMENT ENGINE 1 1058 OWNER S MANUAL 1036 EMISSION LABEL l 1019 LABEL KIT 447A_ 968 445_ 967 305 24_ 865A_ e 447 447A 12GT _ 855 163 __ 928 654 1027 D 53 1 1095 VALVE GASKET SET 276 50 ...

Page 51: ... CARBURETOR OVERHAUL KIT 11_S0 _142 1128 _ 51 278 633 987 104 _ 672 _ _ _ _ 105 W 1123 1124 137 818_ 552 _ 552A 742 404 0 552A _ 891 _ 977 CARBURETOR GASKET SET 633 51 987 137 672 _ 180 L_ 1123 _ 278 1124 I_ 914 _ 1054_ 672_ _ _ 3 _ _ _ j F 108_ I _1 t _ 130 98 E 81_ lO8 m _ _ _ i 117_ 1124 _ I 117A 11126 _ 137_ _ 1127 _L _ 1_ 42 1123_ 276 _76 160 51 ...

Page 52: ...17 276140 BRIGGS ENGINE MODEL NUMBER 446777 TYPE NUMBER 0244 E1 74 73_ 334 4_ 668 3_ L851 lO7O_ _ 992 _ 1119 _ _ 75 I_ 363 358 ENGINE GASKET SET 3Cc_ 9_ 12 20 868 _ 943 0 51 _ 1022 524 163 _ 276 691 526 5o_ 573 _ 405 697 52 ...

Page 53: ...on 020 Over 250 690957 Retainer Breather size 252 690956 Collector Oil 27 690975 Lock Piston Pin 265 691024 Clamp Casing 28 690229 Pin Piston 267 695134 Screw Casing Clamp 29 499583 Rod Connecting 276 690997 O Washer Sealing 32 690976 Screw Connecting Rod 287 690960 Screw Dipstick Tube 33 697576 Valve Exhaust 304 698073 Housing Blower 34 499597 Valve Intake 305 691005 Screw Blower Housing 35 69096...

Page 54: ...36 697913 Spacer 1051 691265 Gasket Carburetor Plate 1054 280275 Seal Governor Shaft 1058 275475 Screw Ring Gear 1059 698516 Screw Drive Cap 1070 691058 Clip 1090 691293 Pin Locating 1095 694013 Gear Ring 1100 690973 Gear Timing 1119 691183 Retainer E Ring 1123 699725 Screw Oil Pump Cover Gear Pinion 1124 Bracket Fuel Pump Harness Wiring 1126 Nut Brush Retainer 1127 Nut Brush Retainer 1267 Screw R...

Page 55: ...CROSS HILL 15 DEGREES MAX _ ARNING To avoid serious injury operate your tractor up and down the face of slopes never across the face Do not mow slopes greater than 15 degrees Make turns gradually to prevent tipping or loss of control Exercise extreme caution when changing direction on slopes ...

Page 56: ...e it no matter who sold it For the replacement parts accessories and owner s manuals that you need to do it yourself For Sears professional installation of home appliances and items like garage door openers and water heaters 1 800 4 MY HOME Anytime day or night 1 800 469 4663 U S A and Canada www sears com www sears ca Our Home For repair of carry in products like vacuums lawn equipment and electr...

Reviews: